Recently in what was I thinking? Category

We Be Monkeys

| 9 Comments

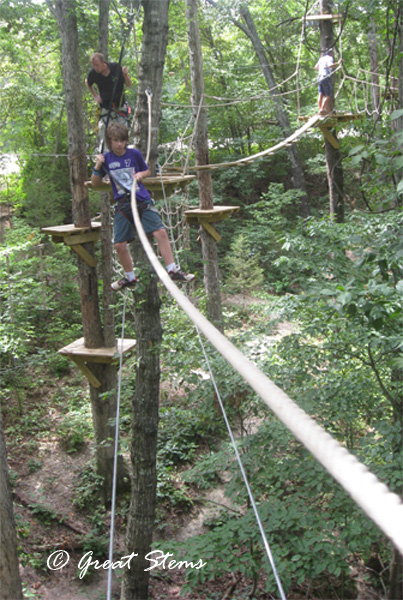
The boys and I are back from Arkansas -- we had such a great time. One of the highlights on our trip was testing our nerve and strength of will in the canopy of the Ozark forests -- a high-wire adventure in the trees at Loco Ropes.

locoa07-26-11.jpg

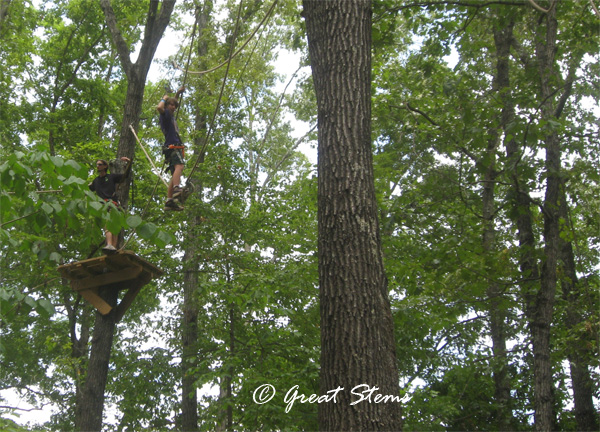
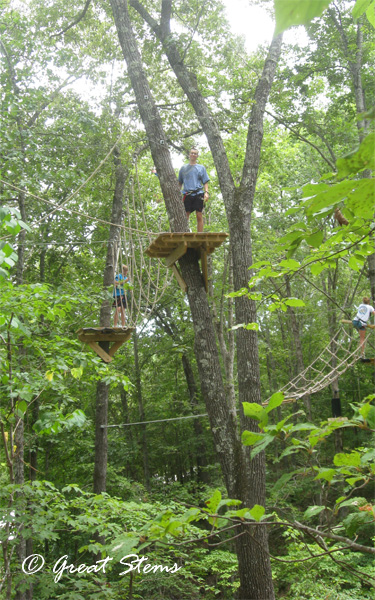
There are three courses (you can do just Line 1, or sign up for all 3). Each course has around 10 rope challenges, all different, but every one of them 3-6 stories off the ground. You might have to balance and walk on a tight-rope, step carefully along swinging logs, traverse wobbly rope bridges, or maneuver in, out, over, or through ropes placed in such a way to test your bravery or flexibility. The biggest test of will for me was a leap-of-faith drop from a high platform, with the cable zip not engaging until you've fallen a few feet. I think I sat there for 2-3 minutes trying to silence my brain into nothingness in order to get my body to sneak off the platform before my brain stopped me again.

locob07-26-11.jpg

My sons had a blast, completing all three courses with ease. I did Lines 1 and 2 and was perfectly content to skip out on the third -- hey, I'd already proven myself! (The picture above I took while up in the trees doing Line 1 -- the others are of the boys doing Line 3).

locod07-26-11.jpgWas it Loco? Yes! But absolutely fun, challenging, scary, rewarding, and memorable, too. The boys are eager to go back, and so we will one day.

Headless Horseman Strikes the Garden

| 9 Comments

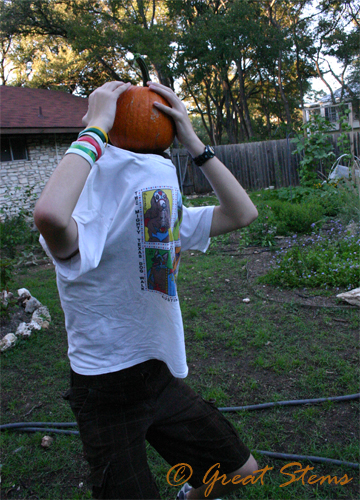
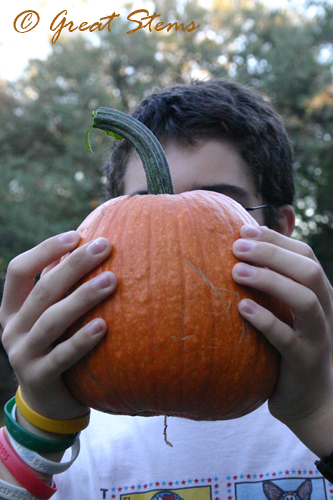
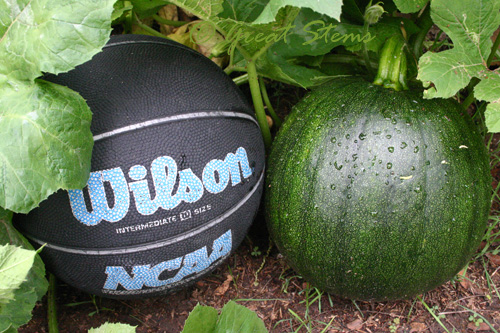
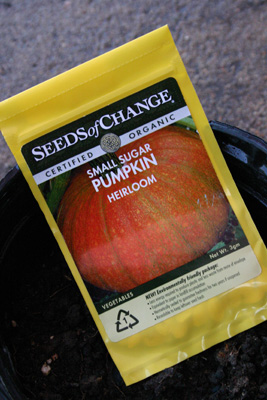
With Halloween around the corner, we all know that monsters might appear at any time of day or night, but the mere picking of our first orange sugar pumpkin brought to our garden...duhn Duhn DUHN... the Headless Horseman!

headlesshorseman10-26-09.jpg

There it is, our first orange sugar baby.   sugarpumpkin10-26-09.jpg

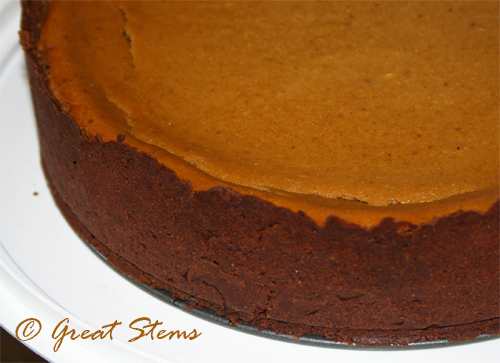
I spent the evening creating this Pumpkin Cheesecake with Chocolate Crust using a fantastic recipe I found at The Hungry Mouse. It's made with cognac. Enough said. Well, not enough -- I want to add kudos to Jessie for her detailed photos and instructions on the making of this yummy and divine dessert.

pumpkincheesecake10-26-09.jpg

But alas, I confess that I resorted to canned pumpkin to make it. Here's what happened: When I cut open that little sugar pumpkin that passed all its tests on ripeness, I found that there was a fair amount of green mixed in with the orange inside. I honestly didn't know whether a little green was okay, but as the pumpkin was already cut open, I went ahead and scooped out the seeds and pulp and baked it. I figured I'd give it a taste test after baking and decide then what to do, all the while feeling pretty much like a pumpkin murderer knowing that there was a good chance I wouldn't use it.

Well, the baking went fine, but when I tasted it, my first sugar pumpkin, I couldn't tell whether it tasted the way it was supposed to, so I erred on the side of safety and decided to open a can of pumpkin. Well, it turns out that the canned pumpkin tasted exactly the same, so I could have used my little sugar pumpkin, but it was too late!

But the good news is that I remembered that pumpkin is good in a variety of ways for dogs, so the little orange-greenish pumpkin will not go to waste. I've already given some to the dogs, and tomorrow I hope to try my hand at making pumpkin dog treats, perfect for the holidays. I might also try making some muffins or other yummy human treat.

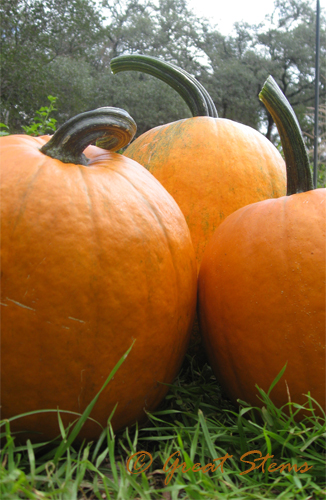
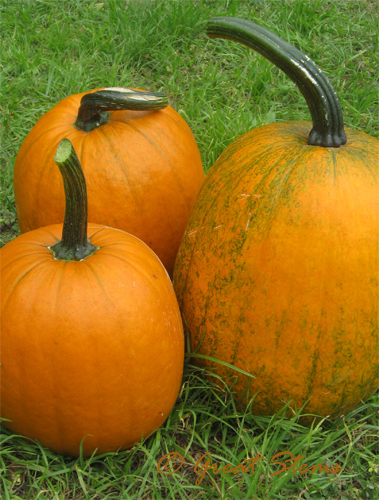
pumpkins10-26-09.jpgThe cheesecake is for today's annual pumpkin carving party at our friends Stepan and Jennifer's house. It's our first year growing our own jack-o-lanterns, which have been behind schedule due to the hot summer and fall rains. But we chose three of our 10 growing pumpkins for early carving. Two are small, and one is still a bit green, but we grew these for carving, so carve them we will! The other seven pumpkins still on the vine will be for carving later in the week or for fall decorating.

pumpkinsb10-26-09.jpgMy yard is going to look so empty after I have to remove all these pumpkin vines... 

Reflections on the First Year

| 20 Comments

Has it really only been a year? So much progress has been made in our first year of gardening that it's hard to believe it happened in a mere 365-ish days. Hey, I only about destroyed my back and my husband had to have knee surgery, but what does that matter when our yard is such a pleasant place to be now? (Ok, my husband just pointed out that we can't really blame gardening for our failing bodies, but it sounded good.)

What started it all? The felling of one very dead hackberry that was dangerously leaning over our house.

reflections2009x.jpgWhen that tree fell, I had no idea that I was about to embark on a gardening endeavour of massive proportions. But I looked around my yard and hated what I saw. It was time, after 13 years of doing nothing, to do something. Even if I had no clue whatsoever about what to do. 

But apparently I figured a few things out. The rest will come when I figure those out.

Here are a few tidbits of how our outdoor world has changed. Now be warned, the overgrown state has to do with all the rain we've finally been getting -- I haven't been able to clean anything up. At least things look more green...

The backyard, before and after:

reflections2009a.jpg

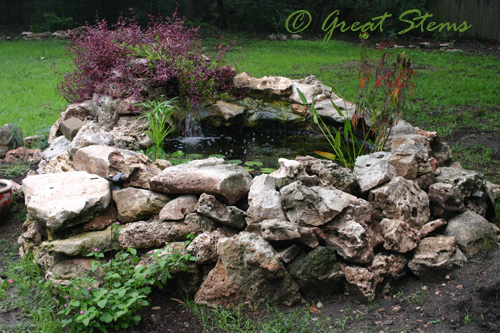
reflections2009zh.jpg The pond, before and after:

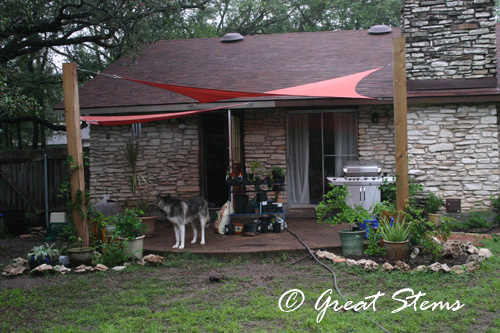
reflections2009zc.jpgreflections2009zg.jpg The back porch, before and after:

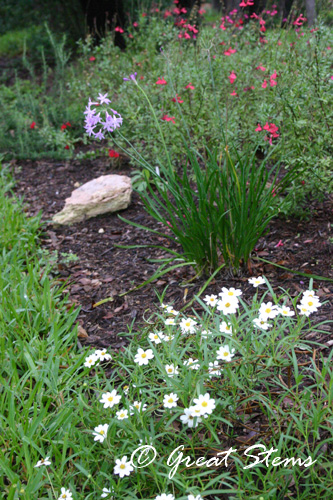
reflections2009f.jpg reflections2009zl.jpg The front garden bed, before and after:

reflections2009v.jpg reflections2009zza.jpgThere's a lot more to our yard than what you see here, and I invite you to see more. We have a long way to go, but it's fun to take a look at how far we've come. You can also hear more about the story that got us on our gardening journey.

Pumpkinball

| 20 Comments

pumpkinball09-29-09.jpg

Were you expecting Cinderella?

It's almost October, little pumpkin. Leave the castle on time or you'll turn back into... a pumpkin! Well, that's not so bad I guess.

Remember the pumpkin growing in the dead tree? What's wrong with this picture?

pumpkintreeb09-29-09.jpg It really looks like this now.

pumpkintreea09-29-09.jpg

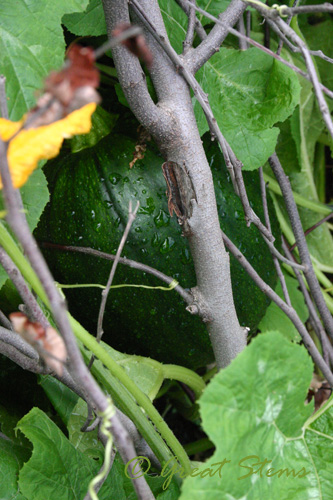
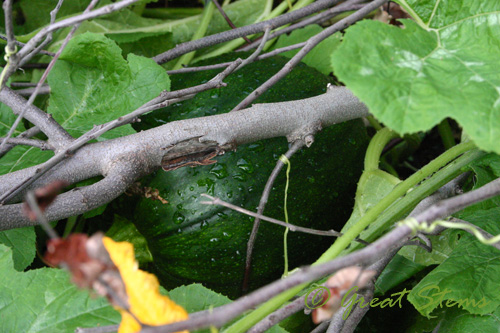
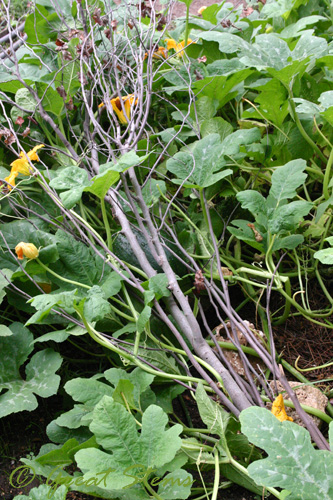
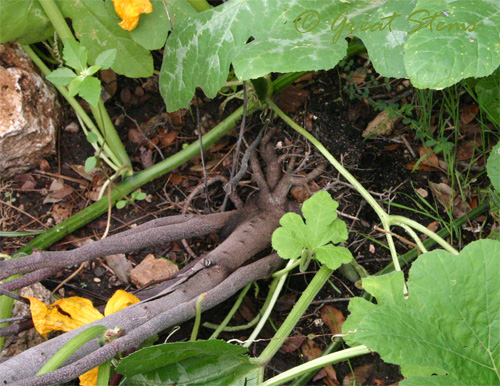
The pumpkin totally took that tree down. The remaining root ball was pulled out of the ground.

pumpkintreed09-29-09.jpg

pumpkintreec09-29-09.jpg  I guess I'm back to calling this my pumpkin army!

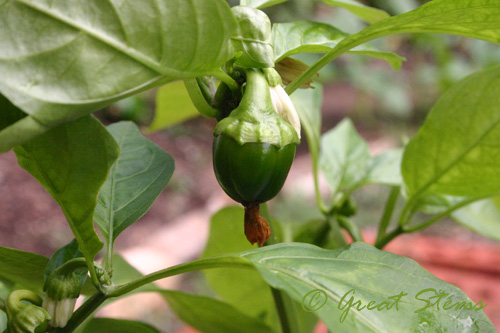
And my husband and I are now grandparents. Our son has his first tiny bell peppers growing.

babypepper09-29-09.jpg

They are so cute and little! Do red and yellow ones start out green, or will this one stay green? Even so, I don't think I'm ready to be a grandmother. It's probably not polite to eat your grandchildren. Can I be a fairy godmother instead? I have pumpkins at the ready! I'd be Cinderella, but I already have my Prince Charming.

The After Bird Bath

| 23 Comments

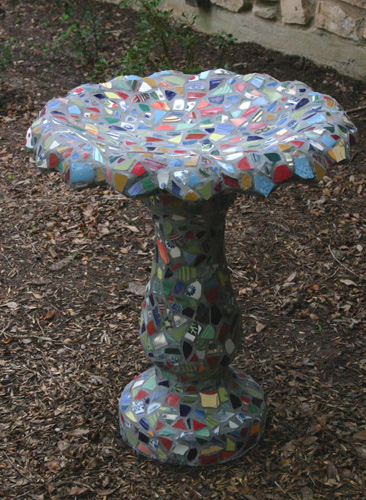
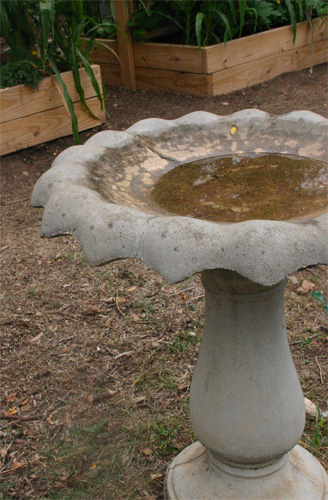
It took longer than I had planned (doesn't everything), but the bird bath is finished! Well, it's got another day to cure before I put water in, so maybe it's not technically finished, but close enough for pictures! Here's the After Bird Bath.

birdbatha09-28-09.jpgI apologize for the darkness of the photos -- there's a thunderstorm brewing out there. I'm crossing my fingers for rain, even though the bird bath hasn't finished curing. I might go out and put a temporary cover on it just in case.

birdbathb09-28-09.jpg

Here's the Before Bird Bath. We got this for free from someone on Craigslist. It had cracks in the top, was ugly, and was barely functional.

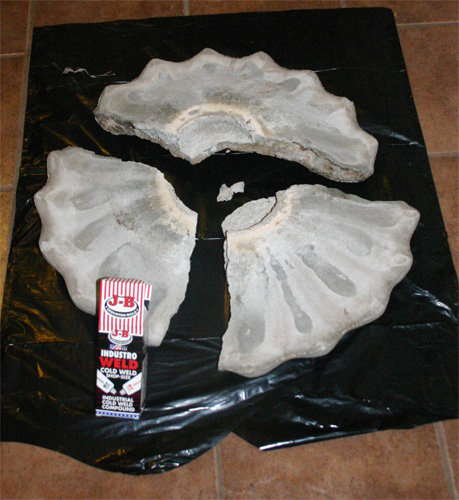
birdbath09-09-09.jpgDuring a recent rainy week, my exterior painting got put back on hold, so I decided it was a good time to make the bird bath prettier. And because life likes to play its little jokes, the top part broke into three pieces when we moved it indoors, adding another day's delay in getting started on the main project.

birdbathd09-28-09.jpg

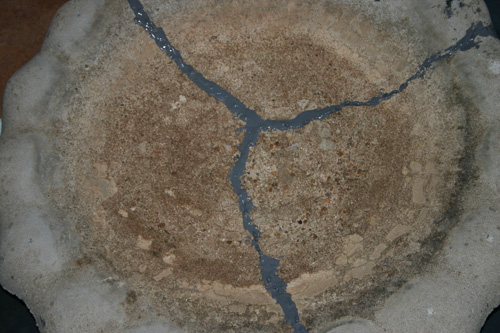
I searched for a non-toxic adhesive that was strong enough for concrete and found JB Weld Cold Weld Compound. I spoke to a person at the company to make sure it was the best choice for repairing a birdbath, and she was confident that it was safe enough for my feathered friends and strong enough to hold the heavy concrete together. So I glued the pieces back together, and I'm pretty certain that if the bird bath breaks again, it won't be in those glued cracks, but elsewhere in the concrete.

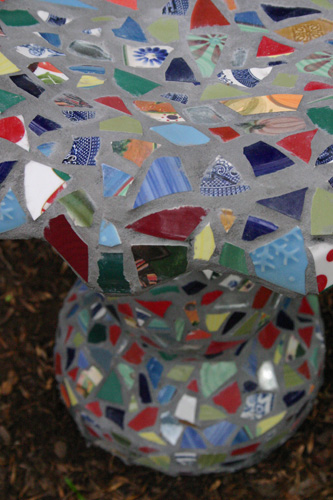
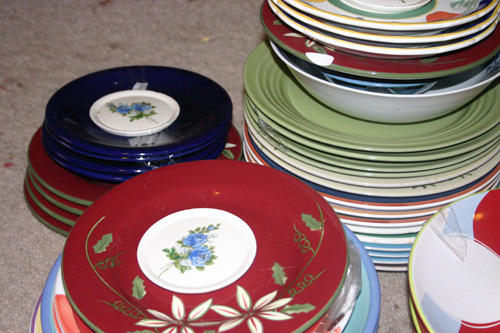
birdbathh09-28-09.jpgFor the pieces, I spent several days scouring the local Goodwill outlet for colorful plates I could break. What I learned while breaking them was that some plates are just too thick and porous to be useful, so in the future I will be more selective in my choices. I originally was going for color, but then later I started going for a certain thickness. Ideally all the pieces would be similar thickness, but I had to work with what was available.

birdbathi09-28-09.jpg

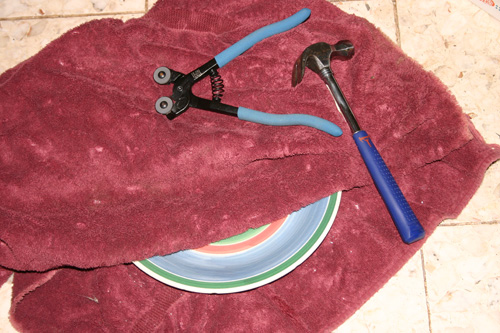
I used a hammer to break the dishes in an old towel (with safety goggles on). The towel keeps the pieces contained. I kept tile cutters on hand in case I need them to trim a piece. But mostly I used the hammer.

birdbathg09-28-09.jpg

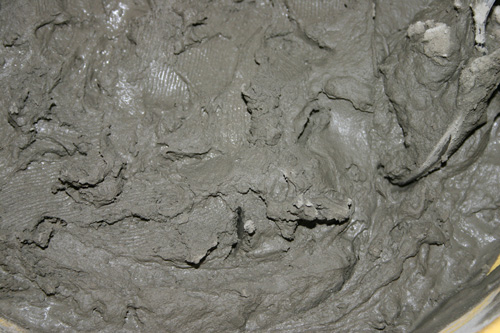
Then came time to adhere the pieces to the bird bath. I did my best to research what materials to use, but there's a lot of conflicting information out there. Ultimately I decided to use thinset to adhere the mosaic pieces to the concrete. I chose Versabond because it was readily available and says that it's appropriate for outdoor use, but some people said they don't like it. So time will tell. Wear a dust mask when mixing this product, due to the cement dust. Follow the bag instructions -- the goop will be thick like peanut butter.

birdbathe09-28-09.jpg

Depending on the area, I used a putty knife, a plastic knife, or my gloved fingers to spread on the thinset, then placed the mosaic pieces at random, working in small sections at a time. Other times I backbuttered the pieces (spread thinset directly on the back of the mosaic piece) so they would stick better. The downside to using thinset is that it sometimes would be thick between the pieces (where the grout also needed to be), but I tried to pay attention and make sure that the thinset wasn't too high up.

birdbathf09-28-09.jpg

This process took a couple of days. It's a lot of work making something look random! Also, I ran out of thinset toward the end and had to buy more. Should have bought the big 25-lb bag.

I don't have pictures of the grouting process, because I didn't want the camera near the mess, and I was mostly alone when I worked on this project. But I chose a sanded grout, though again I did my research. I ruled out using more of the thinset as grout.

When mixing the grout (again, with mask), the texture of the goop is different -- it will be less thick and wet than the thinset was, and it will be more gritty. Follow the instructions on the container, then smear it into the crevices between the pieces. After the recommended number of minutes, take a damp sponge and begin to clean up the pieces -- the grout will become smoother between the pieces. I had to do this several times as I went along, and then, grumble, I ran out of grout (right toward the end again) and had to rush to the store to get more. Should have bought two boxes from the get-go. The grout is a messy process, but it's very rewarding when you see the finished look.

To seal or not to seal? I searched and searched for information, but the gist of it is that grout sealers are almost all toxic and will break down over time when in water. Since this is for a bird bath, bird health is my main concern, so at the moment I have not sealed the bird bath. I found only one sealant that is considered semi non-toxic, but the woman I spoke to at the company said that it will break down in water over time. A woman at a grout company said she didn't think I should seal it at all. I'm going to read more, but I'm erring on the side of caution for my birds.

The After Bird Bath is outside near a yaupon and a window. The birds can enjoy a safe spot for splashing, and I can enjoy watching the birds. And now I get to choose plants to grow at the base! Nothing too big, so cats won't hide nearby.

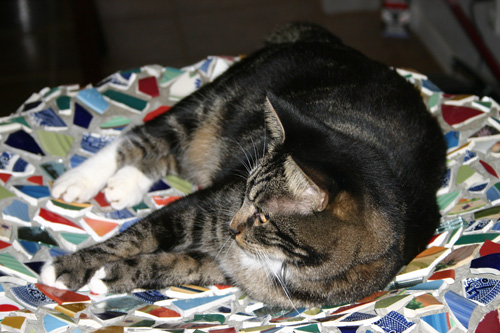
While I was working on the bird bath inside the house, my cat kept wanting to lay in the top and dream of catching birds, as if I built this for her. Wrong, Tooga!

birdbathc09-28-09.jpgHere's a general list of materials I used:

Concrete bird bath

(JB Weld for repair if needed)

Versabond

Bucket and tool for mixing

Putty knife and/or other knife for spreading

Sanded grout (when pieces are more than 1/4 in. apart)

Hammer

Old towel

Dishes to break, or tile pieces

Tile cutters if necessary

Water for mixing and cleaning up

Sponge (not too big)

Rags or cheesecloth for buffing

Safety goggles

Dust mask

Rubber gloves

Paper towels for handy clean-up


It was a long project, but we love the results. Hopefully the birds will, too!

Goodbye Cantaloupe Thing

| 17 Comments

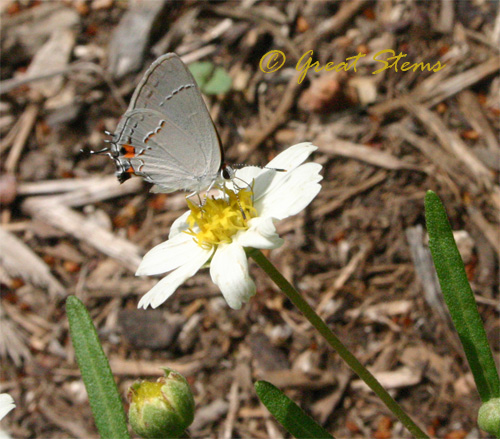
Due to some exciting goings on, my next few posts will be bird-related, so I thought I best put out a veggie garden update. But first I want to share some thrilling butterfly news -- the Monarchs, Queens, Swallowtails, and Gulf Fritillaries, among others, have finally returned to the garden! You can believe I'll be out there with my camera. I did manage to capture a picture of my first Gray Hairstreak butterfly. I was happy to see her on the Blackfoot Daisies -- those flowers are often ignored by the bigger butterflies, who go straight for the Lantana or Mistflower. I read that Gray Hairstreak caterpillars will eat bean plants. Oh well, guess I'll share.

grayhairstreak09-18-09.jpgBut back to the "farm."

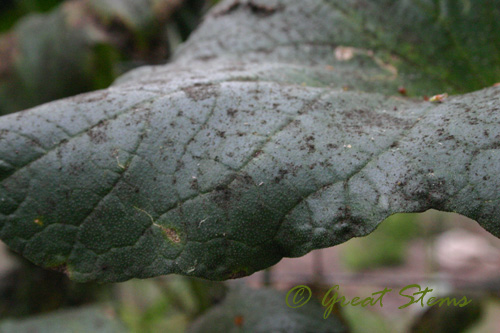
The cantaloupe experiment has finally come to an end, and it's report time. It's kind of sad, really. My beautiful cantaloupe plants finally succumbed to the aphids, which had become so abundant (despite the ladybugs) that their sticky "honeydew" residue, combined with the rains from last week, had led to a nasty sooty mold problem.

aphidsootymold09-18-09.jpg

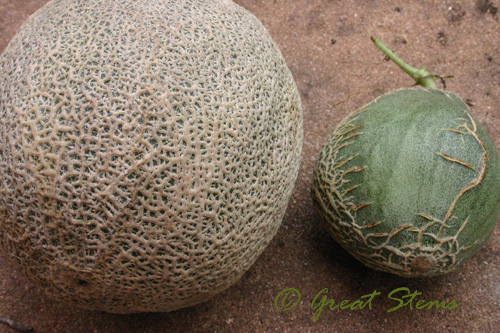
After several days of wondering whether to let my cantaloupes keep trying to ripen, I decided to go ahead and pull the plug. My big one just kept growing but never sweetening, and the shapes of the other two medium-ones led me to believe that I was, in fact, growing a hybrid. I suspected as much, but I decided to enjoy the process anyway.

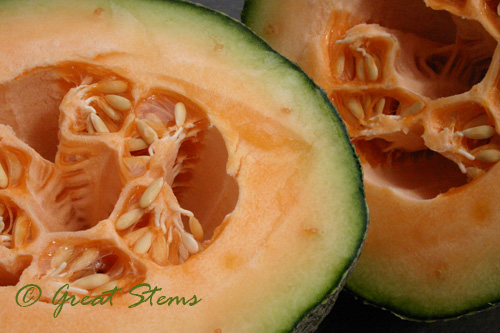
  cantaloupehybrids09-18-09.jpgThe big cantaloupe, cut open, actually did look like a cantaloupe. I opted not to take a bite, but I did lick a piece. Yuck... as I suspected. Though I couldn't help but feel a little disappointed, I do consider the experiment a success. Growing the cantaloupes got me excited about my first veggie garden, led to my first raised beds with trellises, and really helped me get a headstart on the veggie learning curve. I did learn a lot, and I got hooked on growing edibles. Plus, one can't beat the excitement of finding out that your plant is actually growing fruit (even if it's weird hybrid fruit). I don't consider the cantaloupes my first official harvest, mind you. They were an experiment, especially after I found out that seeds from store-bought cantaloupes should not be used, no matter how much fun it might be.

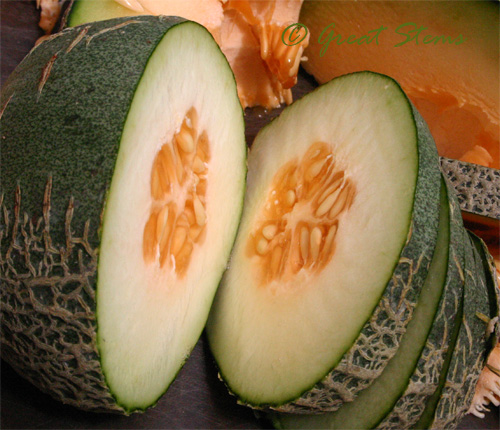
cantaloupehybrid09-18-09.jpgSo I began the process of cutting up the fruit for the compost bin. By the way, ever wonder what the inside of a young cantaloupe looks like? Pretty cool.

youngcantaloupe09-18-09.jpgRemoving the icky plants from the trellis was NO fun. During the process I realized why many garden bloggers opt only to show their beautiful harvests instead of what might be a failure -- it's depressing. I was out there quite grateful that my camera was nowhere near the sooty mold, and while I felt partially obligated to show the whole miserable trellis, I just wanted to get that cantaloupe and all the thousands of aphids into the trash and as far away from my sugar pumpkin plants ASAP. I didn't even want the plants to go into the compost, they were so gross.

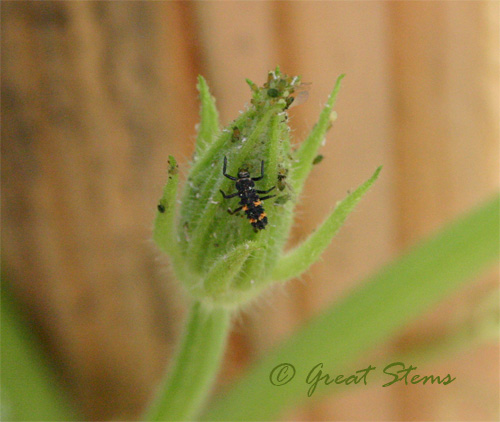
A closer inspection of the sugar pumpkin plants showed that the aphids are starting to move over, and I plan to attack them better. I was happy to find several ladybug nymphs -- hurray for my aphid-fighting allies!

ladybugnymph09-18-09.jpgBut all is well, and I'm looking forward. The sugar pumpkins are the biggest things I've ever seen. They are growing up and over and out from the raised garden bed.

sugarpumpkins09-18-09.jpg

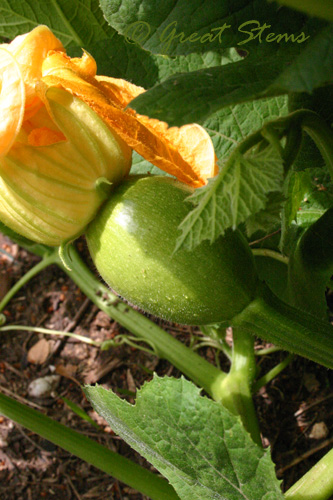
I FINALLY had a blooming female bud on a sugar pumpkin, and hopefully I helped it pollinate in time. Cross your fingers! There will be more, and I must be on the lookout. There were two blooming females on the jack-o-lantern pumpkins, but I doubt they'll be big enough for carving by Halloween. At least they opened, and I did the pumpkin porn thing to help things along -- I didn't have time to watch to see whether the bees were doing their job!

pumpkinovary09-18-09.jpgThe jack-o-lantern pumpkins have begun their spread into the perennial garden, so I have to monitor them. One is even taking advantage of the dead Mexican redbud. It's nice to see green on the redbud again, poor thing.  ;)    It's scheduled for fall replacement.

pumpkinvineintree09-18-09.jpgThe corn is growing, though I've found a couple of worms hiding out in the leaf niches. I'm trying to watch for more, but they seem to sneak in when the gardener's not looking. I've also got young beans, zucchini, and snap peas growing, as well as tiny kohlrabi, carrots, lettuce and spinach seedlings.

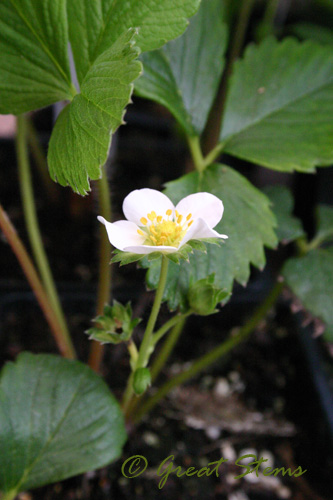
This morning I found some strawberry plants at Natural Gardener. These are "Seascape" strawberries, and when more varieties arrive, I'll try to get some for comparison. I'm eager for strawberry success!

strawberryplant09-18-09.jpgAnd another exciting find at Natural Gardener -- I finally got a gargoyle. They arrived this morning, and the staff seemed as excited as I was. Apparently they don't usually have gargoyles. He's a little guy, but his protective watch over our garden is sure to drive away all pests. Right?

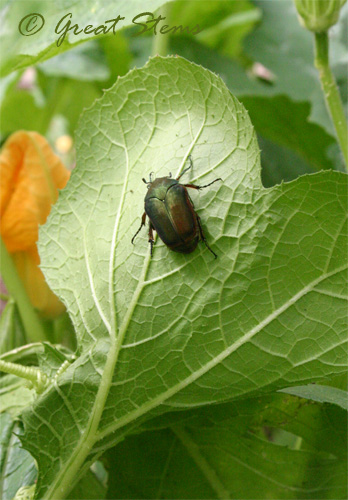
gargoyle09-18-09.jpgMaybe he can tell me what to do about this Green June Beetle. I found it on one of my pumpkin plants. I see beetle grubs in the soil all the time. I believe they qualify as a minor pest, but I'm not sure. The beetle is pretty, as far as beetles go. Underneath is a pretty, shiny coppery surface. It's still alive, but in a jar, until I decide whether it should stay or go. I don't care about damage to turf, as I have none worth saving, but I don't want damage to other plants and fruit.

greenjunebeetle09-18-09.jpg

I did learn an interesting way to identify the Green June Beetle white grubs from other white grubs -- the ones of the Green June Beetle will "crawl" on their back via undulating movements. Somehow I think Shrek would appreciate that.

Cantaloupe Sex Ed

| 23 Comments

And the mistakes I've made, SO FAR.

Here's what I did wrong. I'm going to be happy that this list, as far as I'm aware, is short.

1.       I grew cantaloupe from the seeds of store-bought cantaloupes. To be fair to myself, I didn't know any better! So don't do the same thing -- sure it's tempting, but hybrids, if you bought one from the store (most of them are hybrids, apparently), will give you heartache or at least some stress. Read on to find out why. To those I gave seedlings, I will report my findings as I find them out, and I greatly apologize for any grief you experience!

2.       I took a picture of the giant grasshopper, and it got away. I'm still kicking myself about this one, and it only happened yesterday. The babies are hard enough to catch. If you see a big one, don't try to capture the awe in regards to its size or even impressive markings. Just kill it. It will eat and make babies. Something eats bits of my corn, and I blame him. Or them.

Here's what I'm doing right (again, as far as I'm aware). Top-Ten List! Top-Ten List That's Really in No Particular Order!

10.   I gave my cantaloupe seedlings a raised bed and trellis in which to grow to their heart's content without getting trampled by dogs.

9.       I learned about square-foot gardening and went ahead and spent the big bucks to give them a good soil in which to grow. Even the in-ground pumpkins got a healthy dose of compost mixed into their soil spots.

8.       I lovingly give them water each day, and I know to hold back on water as fruit maturity begins to happen.

7.       I learned the difference between male and female flowers and what "self-fertile but not self-fertilizing" plants are.

6.       I learned about and am quite willing to help my cantaloupes' pollination. I don't have many bees here yet, so I have to do what I can to help (I did see one of those big black ones this morning, but he didn't linger long at the cantaloupe flowers; I also see an occasional sweat bee).

5.       I check them each day for bugs and kill anything that looks menacing. Unless it gets away while I'm taking a picture, that is...

4.       I'm being a good mom by growing the cantaloupes at my son's request, and along the way I get to teach my kids about plant life cycles and good gardening practices (and/or my mistakes!).

3.       I gently guide the cantaloupe vines up the trellis to give them something to hang on to.

2.       I learned about companion planting and put in marigolds and corn in their raised bed.

1.       And most importantly, I love them and talk to them and love them some more!

And there you have it. I'm so excited to have thriving cantaloupe plants, but I'm worried that I'm growing a hybrid. So I'm seeking words of wisdom from the experienced cantaloupe gardeners out there! And Cat at AmloFarms has some blooming male flowers (from REAL seeds) she can share with me for pollination purposes. This cantaloupe thing is getting pretty complicated, haha. But for the sake of my cantaloupes, I will drive across town and back! Thank you, Cat! 

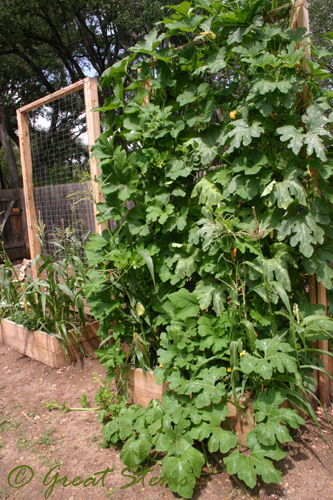
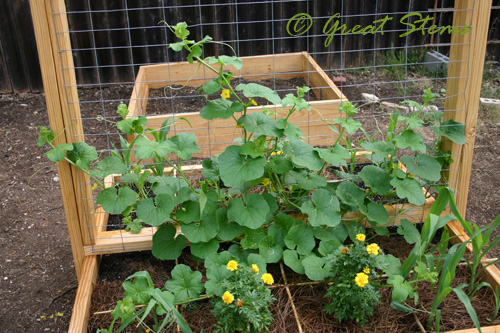
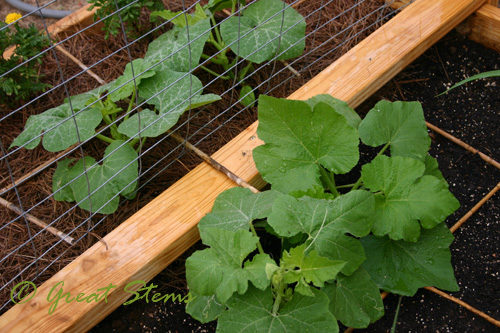
The cantaloupes are happily growing up their trellis and trying to grow out wide, too.

raisedbed08-12-09.jpg

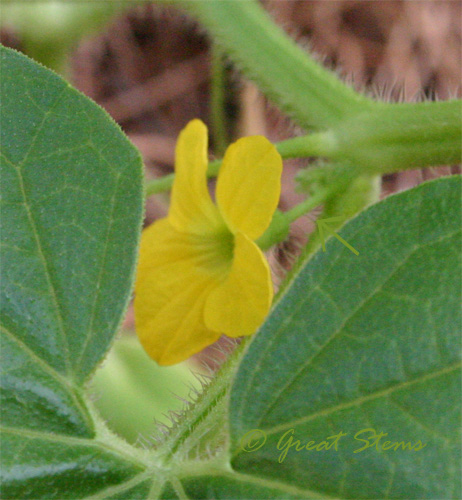
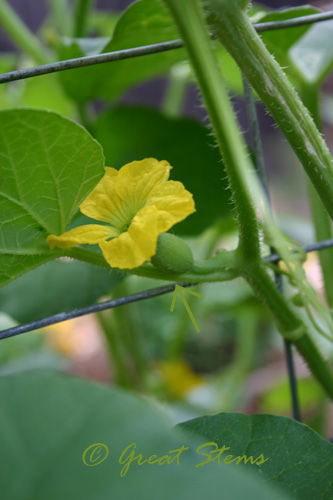
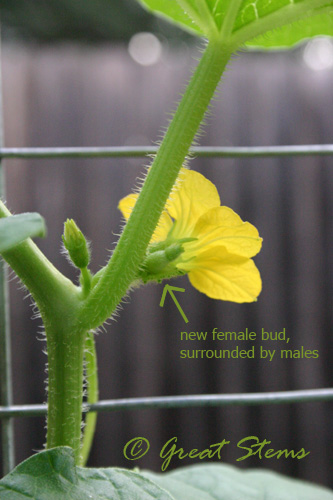
We've had male flowers for awhile, and today (day 38) I found my first female. Here's how you tell the difference. The easiest way is looking at the flower stem.

The male rises from the vine with a single plain stem of its own.

cantaloupemaleflowerb08-12-09.jpgThe female has a cute little bulge that will become the fruit if pollinated.

cantaloupefemaleflower08-12-09.jpg

Here's a baby female bud.

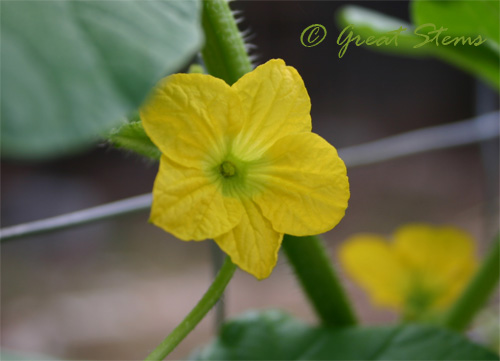
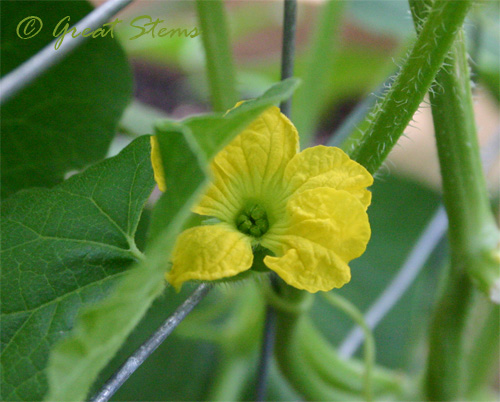
cantaloupefemalebud08-12-09.jpgYou can also tell the difference by looking at the inside of the bloom, but here's where I'm unsure about the condition of the inside of my cantaloupe blooms. The male stamens will have pollen, but I can't tell whether mine do, haha.

cantaloupemaleflower08-12-09.jpgAnd the females will have their stigma ready to receive pollen. But mine look quite green, so I don't know if mine look the way they should (I've seen pics with them yellow).

  cantaloupefemaleflowerc08-12-09.jpgAll the same, I did my best to get some pollen from the male to the female. At first I tried q-tips and a paintbrush, but I saw hardly any yellow on either. So I finally pulled off some male flowers and exposed their stamens and rubbed them on the female.  

cantaloupemale08-12-09.jpg

No idea whether any pollen grains stuck.

So experienced cantaloupe gardeners, should I be seeing lots of yellow pollen on the males? The male pumpkin flower (just saw my first two today!) has a lot of pollen, that's for sure. And ants. First blooms, day 38.

pumpkinmaleflower08-12-09.jpg

Here's one of the giant plants. They have a long way to go to reach full size. Egads.

jackopumpkin08-12-09.jpgFrom what I've read, if I read correctly, the female flowers should be ok and just the males might be sterile. But I don't know whether the females are sometimes sterile, too. And even if pollination happens, will I get a regular cantaloupe out of it or some dud?

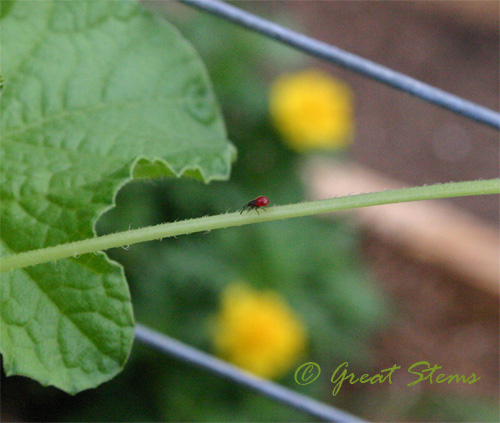
And while I'm asking, let me ask this: Can someone identify this red bug for me? The bigger versions of it are black, but I don't see any of those on the garden yet, but last fall I had a ton of all sizes in a bunch of fallen leaves. Even the people at Natural Gardener couldn't name them for me. I kill them when I see them now. But I'd like to know what they are. They are not tiny lady bugs, that's all I know.

redbug08-12-09.jpg

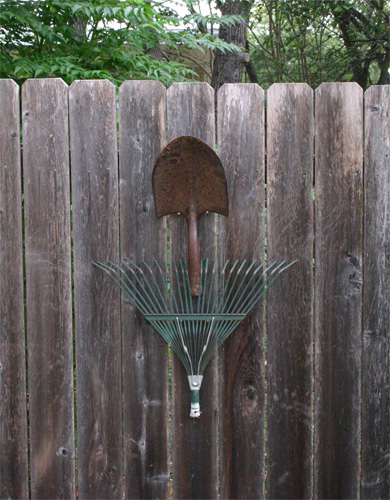
redbugb08-12-09.jpgIn other garden news, I decided to do something with my broken tools. Please tell me this looks like a flower, because it's supposed to, HA! I will probably paint it at some point, but it's growing on me (hehe) as is, too.

shovelflower08-12-09.jpg

You can see the evil chinaberry in my very nice neighbor's yard behind it -- it's been my nemesis for many a year. My neighbor finally had it cut down several months ago, but the workers left the stump and roots, so of course it's been growing back with a vengeance. We cut it again just to prevent seeds and it's back -- so the neighbor is getting the tree people back out to properly kill it. Not sure they'll succeed if they don't get the roots out. I'm having to close my eyes and ears about the herbicides they'll probably use... But I'm so thrilled to have a neighbor who is trying to help with the invasives problem!

Sugar pumpkins continue to grow and confuse me. They just aren't eager to send out tendrils, but growing they be, with new bloom buds forming.

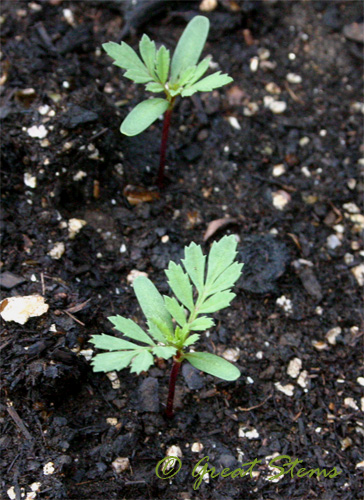
sugar pumpkins08-12-09.jpgMarigold seedlings! Only about 6 took, but I have more seeds to try with.

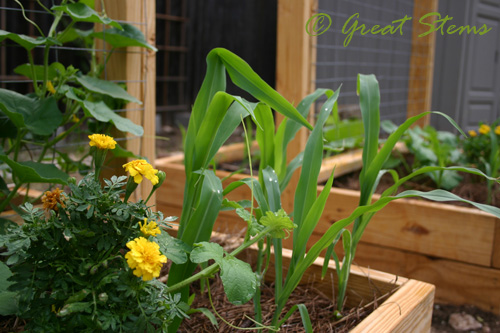
marigolds08-12-09.jpgAnd much of my corn is happy. A few seedlings are getting chomped by something <evil eye at grasshoppers, even if they aren't to blame>, but the rest are growing. I never really realized how beautiful a corn plant is until all this growing stuff.

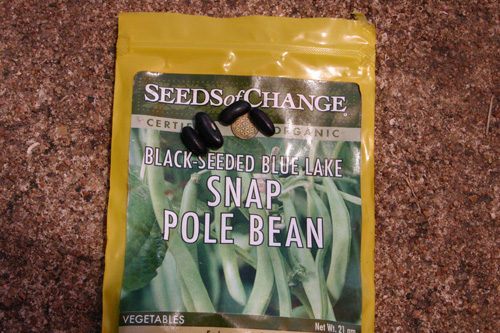
cornmarigolds08-12-09.jpgAnd I've planted 8 pole bean seeds so far. I'm making use of the far corners of the trellis squares (ok, according to square-foot gardening, those squares belong to the cantaloupes but they were just sitting there empty! seemed so wasteful). I'll be planting more along the fence once I amend the soil. My wonderful oldest son dug out the weeds from that area for me this morning. This whole "raising kids to work on the farm" was a brilliant plan of the pioneering farmers!

I planted Black-Seeded Blue Lake Pole Beans. The seeds look like engorged ticks. Don't they sound wonderful? But I hear they are delicious. No, really. Really!

polebeanseeds08-12-09.jpg

And we had another frog in the dog pond. Not surprisingly, he's just as cute as Murray! Pictures soon!

Creature from the Black Lagoon

| 10 Comments

At long-last, my neighborhood got some long-needed rain. I say my neighborhood because in all honesty and selfishness, I have no idea what happened elsewhere in Austin. I was too busy out in the rain doing a little happy dance. I guess the gardening gods felt sorry for me and let the rain fall. I shall pay proper homage later.
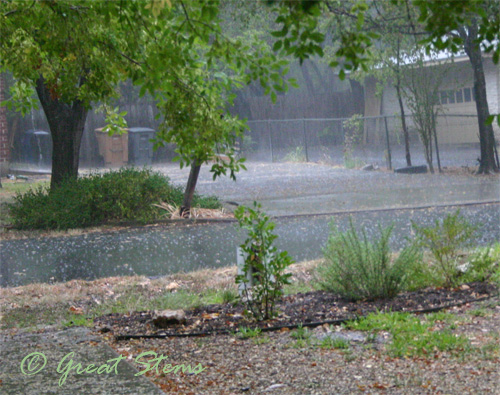
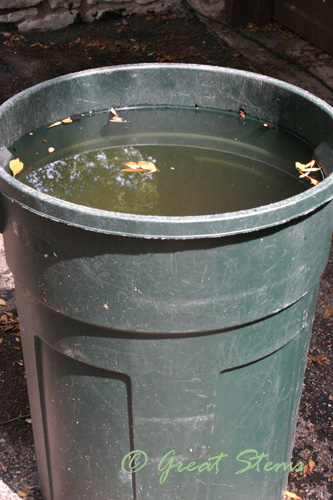
rain07-30-09.jpgAnd it was a good long rain. Long enough to give a deep watering to the trees, gardens, and scorched earth. Long enough to fill my mock rain barrels and get the toads ready for l'amour. See this massive spout of water? We're in the process of painting and have no gutters up, so no rain barrels, but I put out two plastic bins to catch as much water as I could. They overflowed, so much water fell. Yay!  
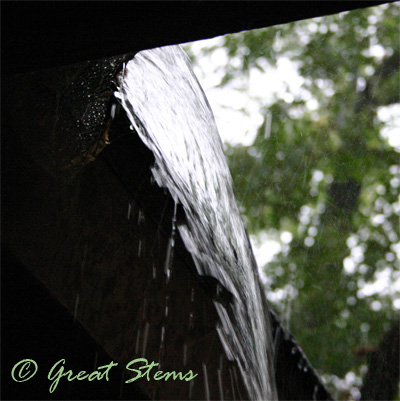
rainb07-31-09.jpg

raind07-31-09.jpgEven the entryway's crazy-tall Japanese Yew, planted 20+ years ago by some previous owner, got some water. You can't see much of it from this picture, because I was taking pictures of the rain!
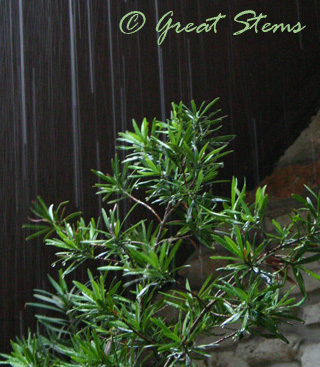
rainc07-31-09.jpgHey, I just now read that the Yew is quite toxic. Why am I not surprised? It seems everything I want to plant or is already here is toxic (except the key lime tree I bought today. Wheee! Oops, hubbie, ignore that. But if you don't ignore it, blame the wee one; he insisted on getting it. It was only $20 and quite large! Key limes, honey, key limes! Just think of the money we'll SAVE!).

So what does rain have to do with this odd title, "Creature from the Black Lagoon"? Well, I'll tell you. It all started when I woke up at 6-something this morning and let the dogs outside. When I tried to get them to come back inside, the puppy was standing in the dog pond (a.k.a. wading pool) and not moving.

Grover wasn't moving because, as it turns out, he was surrounded by several toads in the water. They weren't very happy with him in there, and I guess he didn't quite know what to do, either. I didn't get a picture, as I decided to rescue the toads and move them toward the main pond. Here's a picture of Grover later, with a stick he'd found. 
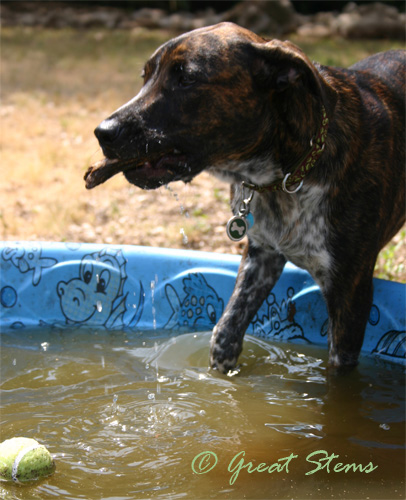
grover07-31-09.jpg

But Grover is not the Creature from the Black Lagoon. And it turns out that two of the many toads were actually double -- mating toads foolishly thinking that the dog pond was a good place to hook up. Even as I rescued the toads and helped them find their way to the crevices of the main pond rocks, those silly boy toads kept a tight grip, making the females lug them around. I could hear the toads croaking last night and this morning -- I guess rain brings out toad passion. Water's here -- let's get together, baby!

While I was outside, I realized that the waterfall in the pond had become a trickle, which meant that the pump was clogged with something. So I decided to go ahead and deal with the pond right away. The rain might have sent some tree debris into the pond. While I got ready, I grabbed the camera and caught a picture of a toad on a pond rock. All those toads aren't Creatures from the Black Lagoon either.
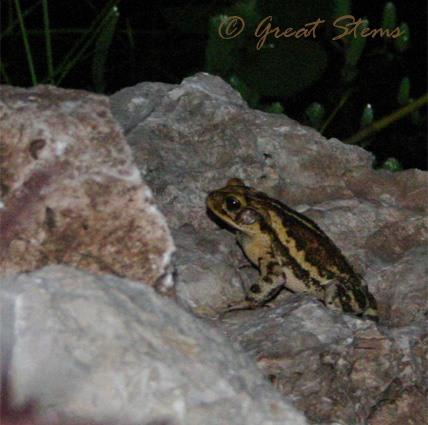
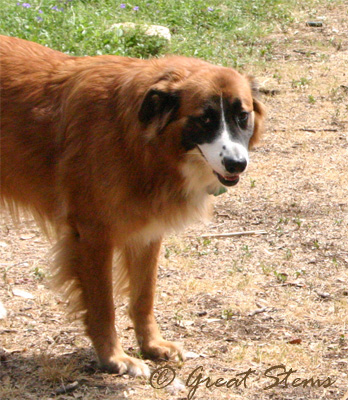
toadb07-31-09.jpgIf it wasn't rain debris clogging the pump, there was a chance it was something messed up from the last time Sheba got in the pond. I'm still trying to get a good picture of this pretty dog, but she truly tries to hide from my camera. I have to be sneaky.
sheba07-31-09.jpg

She might be camera-shy, but she's not the Creature from the Black Lagoon either.

So I get in the pond and begin my work. Sure enough, the filter was slightly tilted, letting debris get in. And there was an umbrella plant that had been knocked to the bottom of pond. Amazingly it was fine and had new growth. Is it the creature? No. Nor are the snails I found (the dwarf puffer in my aquarium will be most appreciative when I feed those to him!).

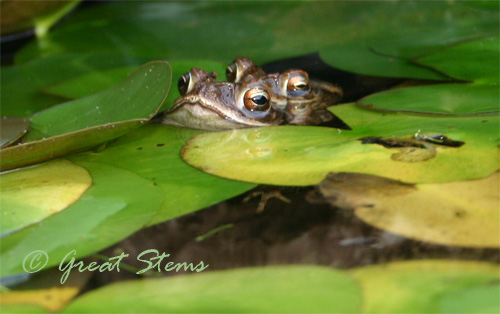
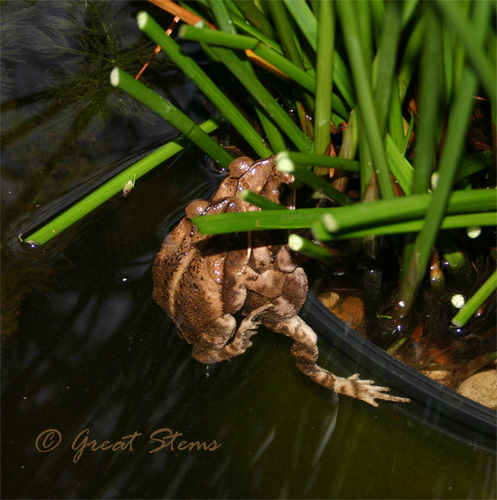
Since getting in and out of the pond is an annoying chore, I decided to make the most of my time in there. I threw out any leaves and sticks I found, got sludge that had collected below the pump, trimmed the dwarf papyrus, and gathered pea gravel that had fallen out of knocked-down plants and put it back in the respective pots. While I was working, two pairs of mating toads hopped up the pond rocks and joined me in the pond. I guess mating takes priority over being scared of the human. And amazingly I didn't drop the camera in the pond during these pictures.
matingtoadsc07-31-09.jpg

matingtoadsb07-31-09.jpg

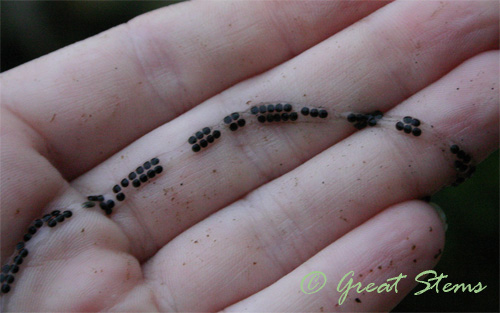
The mating toads aren't Creatures from the Black Lagoon. Nor are these toad eggs I found while working on the plants in the pond. Pretty cool -- I hadn't seen eggs before. Suddenly I realize how many eggs are probably in my pond. Hopefully it won't affect the fish, or vice-versa! The fish aren't the Creatures either. But they gave me little goldfish "kisses" in the pond while I worked. Hey, I can pretend they were kisses! 
toadeggs07-31-09.jpg

I continued working, even sitting down in the water to collect some hair algae that was growing in various places in the pond. It had become a problem after the last major time Sheba got in the pond, when she knocked half the plants into the depths of the pond. Lots of spilled soil and whatnot had been added to the pond, and the hair algae went wild. We added a barley block and more submerged grasses, and the pond is back on track. The hair algae? Not the Creature. But you're getting closer.

I found lots of nasty sludge in the filter pot. I scooped much of it out with my hands and tossed it into the nearby garden bed. Some sludge is ok, but not in my filter pot. I opted not to take a picture with my nice camera while having sludge in my hand. Sludge? Not the Creature.

You can see in the second mating toad pic the dwarf papyrus I trimmed back. It's trying to bust out of its pot now, but today wasn't the day for me to deal with it. So I trimmed back the parts that were drooping into the water. There were a lot. The monster "dwarf" papyrus, before or after its haircut, isn't the Creature.

Here's the cleaned-up pond. 
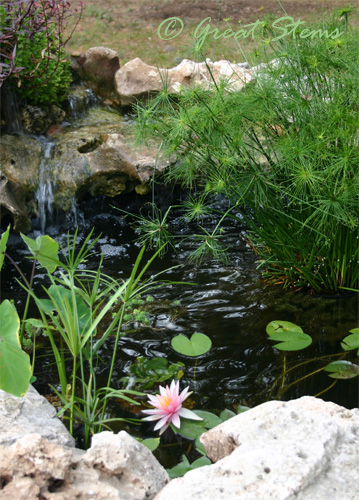
pondb07-31-09.jpgHmmm, after looking at this picture, the dwarf papyrus still looks like it needs a haircut. Reminds me of my husband on our wedding day, when his hair looked exactly the same after having paid for a haircut... you know, before wedding pictures... sigh. 

So the "dwarf" papyrus isn't the creature, nor is the baby dwarf lily I decided to lower slightly into the water to let it grow taller. Not the Pink Sparkle flower, either.  
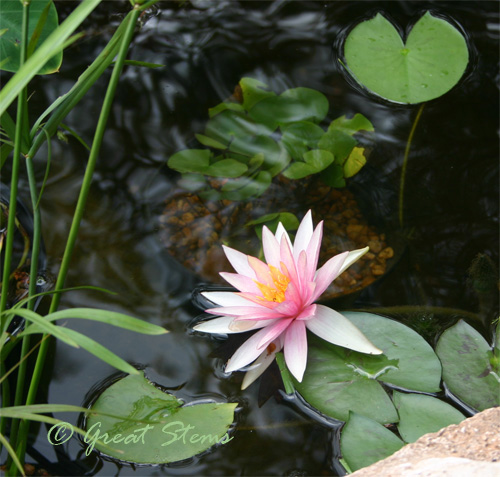
ponda07-31-09.jpg

I decided while I was out there to go ahead and plant the swamp milkweed I'd grown from seed, not realizing that Asclepias incarnata was actually swamp milkweed (It didn't say it on the package! Not my fault...). As the name implies, it likes water, and I had a dilemma of figuring out where to put it, as I really didn't want to plant something that wasn't drought-hardy. I finally figured out that if I plant it next to the dog pond, their splashing was likely to give the plants the extra water they'd need. I already cart the dirty dog water to my plants all over the the backyard, before refilling the wading pool. It's a pain, but I do it. Can't waste the water and can't leave it in long enough for mosquitoes.
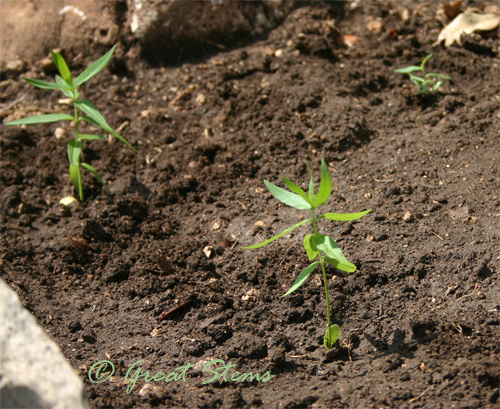
swampmilkweed07-31-09.jpgAha, Swamp Milkweed, you say -- with "swamp" in the name, the milkweed has to be the Creature from the Black Lagoon. Nope, wrong again.

It's not this bug I found on the buds of my Texas star hibiscus, which apparently likes its spot in the pond. I can't wait to see the flowers!
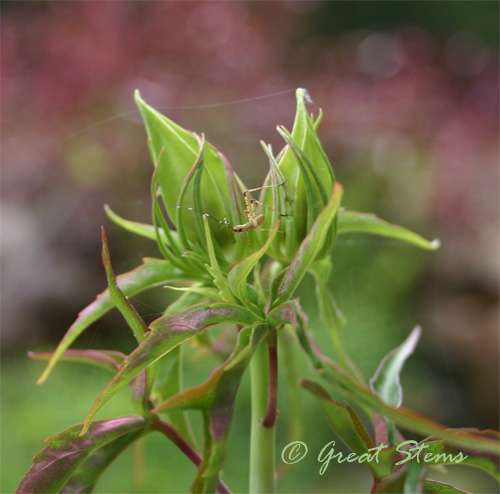
bugonhibiscus07-31-09.jpg

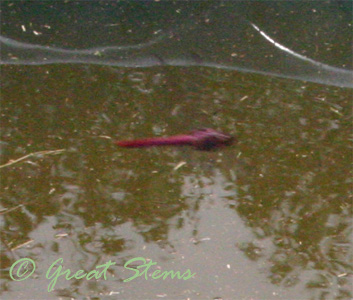
It's not any of the dragonflies that were flitting about the yard and the dog pond. I couldn't get a good picture, they zoomed so fast; but I think they were Roseate Skimmers. The male was a gorgeous pink/fuscia. The females (if they were the same species) were brown/orange/black.
dragonfly07-31-09.jpg

Ok, then what in the world was the Creature from the Black Lagoon in this story? ME, it was me. Picture if you will a woman wearing an old t-shirt and some old, too-short shorts (It was still just before dawn when I got in that pond! Who'd be watching?), who gets in a pond to do some maintenance. After sitting in the depths to gather sludge, hair algae, debris, gravel, and whatnot, I was rather a solid wet, gross mess from head to toe, and having the waterfall turned back on while I was in there guaranteed that more silt was churned up to collect on my clothes. Oh, but the story doesn't stop there...

When I got out of the pond, I figured that since I was already filthy, I might as well plant the swamp milkweed in the wet soil nearby, as you know. What's a little more mud? Nothing, until I went to the backdoor to go back into the house to take a shower. It was LOCKED. Locked by my husband, who so generously let me stay working in the pond by taking the boys to camp for me. Locked, perhaps out of habit, just before he left the house. And there I stood, now about 8:30 in the morning, looking like the Creature from the Black Lagoon. And then the realization that I was probably doomed to walk through the neighborhood looking like that to find someone to let me either call my husband or help me get into my house.

Fortunately, a spark of brilliance came to me (thank you again, gardening gods... or house gods) and I was able to get inside the house without having to show up on a neighbor's doorstep, ring the doorbell, and <shudder>. If I hadn't found a way inside, this story might be called "The Black Widow" instead of the "Creature from the Black Lagoon," if you get my drift.

And no, I did NOT take a picture. 
Pumpkin Army Bases, Day 15

| 9 Comments

I think I need a better name than Pumpkin Army -- this veggie gardening endeavour just gets bigger and bigger. I've now added corn to the plan. Alas. This is what research does for you! It also gets you: trellises!

trellis3.jpgI'm back from camping. It was good fun -- and nice to have a change of pace. I'd like to say that all my plants survived my absence, but I'm happy that most of them did (mourning the rest). The seedling army grows.

pumpkinseedlings07-20-09.jpgAnd of our three swallowtail caterpillars happily munching away before we left, we found one chrysalis, so we'll try to monitor it for butterfly-ness. Of course, it's in a place that is very hard to get a picture, and it's also in a place that the butterfly will have a hard time getting out of without our help. 
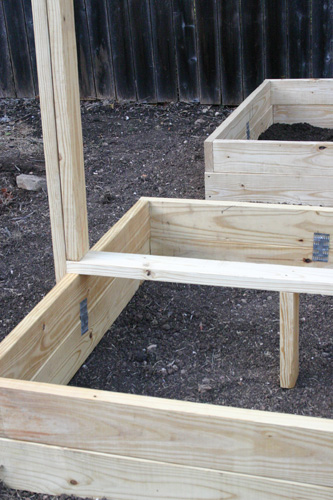
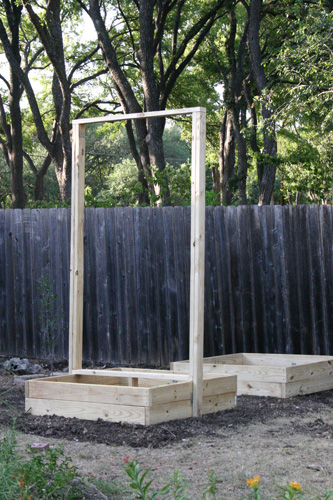
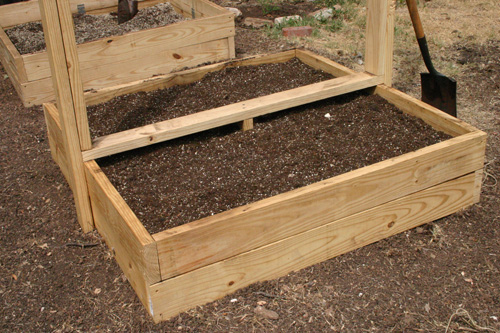
Though my DH didn't quite get to all the plants, he certainly tried, and it was nice to return home to additional hoses and hand sprinklers so that I don't have to drag hoses around to water those plants far away from civilization, my house. (It's not that I hadn't thought of it, I just was trying to avoid spending the money!) In addition, he made great progress on the raised garden beds, which means I will soon have the cantaloupes happily planted.  

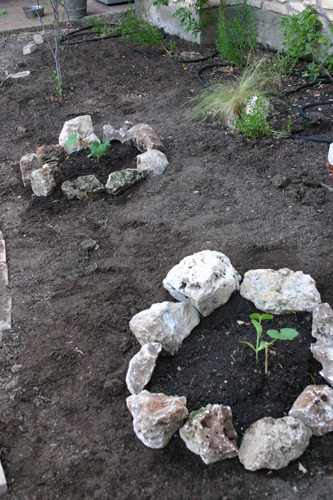
trellis1.jpgThe jack-o-lantern pumpkins are going to be spread around the yard and will have to brave possible trampling by dogs, scary because the vines are so important to the size and quality of the pumpkins. I've got three jack-o-lantern pumpkins in the ground now, with more to come, maybe. I put them in little mounds, and for now I surrounded them with rocks to help the dogs avoid them. One of them is near some other plants, so I'll have to guide the vines other directions, as best I can. It will have to do -- those vines are growing so fast that I wanted them in the ground as soon as possible. I'll get some marigolds and radishes near them for bug repellents. It's apparently not the right season to grow radishes, but if they'll keep the bugs away, I'll try!

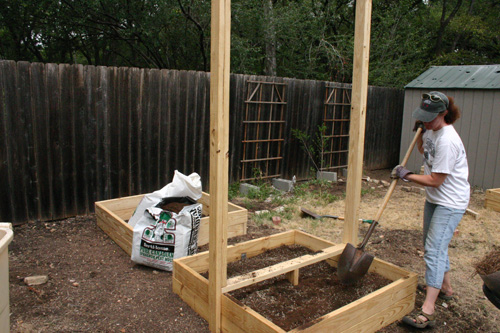
jackpumpkins07-20-09.jpgThe cantaloupes will be in a raised garden bed, grown vertically on a trellis. All in all, we'll have three raised veggie beds (for now, haha). The cantaloupes will be in one, along with corn and some marigolds, and sugar pumpkins will be in another, with some more corn. The third bed will be prepared for yummy fall planting goodness. The third bed was made for me by my kids this weekend, their first project working with drills and saws and whatnot!
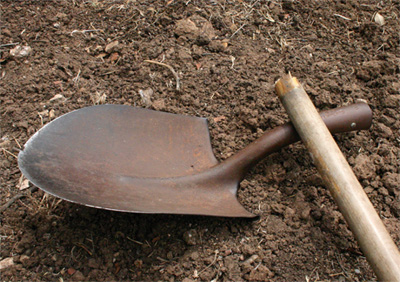
pumpkinseeds.jpgTo prepare the area, we dug out the grass. It was dead, so other than dealing with the hard soil, it was no loss and only somewhat of a pain. Then, with the frames in place, I mixed in compost into the existing soil. I expect some plant roots to extend into that soil, so I wanted to enrich it somewhat. How hard was the soil? Casualty, one shovel.
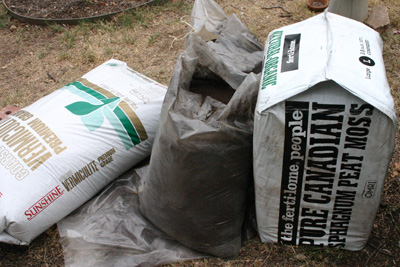
  brokenshovel.jpgFor the main bed soil, I decided to follow "Mel's Mix" for square-foot gardening. I talked with the folks at Natural Gardener before doing this, and they had various suggestions (including Mel's Mix), but nothing really any better or worse. The other option I considered was mixing compost with more of my clay soil, but that would have involved more digging. Forget that! Once I got the stuff home, I read on the bag about dust concerns with the vermiculite, and I felt a little concerned that I'd made a bad choice, but a little more research online made me feel better. 

melsmix.jpgIn mixing the soil, I felt a lot like Hermione in front of a big cauldron at Hogwarts. It was fun mixing it, I admit. I did add in some bonus clay soil from a pile in the yard, for good measure. It's that secret ingredient in my special sauce.

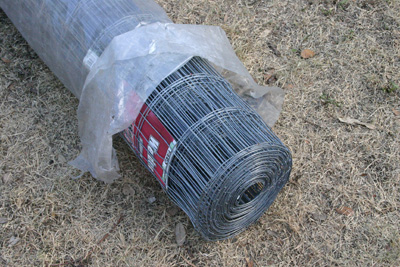
trellis2.jpgtrellis4.jpgBecause someone at NG told me that peat moss can be a pain to get wet at first, I decided to wet down the soil well and plant tomorrow. Sure enough, I had to work with the peat moss in a big soup of mud to get it to soak in the water. Then I really did feel I was creating a magical potion! Tomorrow will be a good planting day. First I'll get the trellis wires in place and the grid. Then in will go the cantaloupes and marigolds and some corn seeds.
trelliswire.jpgSide story... While I was digging the soil for the frames, I found a weird, soft little tube. At first I thought that it was, pardon me, some old dog poop. But then it split open, and a spider carcass fell out. Squeal. And then lots of little spiders came out and crawled over the spider carcass. Shriek! While I was wondering whether they had eaten the spider, more horrors awaited me... the legs of a gigantic spider appeared. And they MOVED. And more baby spiders crawled out and over the legs... By now, I'd made loud enough noises that the kids came running over. And finally the whole spider slid out, and it was the biggest spider I'd ever seen in my yard. Yes, tarantulas are even bigger, but I haven't seen one as a resident yet. Despite my startled reaction to the sudden appearance of this spider and her babies, I find her beautiful. Can you see some of her babies in this picture?
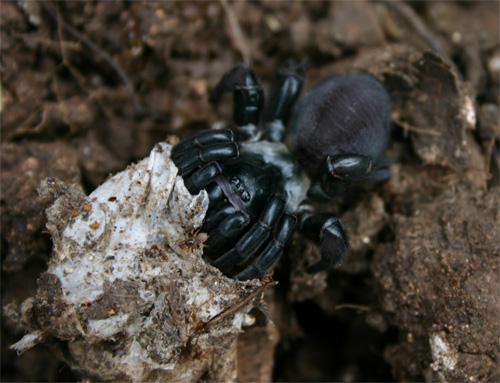
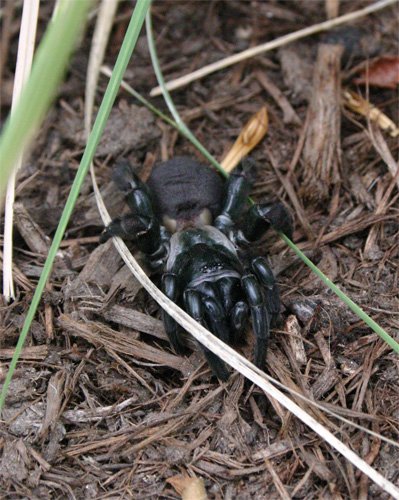
trapdoorspider1.jpgIt turns out this spider is a female trapdoor spider, and she creates a silk tube-like burrow for hunting purposes, laying eggs, and feeding young. I felt some major guilt about disrupting this little family. But once the babies left the tube, all I could do was scoop up (with the shovel) some of the dirt they crawled upon and get them to a prepared garden bed instead of letting them get buried under the dirt I was lifting and turning. The mom spider went to a shady spot, because she looked so shiny and that "carcass" I saw was probably her molted exterior. Or perhaps her mate, eep! 

trapdoorspider2.jpgHopefully they'll survive. Guilt, guilt. Live, spiders, and go eat my pest bugs!

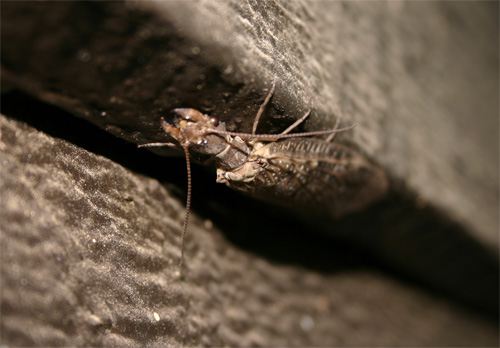
Speaking of horrific creepy-crawlies, check out this bug I found in Oklahoma. At first I saw beautiful wings and thought it was a really unique and large moth. But then I saw the head and its enormous pincher-like mouth. My guess is it's not a moth! This bug was more than 3 inches long, front to end. Imagine this bug about the size of a house. It's got B-movie horror written all over it!   Edit: I googled and determined that this is a female dobson fly. Takes some of the fun out, knowing the name, doesn't it? :) 

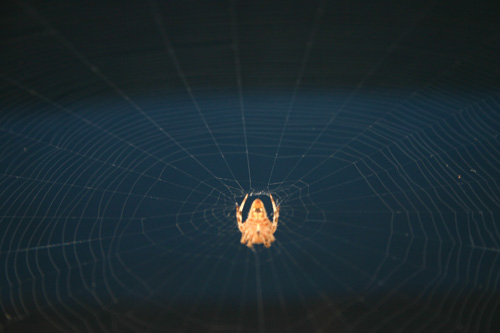
OKbug.jpgWe saw a pretty cool leaf butterfly of some sort there, too, and many spiders. This picture didn't turn out as well as I'd like, but I like the overall effect of the image.

OKspider.jpg

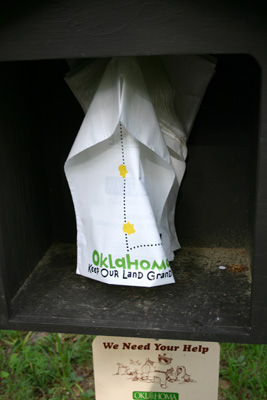
The Oklahoma state parks seem to be very nicely managed and maintained, more so than some of our Texas ones. I loved that they had litter bags to help people keep the trails clean. My only complaint was that they didn't offer any recycling options for bottles or cans anywhere. We kept our recyclables and brought them back to Texas with us. Green points earned!

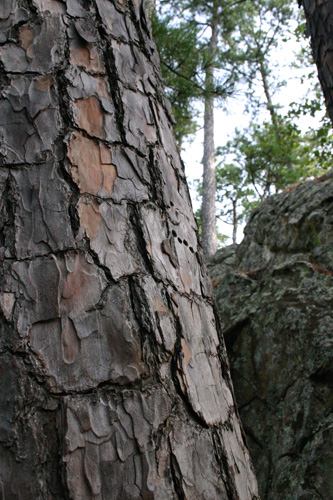
OKlitterbag.jpgI loved the bark of the pine trees at Robber's Cave.
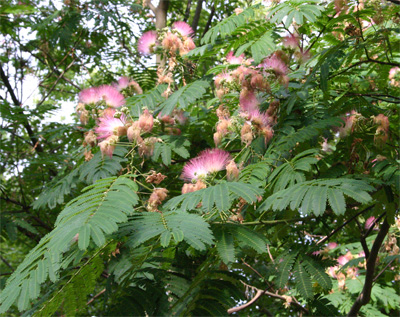
OKpine.jpgAll along the highways and in the state park itself, the beautiful but very invasive mimosa silk tree could be seen. I have a close-up of the flower, but I felt too guilty about admiring the beauty to post it. Bad invasive, bad! 

OKmimosa.jpgAt least it's prettier than the invasive Chinaberry all over Austin.

The Austin Pond Society Pond Tour was this weekend. I have lots of pictures to post over the next couple of days!


Raising a Pumpkin Army... Day 6

| 4 Comments

Day 6... Separating the Seedlings

Now that I've gotten over the shock of discovering that once again I stuck myself into an enormous project I'm not ready for, I'm moving ahead full force. Because that's how I roll, baby! My pumpkin army will help me conquer the world! Muahahaha!

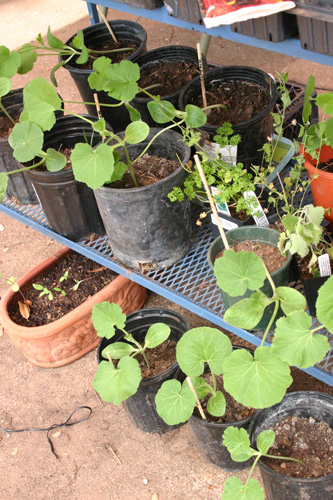
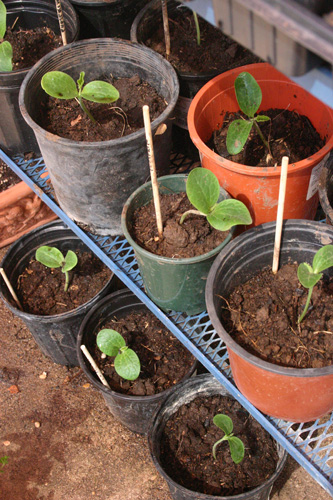
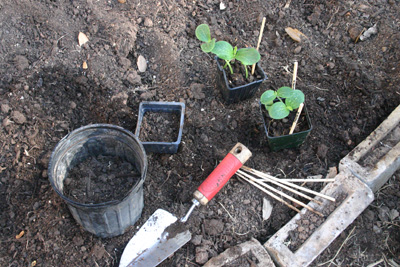
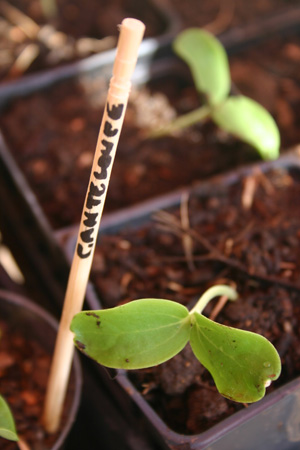
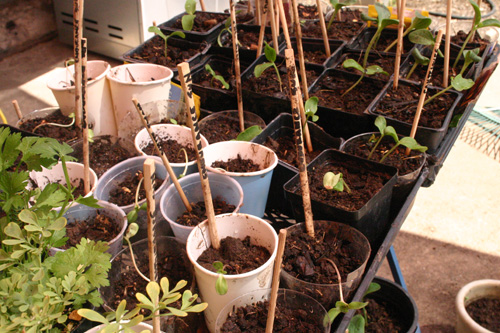
pumpkins07-11-09.jpgThe pumpkins, cantaloupes, and endurance sunflowers are all growing like mad. Today I separated almost all of the seedlings into individual pots, which was quite a chore given that I only have so many available pots -- I used the last of my cups, too. I heartlessly thinned out a few that looked at me funny (ok that's a lie, because it really is painful for me to decide which ones have to go). In all I think I sent 4 little pumpkin plants to their doom, but they will serve another purpose in becoming compost. It means I still have about 20 pumpkin seedlings growing, LOL (I was afraid to count the cantaloupes). I recognize that I can't possibly grow them all, but I'll choose the best of the best after my camping trip this week. If any survive my husband's attempt to water the seedlings in my absence, they are sure to be hardy little boogers.

thinningplants07-11-09.jpg

cantaloupe07-11-09.jpgThe current plan is to put some plants in the ground and some in raised beds with trellises. It will be quite the experiment for this newbie vegetable gardener. I happened upon the wonderful blog of Engineered Garden, and it's this type of trellis we plan to build, at least for the cantaloupes. Actually, I've asked my DH to build them for me while the boys and I are camping. If he succeeds, I should be able to get most of my babies planted next weekend. These seedlings are growing so fast, I hope I don't miss the best window for planting.

Knowing that I'm camping for a week and leaving my plants (seedlings plus the rest of the garden) during a Texas heat wave in the care of my husband, who is NOT the gardener of the family, is a bit scary for me. I think it will take me two hours to write out the whole watering process I go through. But it will be good for him. If I teach him anything, it will be how to deep water, an important skill to have. I worry most that he'll not notice all the plants around the place. He will also have to fill all the birdfeeders and take care of the pond, dogs, cats, hamster, fish, and our neighbor's turtles -- all while working a full-time job. See why I worry? 

seedlings07-11-09.jpgI'm sad that our swallowtail caterpillars will go to chrysalis while we are gone -- we won't get to see how big they'll get before they transition. But if they form their chrysalises nearby, and we can find them, maybe we'll get to see them emerge as beautiful butterflies. 

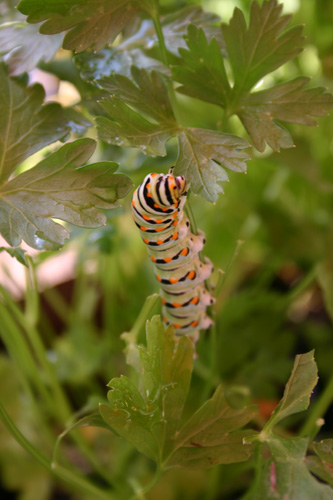
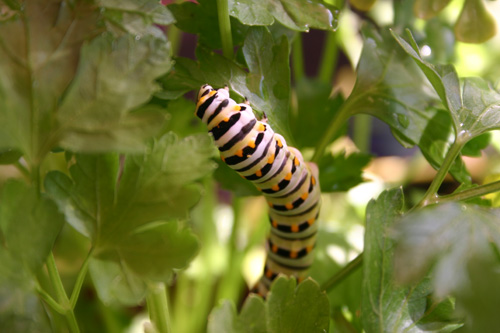
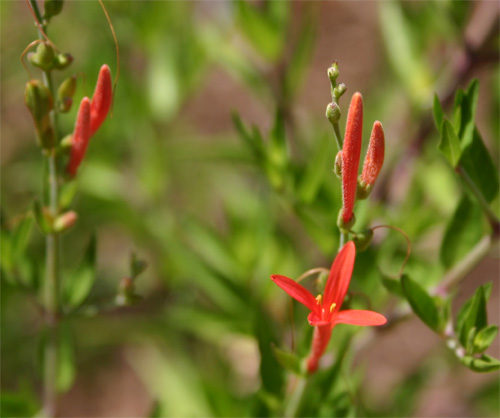
swallowtailcat07-11-09.jpg swallowtailcatb07-11-09.jpgAnd I'm going to miss Garden Bloggers' Bloom Day. But most of my plants have given up their blooms in hopes of sheer survival in the heat (thankfully we have a few left for the butterflies). But here's a new one I'll post -- one of my other Flame Acanthus has finally started blooming, and I was happy to see it was the vibrant red variety. My other Flame Acanthus has orange blooms.

flameacanthusred07-11-09.jpgSee you next week!


Meredith
Meredith O'Reilly happily
gardens for wildlife in
Austin, TX. She enjoys
educating people of all ages
about native flora, fauna,
and healthy environments.


Nature Blog Network


categories

Powered by Movable Type 4.21-en
OpenID accepted here Learn more about OpenID