Alaska: Ketchikan Kayaking and Orcas in Victoria (Canada)

From Sitka, Alaska, we headed to Ketchikan just in time to celebrate Independence Day.  ketchikan07-04-13

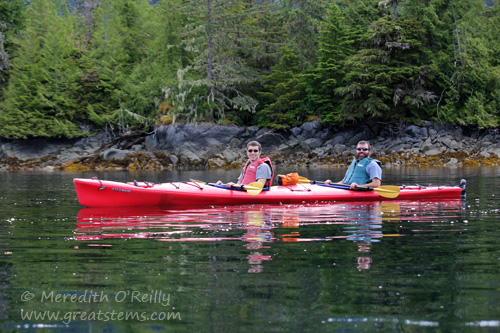
The town was preparing for their big July 4 parade. It would have been fun to join them, but our destination was the Tatoosh Islands for some kayaking.kayak07-04-13

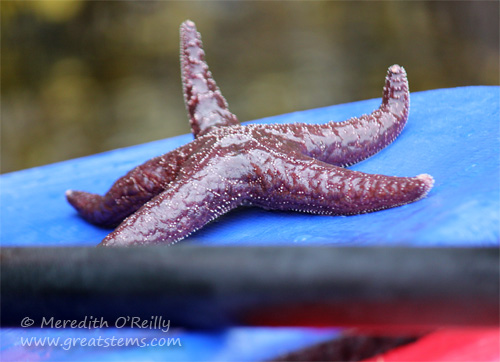
What a beautiful place to kayak, and the weather was perfect. Well, it started out with a hint of rain, as always, but by the time we got in the tandem kayaks the sun was fully shining. ochreseastar07-04-13The water was surprisingly clear, too, and that meant we could see sea stars, jellyfish, and other marine life pretty well. Above is a Purple Ochre Sea Star, a keystone species. It helps encourage marine life diversity by controlling populations of the Common Mussel.harborsealpup07-04-13

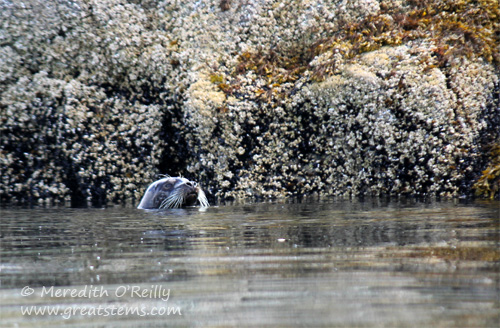
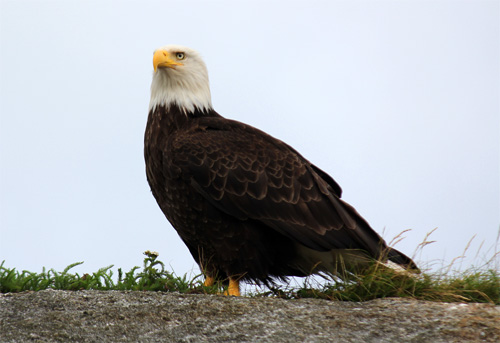
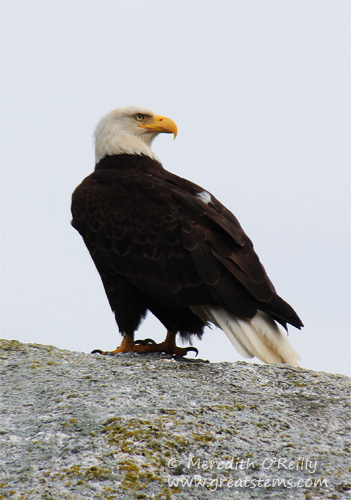
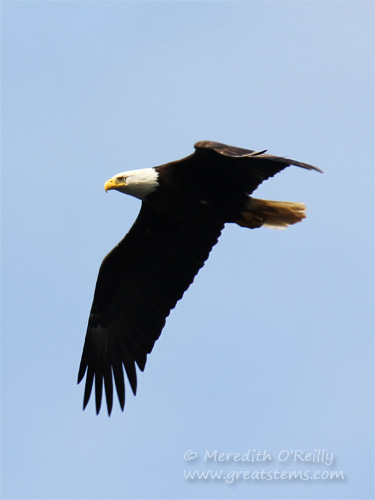
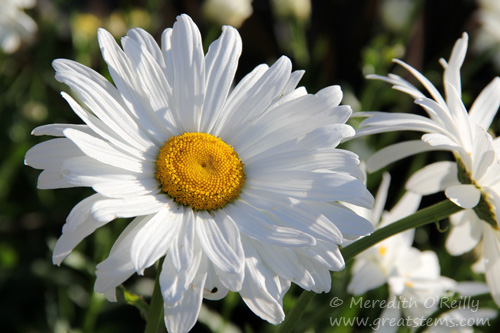
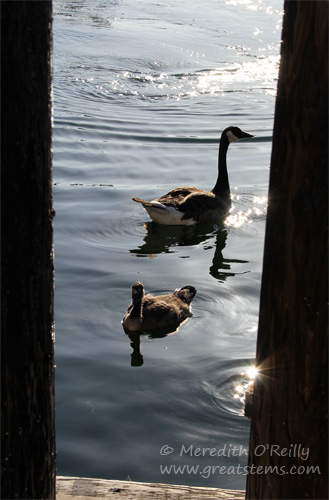
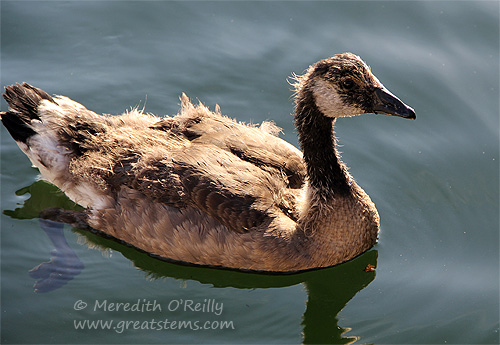
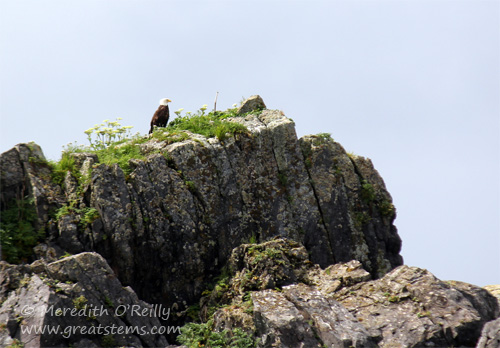
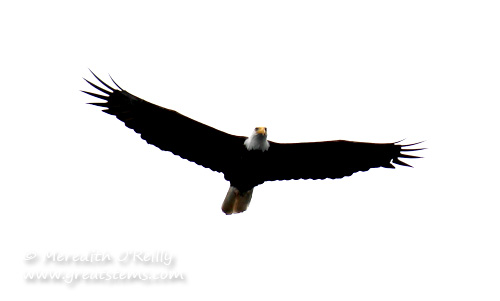
This baby Harbor seal popped its head up as we headed through a mini channel between rocks.baldeagle07-04-13 A bald eagle stood watch from a rock near one of the Tatoosh Islands.baldeagleb07-04-13 It truly is a majestic bird and quite big — an adult can weigh up to 14 pounds. baldeaglec07-04-13 Bald eagles are stubborn birds. If they catch a fish too heavy to fly with, rather than drop it they’ll swim along awkwardly with their wings serving as paddles. daisy07-05-13Our final cruise stop was Victoria, British Columbia — a brief visit to Canada. I’d heard how beautiful this city is, but I’ll have to visit another time to truly see it. Our families voted to go look for killer whales, and so it was back to the ocean for us again.canadageese07-05-13 canadagosling07-05-13While boarding the tour boat, these Canada Geese swam over for a hello. It was nice getting to see Canada Geese while actually in Canada.

orcac07-05-13

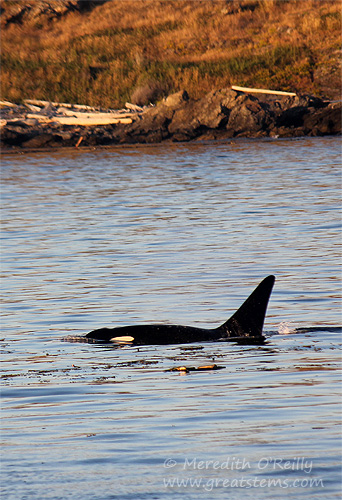
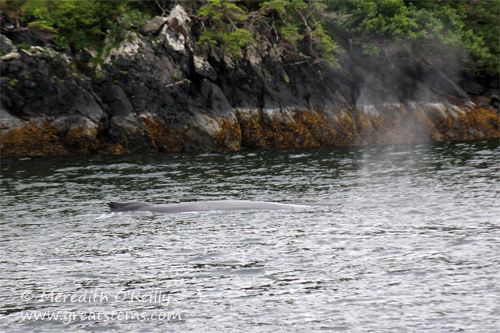
The waters near Vancouver Island are home to many killer whales, all 3 primary types. Resident pods specialize in fish, typically salmon. Offshore killer whales hunt large oceanic fish and sharks. Transient orcas are the mammal hunters, looking for seals, sea lions, porpoises, dolphins, and whales. The three groups don’t intermix and they have different communication signals.

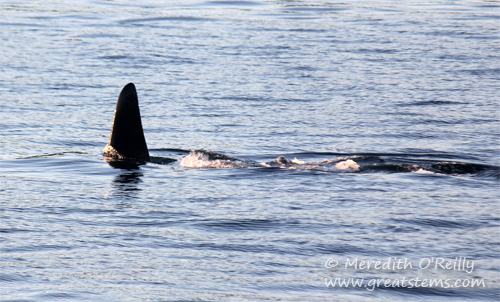
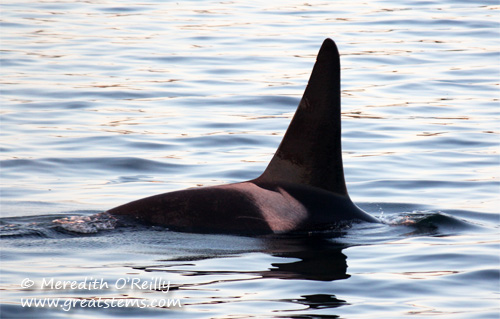
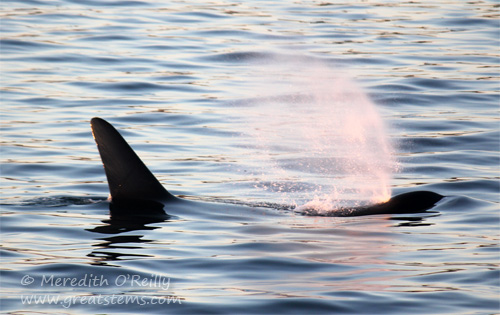
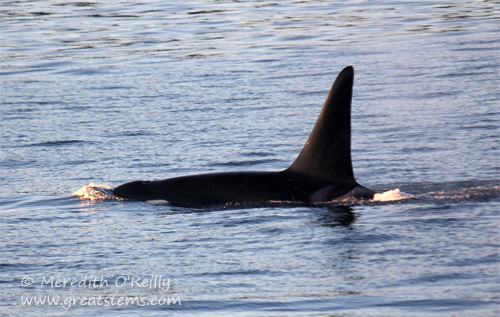
orca07-05-13 We watched a small family of resident orcas. They were very focused on foraging for fish in the kelp-heavy waters.orcab07-05-13 The killer whales were remarkably calm in their approach to getting food — swimming at easy speeds and occasionally curving into a deeper dive.
orcad07-05-13orcae07-05-13 Who would have thought watching killer whales would prove to be a relaxing activity?
sunset07-05-13

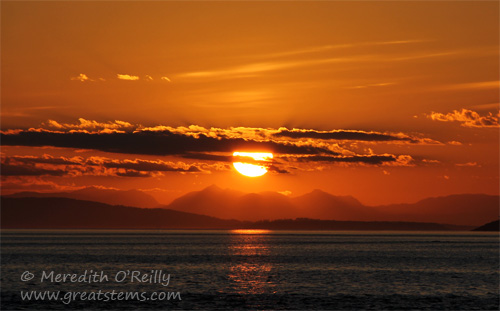
A beautiful sunset brought closure to our cruise. The next day, we spent a remaining tourist day in Seattle with our larger family group, and the boys and I prepped for the camping leg of our journey.

Alaska: Sitka, Sea Otters, and the Sound

After Glacier Bay, our next Alaskan stop was Sitka, a very quaint fishing town. Originally settled by the Tlinget people, there was also a period of time in which Sitka was the capital of Russian America. After the United States purchased Alaska from Russia in 1867, the formal transfer and flag raising took place in Sitka. Lots of history to the town!sitkai07-03-13

sitkag07-03-13

foxglove07-03-13

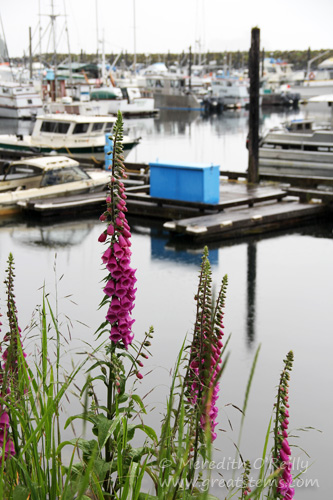
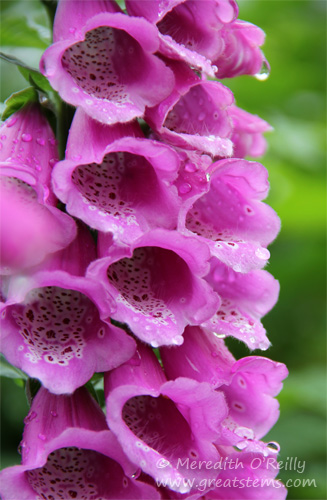
It was raining when we first arrived, but it didn’t affect how scenic the setting was. Foxgloves and other flowers added beautiful color, and many salmonberry shrubs offered plentiful fruit. The greenery surrounding us was enhanced by the dampness.

totemb07-03-13

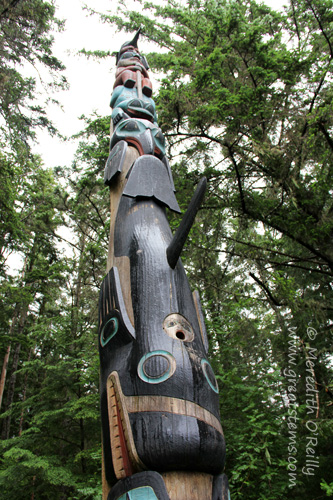
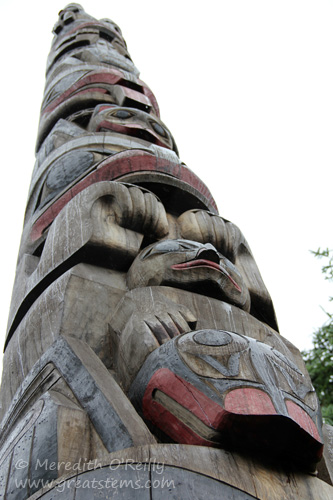
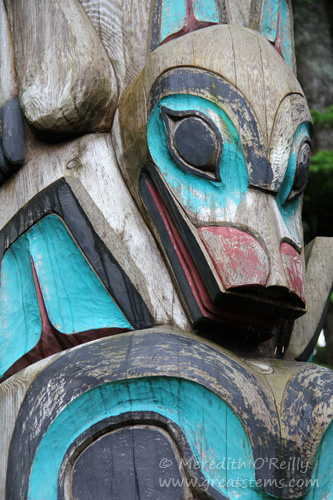
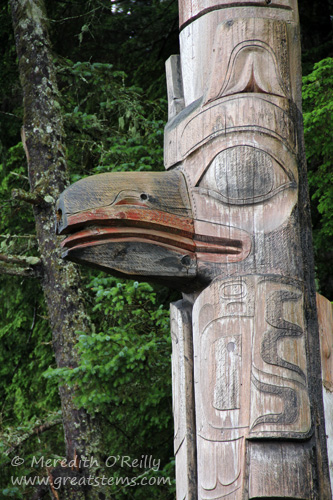
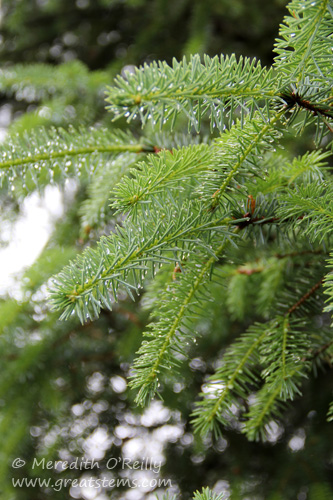
In Sitka, cedar totem poles record history or illustrate ancestry, folklore, or events of Southeast Alaskan native peoples. We found many of these along the Totem Walk at Sitka National Historical Park, a short distance from the center of town. Part of a coastal rainforest and filled with tall Sitka Spruce, the park also preserves the battlefield location of the 1804 Battle of Sitka, the last major armed battle between the Tlingit and Russians.

totema07-03-13

totemc07-03-13

totemd07-03-13

Though each totem pole is unique, the sculptures might use common symbols. One symbol found on many Tlingit totems is that of the Raven, an important spirit in Tlingit culture. The Raven is considered both a cultural benefactor and a trickster.

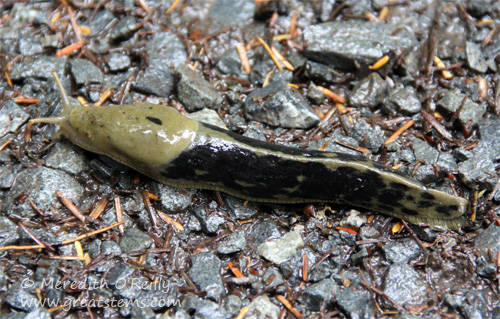
bananaslug07-03-13 Thanks to the morning rain, large banana slugs found easy passage across the paths. Their slow pace make them pleasant photo subjects. This one was about 6 inches long.

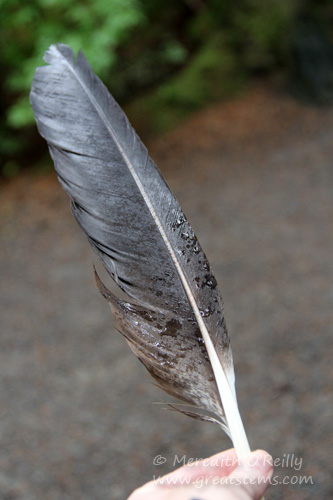
eaglefeather07-03-13

On our way back, I found this beautiful eagle feather on the path. I took a picture of it before taking it into the visitor center to give to a park ranger (it’s illegal to keep such feathers unless you have a permit or are culturally exempt — I didn’t want someone else to pick it up and get in big trouble for having it). Then I promptly washed my hands, which I would have done anyway, but the park ranger stressed that eagles carry all sorts of yucky stuff they can spread. I noted that she didn’t hurry to wash her hands after taking the feather to the back room, however. I preferred to stay salmonella- and mite-free.

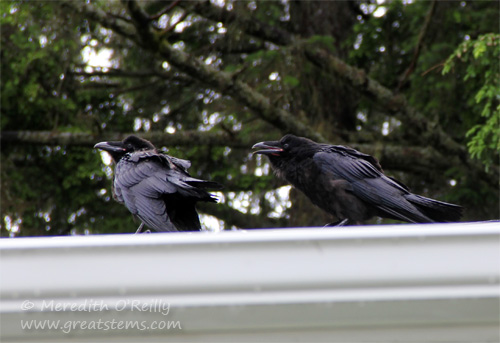
crows07-03-13

After seeing so many ravens depicted on totem poles at the park, I was amused that on our walk back into the main part of Sitka, several ravens greeted us with loud caws.sitkaa07-03-13sitkah07-03-13

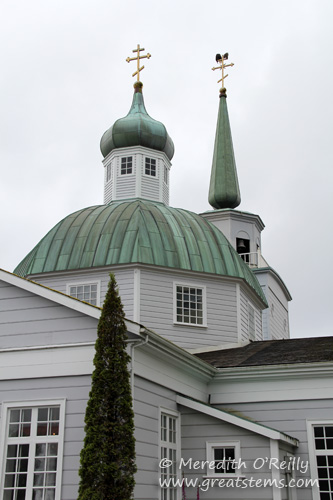
A landmark structure in Sitka is the Russian Orthodox Cathedral, rebuilt after a 1966 fire. See the two bald eagles hanging out on top?

sitkaf07-03-13

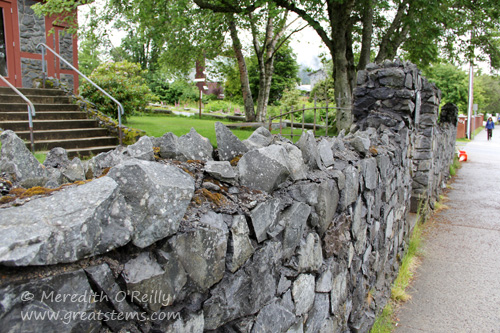
I greatly admired this gray stone wall surrounding another church. At a modest height, the jagged top offers a slight deterrence to those who might climb over, while giving a unique quality to the perimeter.

sign07-03-13

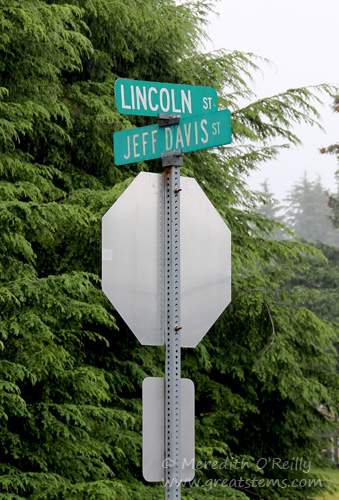
We were amused at this intersection’s sign, bringing together the names of two of historic rivals. However, it’s likely that the Jeff Davis they are referring to is not the Confederate president but the first commander of the Department of Alaska, since he played a role in Sitka’s history. I don’t know whether Lincoln refers to the great Abe himself, but I’ll go with that.

domino07-03-13 Taking a boat in Sitka Sound, we enjoyed plentiful wildlife, and by this time the rain had ceased completely. Above is a friendly, well-known humpback whale named Domino.
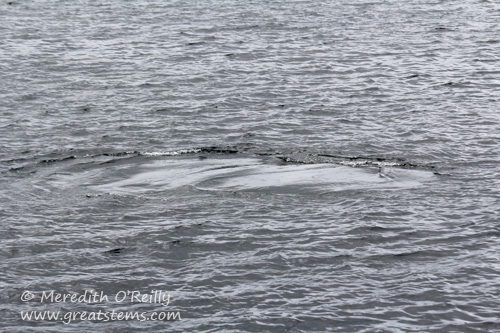
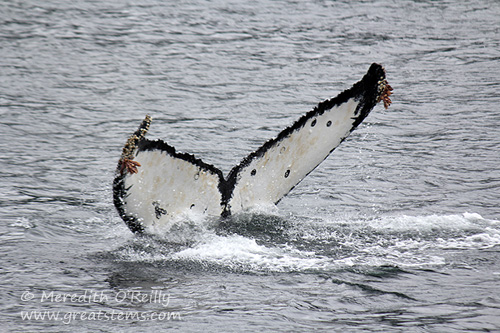
dominoc07-03-13 Here’s what is known as a whale footprint, a slick spot that forms as a whale thrusts its fluke up and down underwater.dominod07-03-13 Not only does Domino have distinct black spots on his fluke, the growth of barnacles at the tips is an additional identification mark for this handsome whale.dominoswim07-03-13
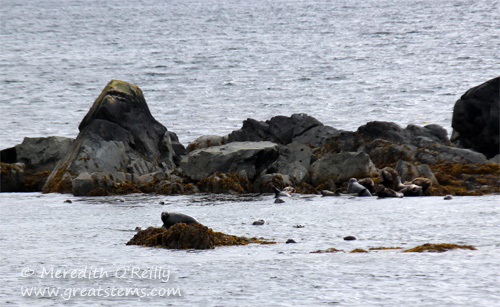
seals07-02-13Near these tiny islands, mere rock outcrops, a large group of harbor seals basked, played, and fed.
sitkaj'07-03-13

There were a great number of bald eagles, almost every direction we turned.eagle07-03-13

scoters07-03-13

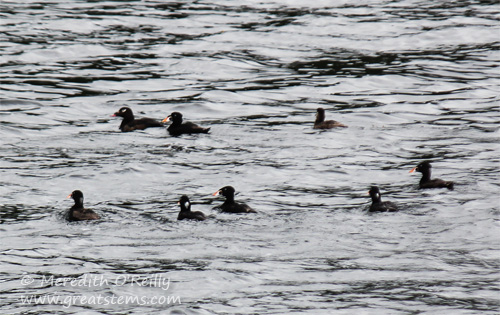
This group of scoters included White-winged and Surf Scoters. We also saw lots of Marbled Murrelets and, of course, gulls.

sitkab07-03-13

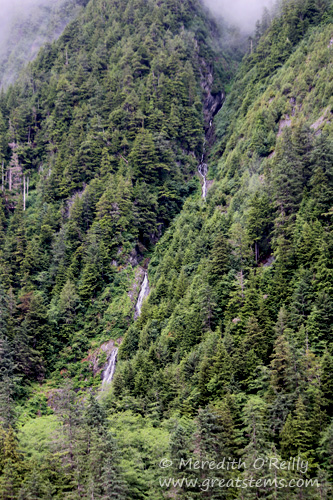
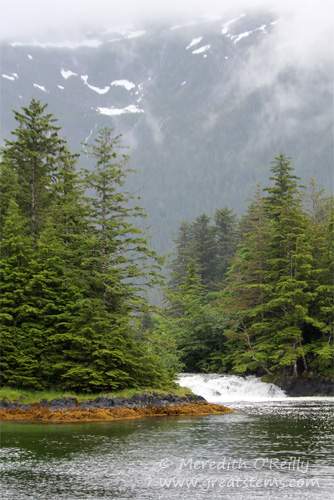
The surrounding forested mountains were quite beautiful, with waterfalls cascading here and there.

sitkac07-03-13

Near this river’s mouth, salmon were practicing their jumps, almost ready to spawn.sitkae07-03-13sitkad07-03-13

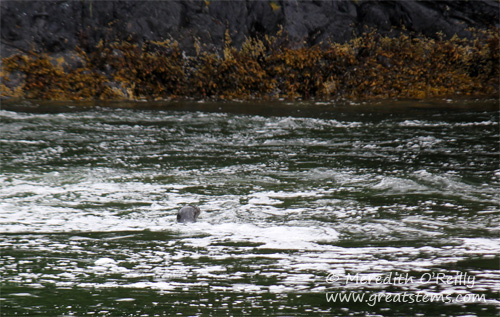
A hungry harbor seal was clever enough to take advantage of the presence of so many fish.

sitkadeer07-03-13

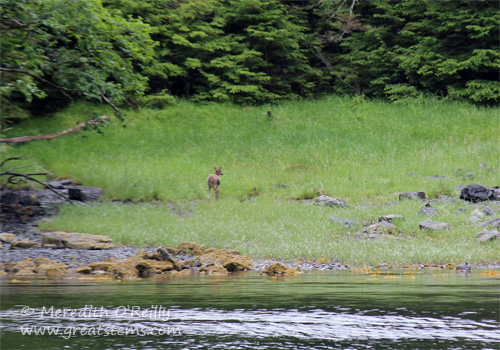
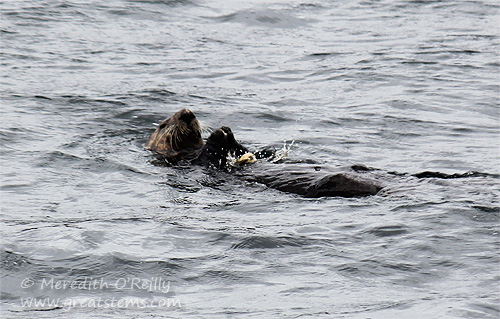
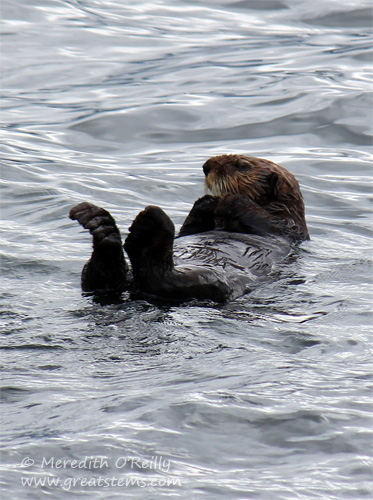
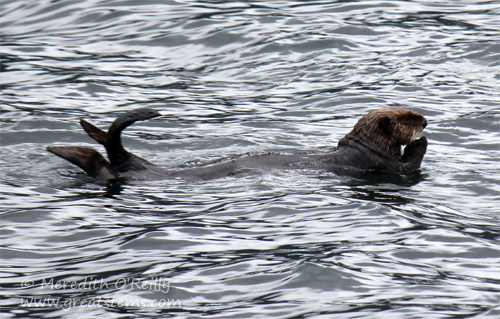
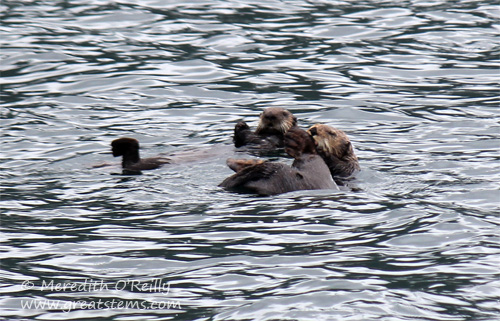
A lone Sitka Black-tailed deer fed on a nearby shore.seaotter07-02-13I can probably safely say, however, that despite the large variety of wildlife we saw in Sitka, our family enjoyed the sea otters most of all (though for some reason that harbor seal going after the jumping salmon still stays on my mind).seaotterb07-02-13 seaotterc07-02-13 They’d roll and preen and dive and eat, and they’d preen some more. seaottersd07-03-13I’m so happy their numbers have been going up — they were hunted almost to extinction by fur traders. Sea otters are still listed as endangered, however. Sea otters are a keynote species, keeping the population of sea urchins and other kelp-eaters under control and thus protecting the habitat that provides shelter and food for so many other marine animals.

The next stop on our journey was Ketchikan for some kayaking, followed by Victoria for some orca sightings. I’ll combine the two — far fewer pictures to share, as it’s hard to take a lot of pictures while kayaking!

Alaska: Glacier Bay and Calving

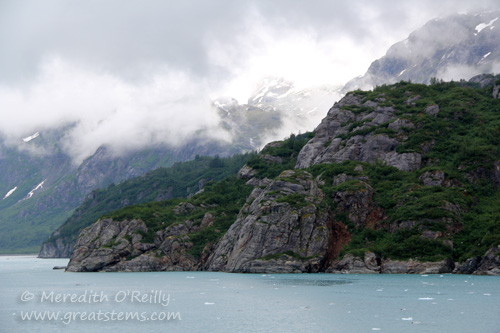
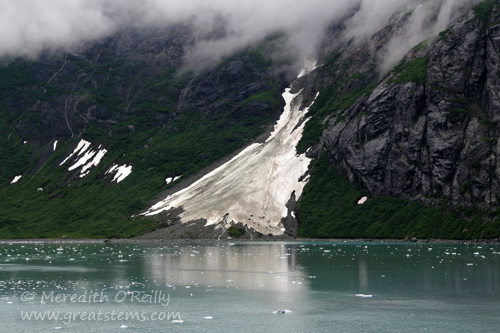
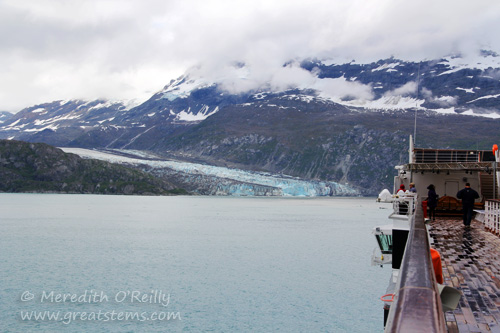
After Juneau, our ship took us to Glacier Bay, an area that just 250 years ago was all glacier and no bay. glacierbay07-02-13

The massive river of ice reached its maximum extent by 1750, gouging the land as it moved along, and within 45 years it had melted back 5 miles, creating Glacier Bay. The glacier continued to retreat north, and what remain (now 65 miles into the bay) are several smaller tidewater glaciers flowing from mountain to sea.

glacierbayc07-02-13

The bay itself is filled with cold, nutrient-rich water and abundant marine life. Surrounding it are young forests, able to grow with the departure of massive ice, though of course pockets remain even throughout summer.

margerieMOb07-02-13

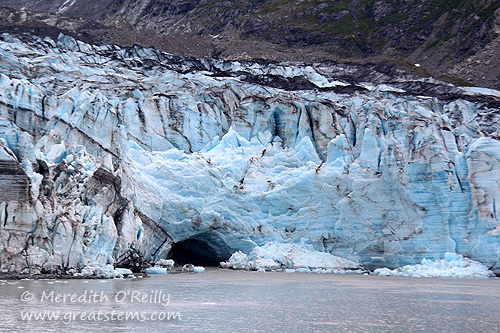
The bay’s tidewater glaciers are accessible only by plane or boat. Perhaps the most impressive is Margerie Glacier, seen in this panoramic image from my husband (click to enlarge). This glacier is about 1-mile wide, 21-miles long, and at its face 250 feet above the water (another 100 feet of the glacier extends down into the water). The glacier flows into the Tarr Inlet of the West Arm of the bay.

margeried07-02-13

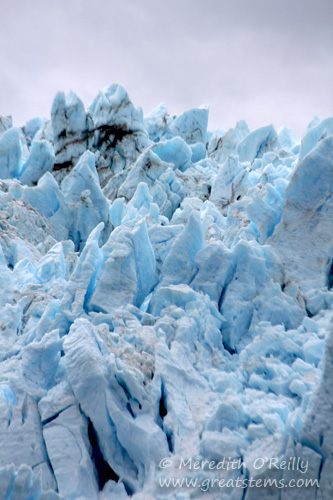
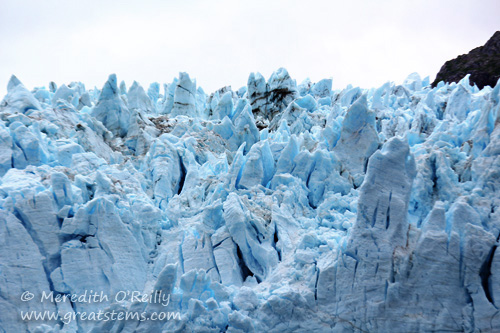
In areas of pure compressed snow and ice, the result was a breathtaking blue color that I couldn’t get enough of.margeriec07-02-13

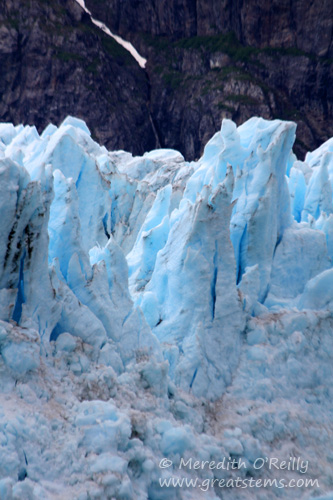
I also loved the jagged ice peaks, an effective contrast to the soothing colors.

margeriee07-02-13

Such jaggedness is not something one usually pictures when glaciers are typically described as slow moving rivers of ice. But there they are, formed as the ice fractures time and again.margerief07-02-13

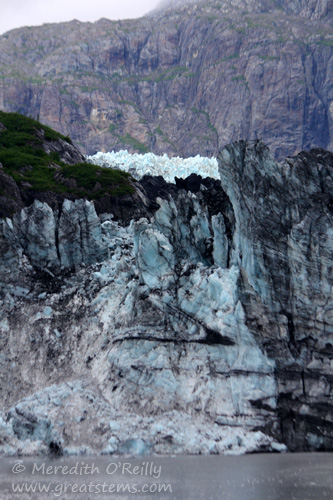
As much as I loved the blue, even the patterns of debris-rich ice were beautiful.

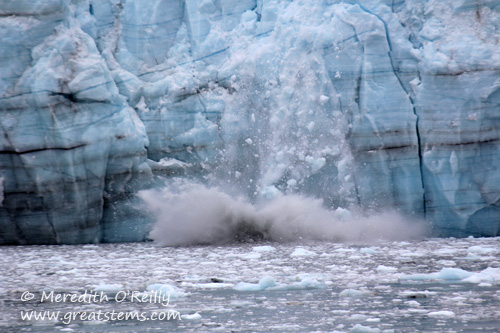
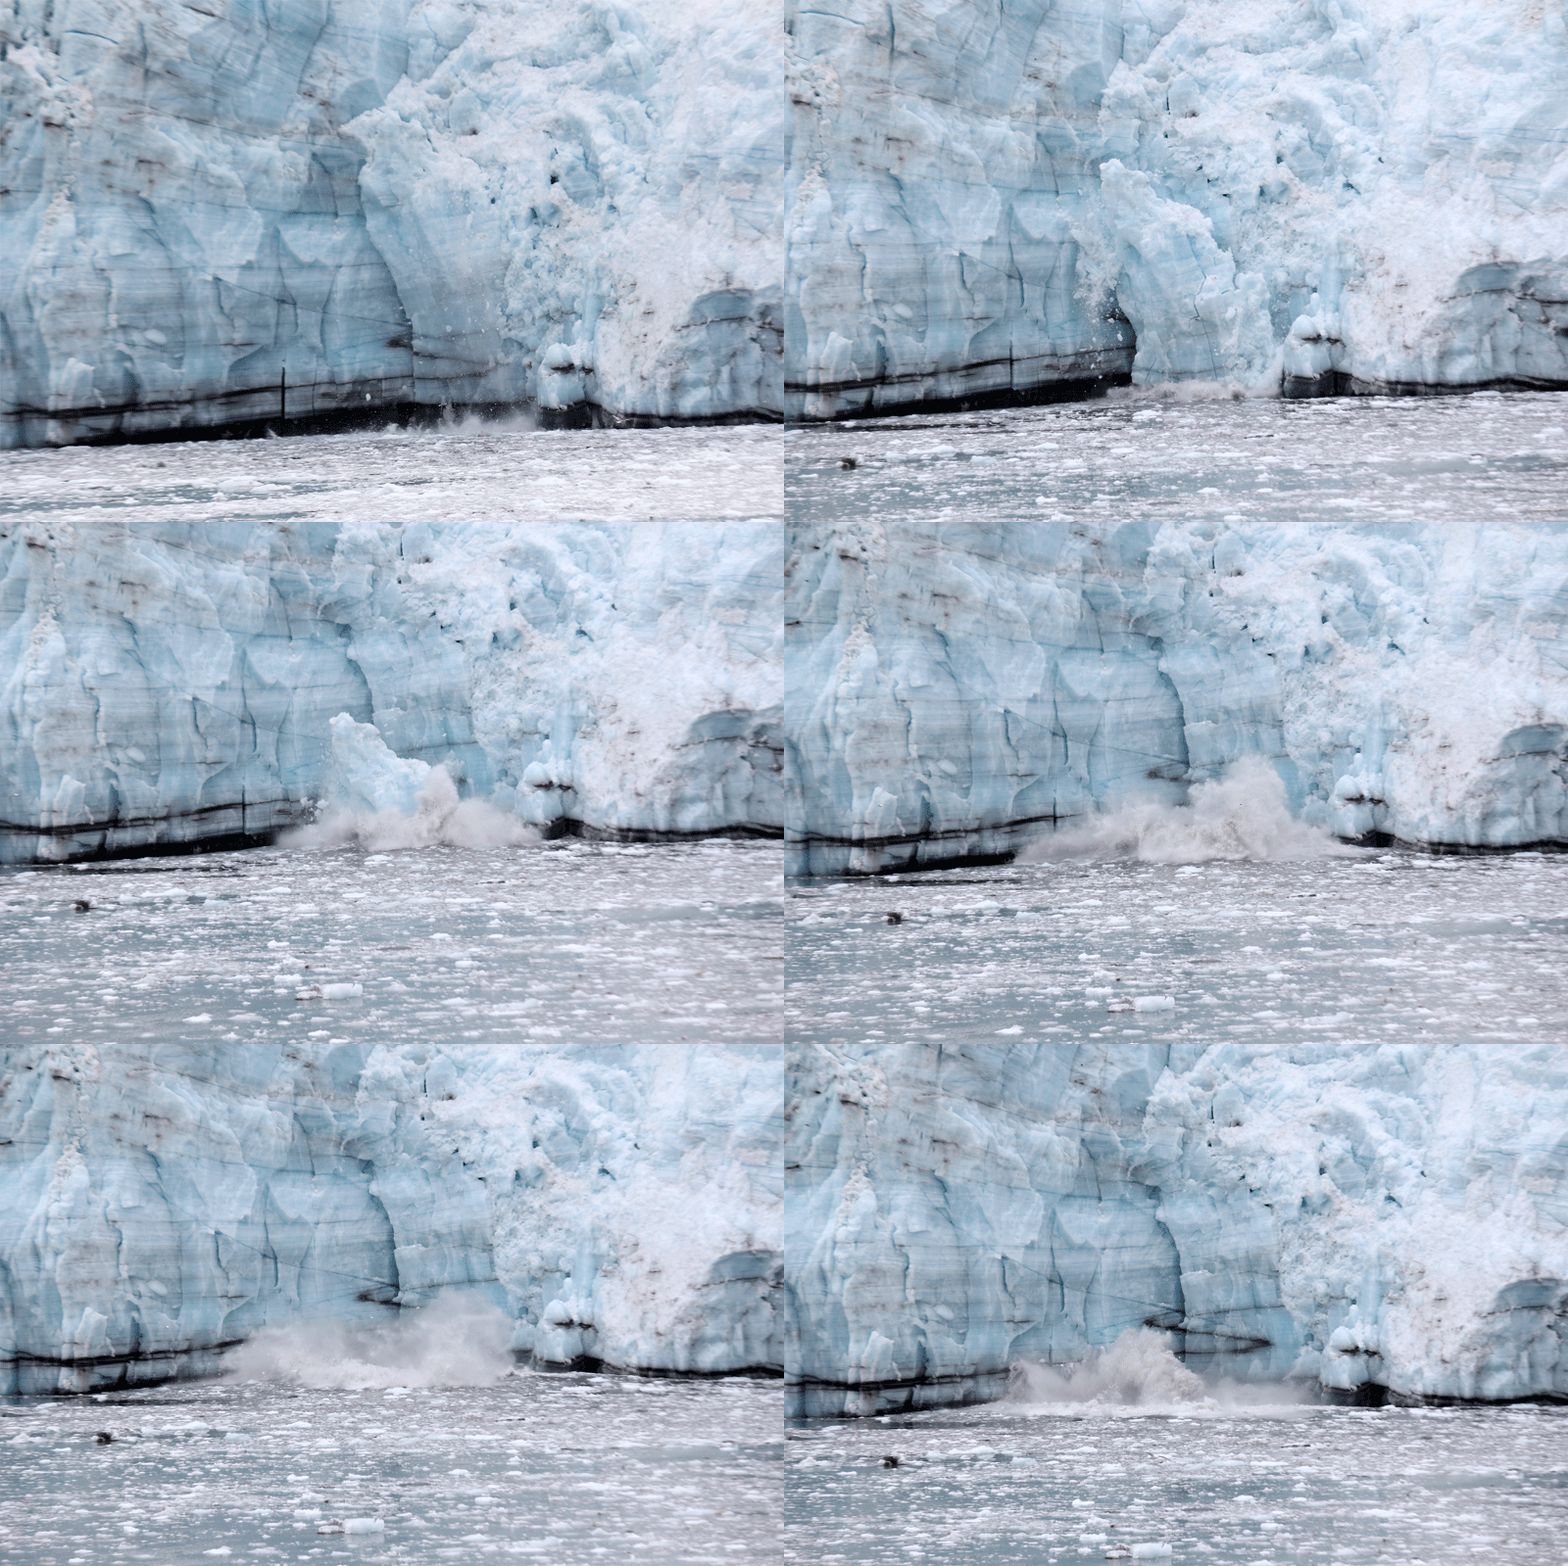
margeriecalvingb07-02-13Calving is the sudden breaking away of ice from a glacier, forming icebergs and the like. Margerie Glacier calves actively all year long. Sometimes, falling ice might simply be small chunks, and by that I mean ones the size of Volkswagon Beetles or school buses.

margeriecalving07-02-13

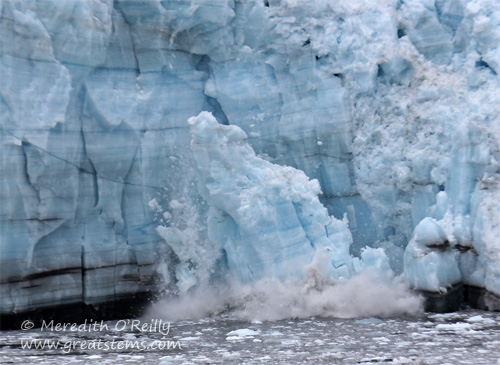
This larger chunk, on the other hand, was about 80 feet tall, the size of an 8-story building. Large ice sections produced massive splash and impressive waves.

Here’s the full sequence of shots as the chunk fell away.glaciercalving3

I wish I could have added in sound effects. Cracking sounds, teasers of potential calving, are like rifle shots — loud and crisp. But an actual fall of ice is a thunderous roar combined with loud splashing and waves.

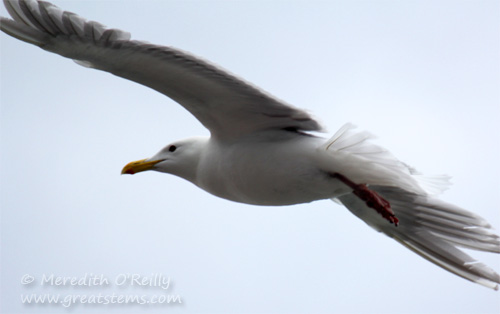
glaucousb07-02-13

Where the glacier dropped ice with a big splash and also where the propellers from our ship churned up water, sea gulls, like this Glaucous-winged Gull, flocked to take advantage of the disturbed fish and other marine life coming closer to the surface. Note the gray wing tips and orange feet as it flies.

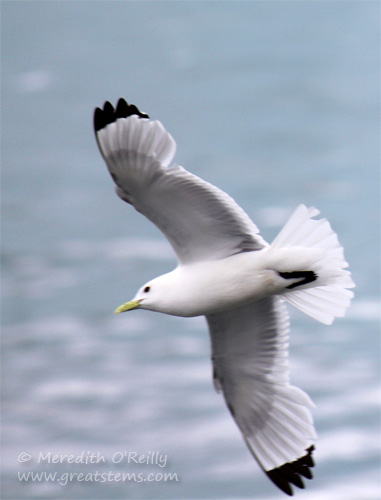
kittiwake07-02-13

The Black-legged Kittiwake, on the other hand, has black wingtips and, of course, black legs. Many Kittiwakes joined their gray-tipped gull cousins as they foraged the cold waters for food.

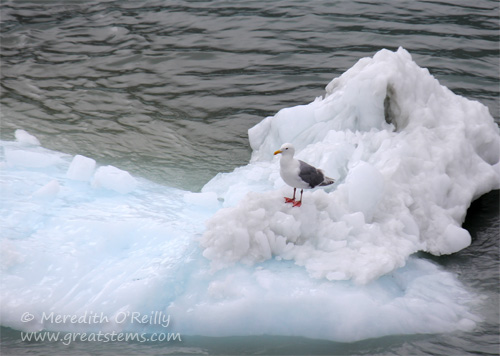
glaucous07-02-13

In down time, the gulls rested on the floating ice chunks and preened their feathers. They are able to do this without frostbite to their feet, thanks to a remarkable circulatory arrangement, called a countercurrent heat exchange system, which minimizes temperature differences between the feet and the ice. The arteries and veins in the birds’ legs and feet are very near each other. This means that arterial blood from the body’s core is already cooled by the time it reaches the feet, while cooler veins are warmed by the arterial blood before it returns into the body. Pretty cool, eh — literally and figuratively.

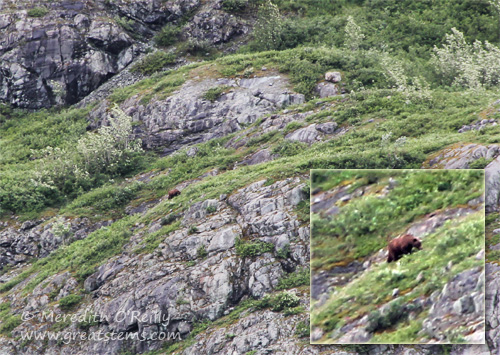
grizzlyb07-02-13As we headed to other glaciers, we spotted this Grizzly Bear walking up a hill. From the ship, it was a mere dot and almost impossible to see without a zoom lens or binoculars.

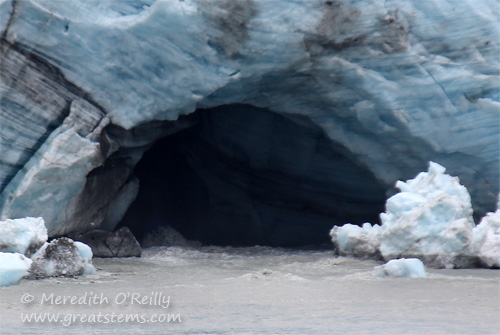
glacier07-02-13Lamplugh Glacier, 8-miles long and about 3/4-mile wide, is another glacier in the West Arm of the bay.
lamplughcave07-02-13

It had a large glacial cave, fascinating and beautiful in its own right.lamplughcaveb07-02-13

Inside the cave, melting ice flowing through cracks in the glacier created a fast-flowing stream.

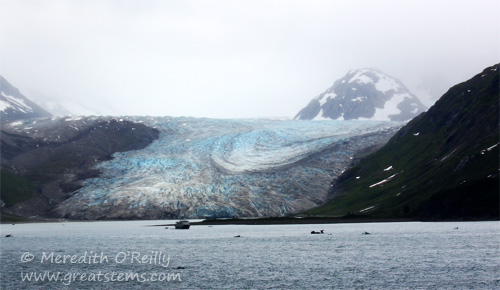
reidglacier07-02-13

Another beauty was Reid Glacier, also found on the western arm of the bay.

I’m very grateful for the chance to see these amazing glaciers, as 95 percent of the 100,000 glaciers found in Alaska are actively thinning or retreating at unprecedented rates due to climate change. I wonder whether Alaska’s glaciers will even exist a few decades from now.

The remainder of the day and evening we traveled toward Sitka, our next port stop.

Alaska: Juneau Whale-Watching and Glacier Visit

Two and half weeks of vacation. Zero caffeine. Success.

The family and I just got back from a two-part summer vacation. During the first week, we enjoyed a pleasant Alaskan cruise with my husband’s family. The boys and I then extended our fun by traveling and camping along the Pacific Coast from Washington to Oregon to California, then back again.

juneau07-01-13

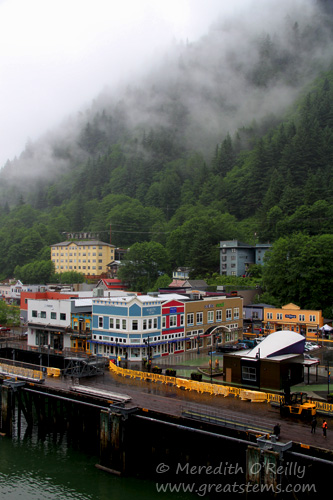
Our journey began in Seattle, but I’ll focus on that in a later post. Our first Alaskan destination was Juneau. Though the captain promised sunshine and warm weather, we arrived to find rain, fog, heavy clouds, and cool temperatures.

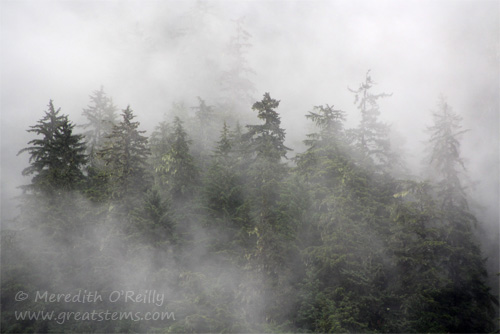
juneaufog07-01-13In fact, fog became the norm for our vacation, so much so that it became downright amusing. But that’s to be expected of the Pacific Coast in July.

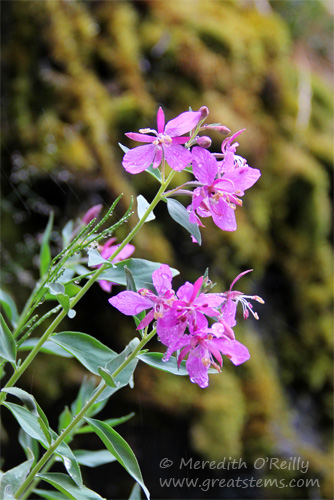
smallconesK07-01-13fireweedAK07-01-13

Fireweed

At least I can say that the worst of the rain for the whole vacation happened on this day in Juneau for us. And by that, I mean it poured substantially the whole day. My hiking boots took 3 days to dry out.

mendenhall07-01-13

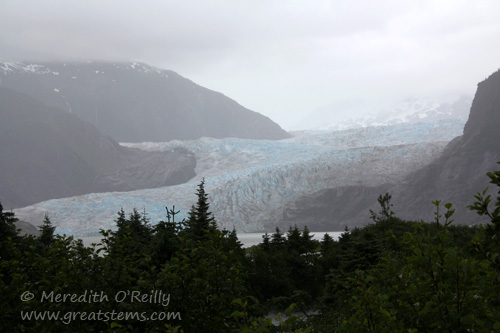
Because our helicopter flight was cancelled due to the poor weather, we instead visited Mendenhall Glacier and went whale watching in Auke Bay. Whales and glaciers don’t mind the rain!

mendenhallb07-01-13

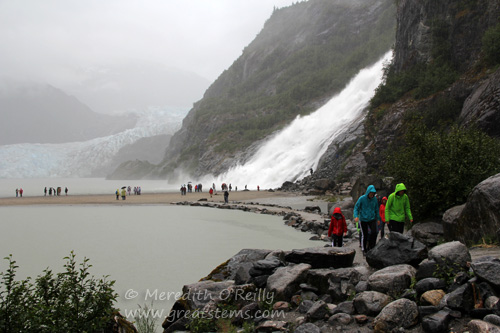
Mendenhall is a 12-mile long glacier that extends from the Juneau Icefield. Nearby are the powerful Nugget Falls. My son and I got fully soaked right down to our toes during our hike to the falls, but it was worth it.

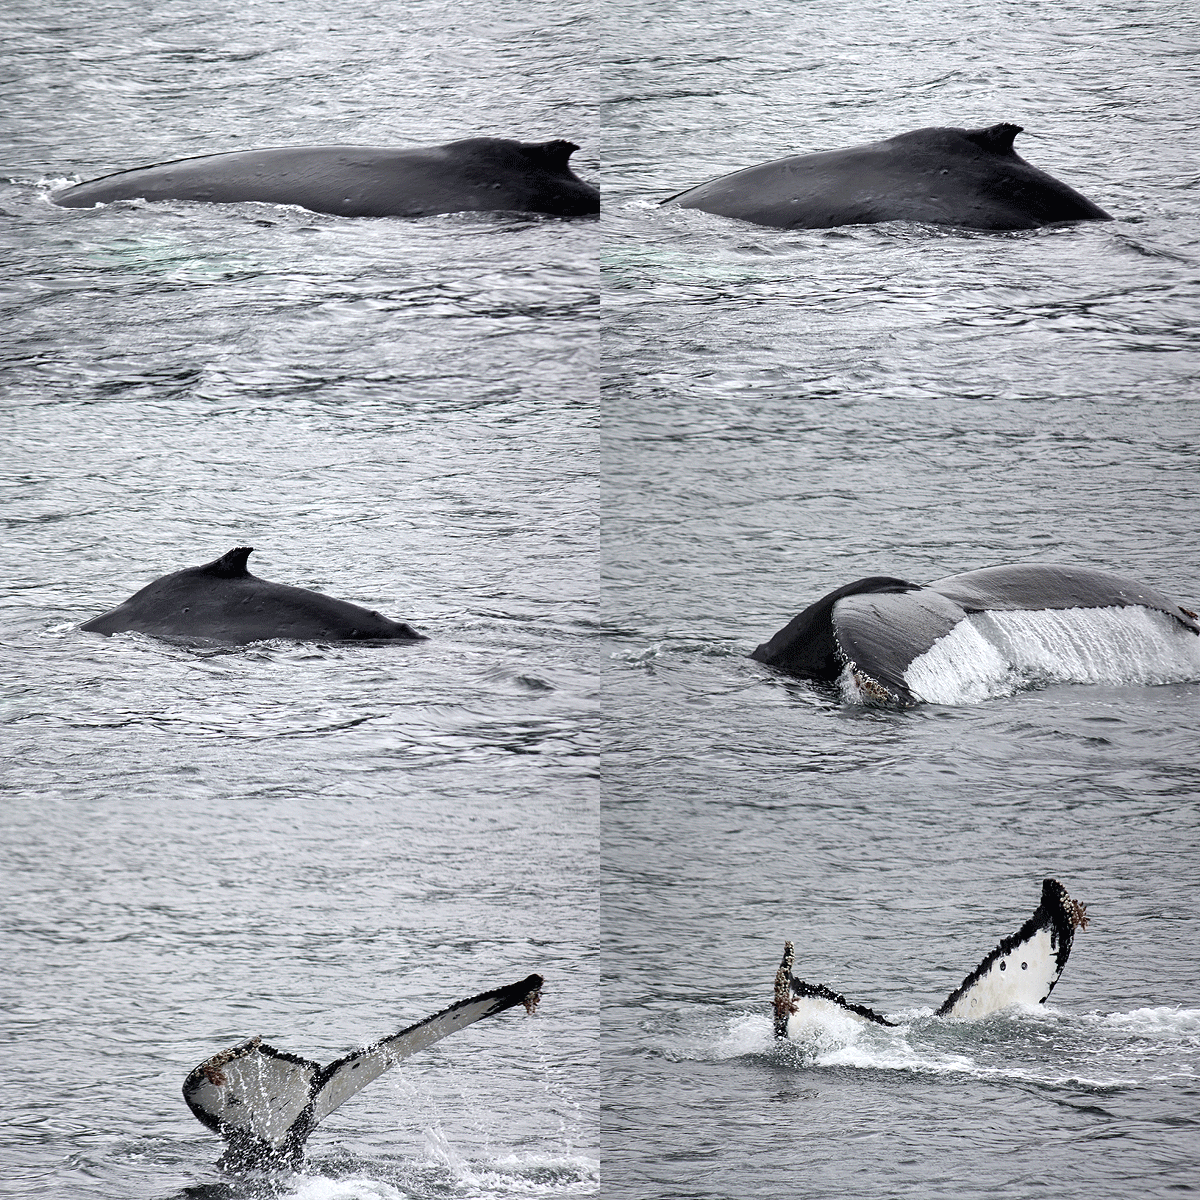
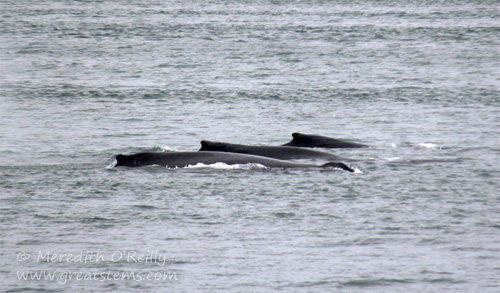
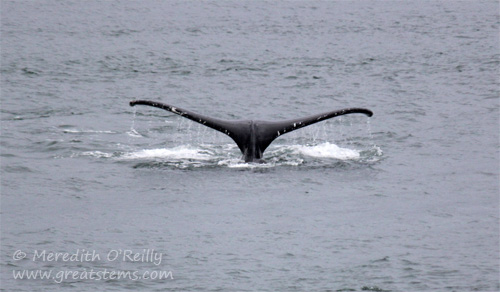
humpbacks07-01-13The real cold and wet fun came when we went whale watching in Auke Bay. Several humpback whales were in sight. These three stayed close together, feeding and taking breaths in near sync.humpbackfluke07-01-13

A visible fluke indicates that a whale is diving deeper into the water and likely will stay down for a few minutes.

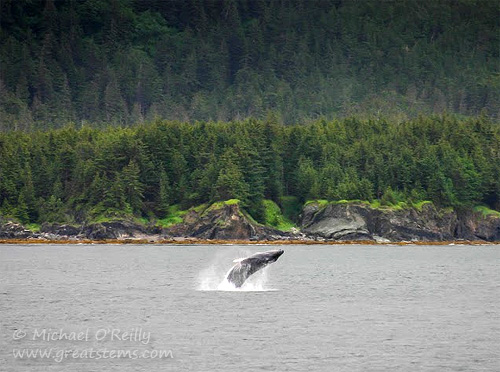
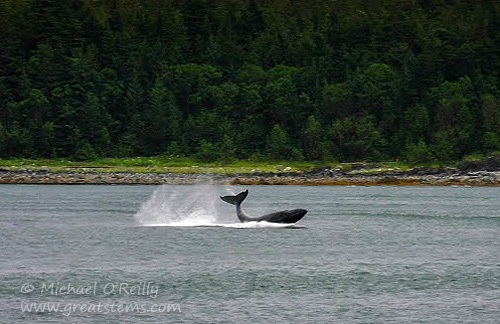
humpbackbreechMOb07-01-13Across the bay, a solitary humpback breached several times. Oh how we wished our boat had been closer!humpbackbreechMOa07-01-13Even across the bay, the sight was thrilling.stellarsealions07-01-13

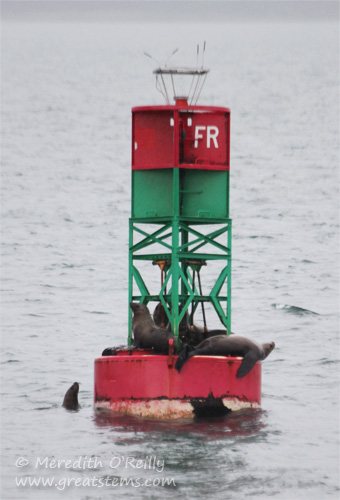
On the way back, our boat passed a channel marker that serves as a popular resting spot for bossy Stellar Sea Lion juveniles. The sea lion in the water kept trying to get on the platform, but those already on top kept pushing him back off.

Though our plans for the day had to be modified because of the weather, we still had a great time. Next up, glacier calving!

Wildlife Project: Bee Boxes

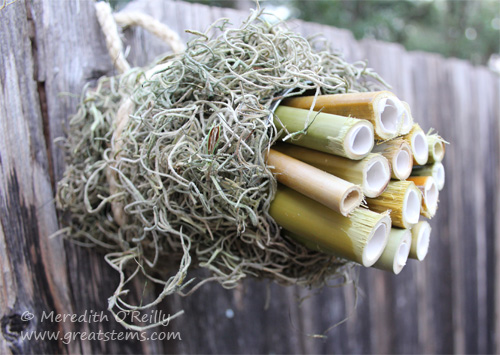
Many of our flowering plants and crops depend on pollinators, especially native bees, in order to produce fruit and seed. An excellent project for helping native bees is to create places for them to nest. In the case of solitary mason bees, this might be a bee box made of wood, cardboard tubes, or even bamboo. For digging bees, a patch of open dirt is all it takes. As is often the case, these projects can be done with simple methods, but if you have access to power tools, you can take them to another level.beeboxe2013

One idea is to place either cardboard nesting tubes (available for purchase online) or bamboo tubes inside a can. beeboxa2013

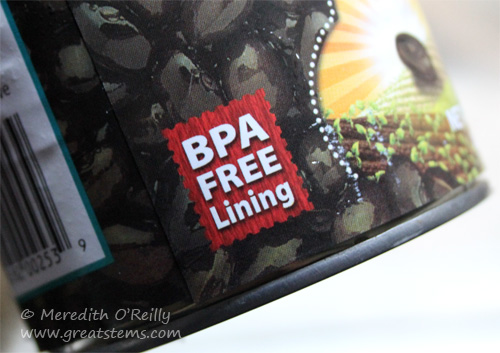
I recommend that you use cans with BPA-free lining if possible (Eden Organic, for example).

beeboxb2013

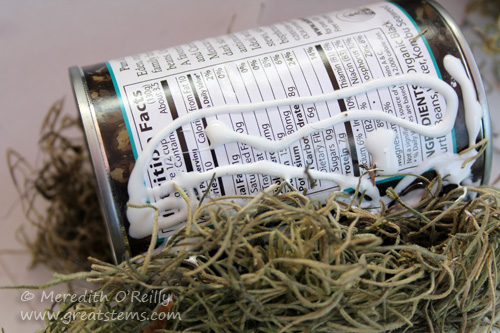
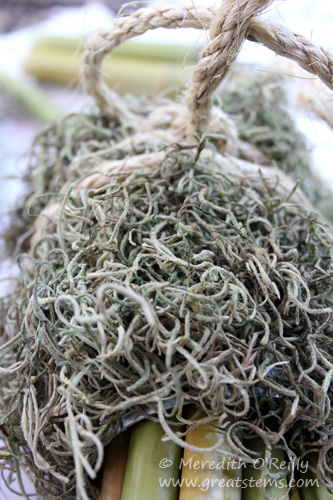
If you like, decorate the outside of the can. Spanish moss is one possibility. Be sure to use outdoor-appropriate non-toxic glue.

beeboxc2013

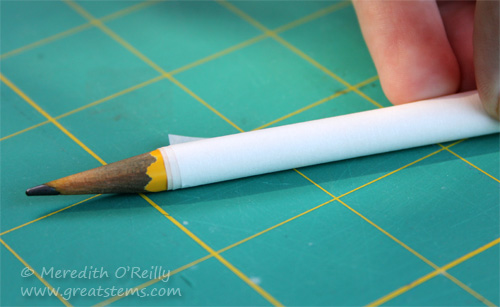
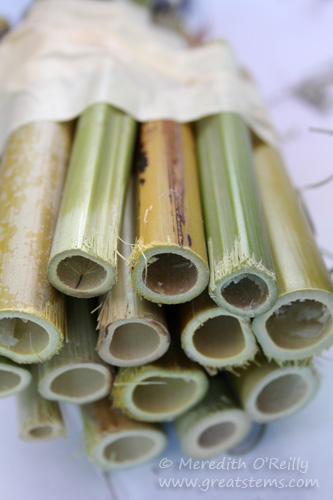
If using bamboo, cut it to lengths of about 6 inches. If possible, select tube portions that are approximately 5/16″ in diameter, or a little larger if you’d like to add a paper liner. This is mainly to provide tubes that are an ideal size for mason bees. A paper liner (see first picture above) can be made with parchment paper cut to about 3″ x 6″ and rolled tightly with a pencil — insert into the tube and draw the pencil carefully back out to let the liner expand to fit the tube.

In order to keep the tubes snugly together, I wrapped around them with masking tape. You can drizzle a little non-toxic glue between them if you like. I also used tape to create a sticky base inside the can. This keeps the tubes in place while letting them be easily removed and replaced as needed later.

beeboxd2013

If you’d like to hang up your bee can, tie twine or rope around it. Or simply place it in a sunny spot in your garden where it won’t roll or be disturbed by pets or other animals.

beeboxf2013

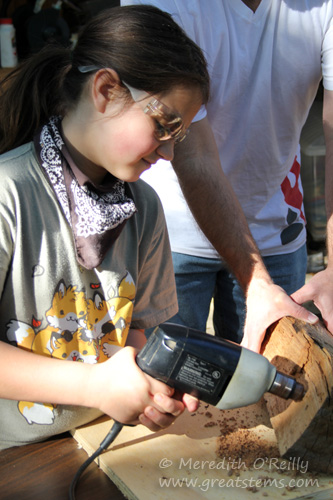
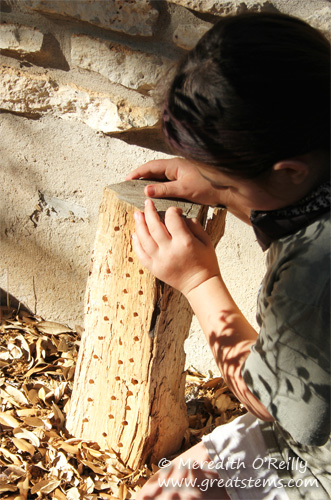
Another popular bee box project is to use a power drill to create holes in natural wood. Ideally, these holes would be about 6″ deep, but aim for at least 4″ if possible. The diameter should be 5/16″ — or use 3/8″ with paper liners as described above. The paper liners keep the wood from absorbing too much moisture, and because they are replaceable, they also help keep the holes clean long-term.

beeboxg2013

When you’ve drilled all the necessary holes, place the bee box in a warm, sunny spot. I’ve also found that particularly here in Texas some partial shade is helpful to keep the Death Star from baking the bees.

MEOinsecthotel06-04-13withtextOf course, to really go all out, your bee boxes can become part of an entire insect hotel!

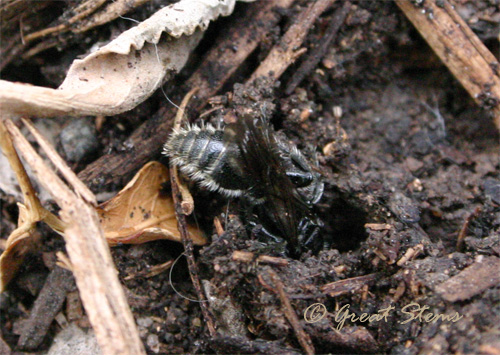
miningbee6-11Be sure to include patches of open dirt elsewhere in your garden to let mining bees, or digger bees, lay their nests, too! Perhaps create a sign for your special “Bee Patch.”

Of course, it’s also important to provide in your garden native plants and shallow water sources for your bees and other pollinators. Keep your garden and yard pesticide-free, and encourage your neighbors to garden organically as well. Thanks for helping our hardworking pollinators!

To see other nature/wildlife projects for kids, click here.


Up Close and Native, Round 2

It’s that time again — let’s play another Guess That Native! game (for Round 1, click here). How closely do you know your southern native plants? Remember, all of these plants are native to Texas, at the very least, simply because that’s where I garden. Even if you aren’t from Texas or the South, I hope you’ll play the game — I bet you’ll know some of these plants or perhaps plants from the same family! Here we go!

A.
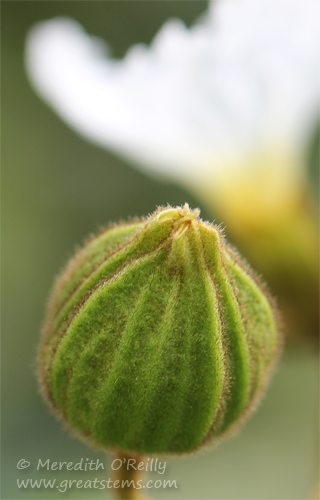
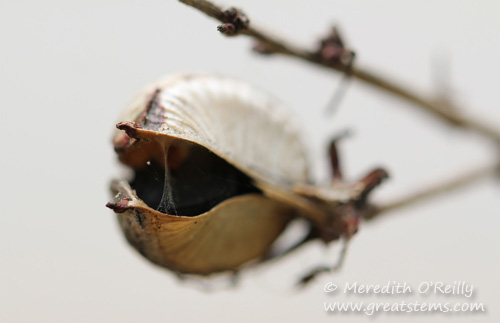
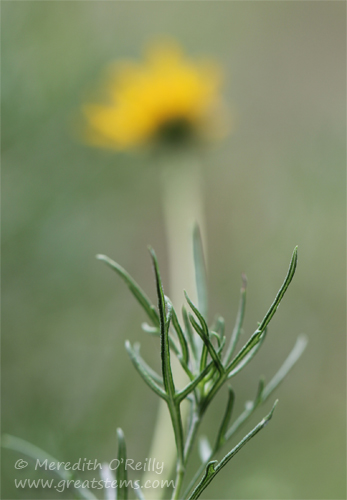
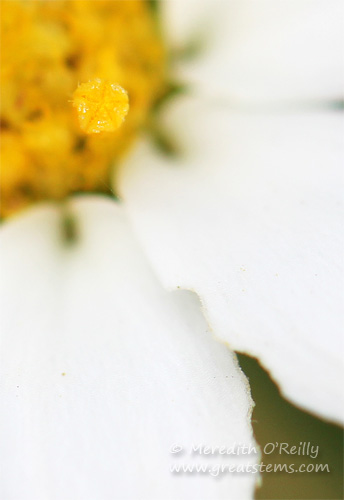
buffalograss05-01-13 B. crossvine03-23-13 C.spanishred06-26-13D.evergreensumac03-23-13 E.mexolive06-26-13 F.redyucca03-23-13 G.skelleafgoldeneye06-26-13 H.blackfoot06-26-13

Ready to check the answers? Let me know how you did!

Walker the Teaching Snake

When my boys asked to have snakes as pets, I was hesitant only because we already have quite the zoo here at home. But I wanted to say yes, because I’ve loved snakes since my own youth. My condition for agreeing was that I wanted snakes that I could use as teaching aides, because I want to encourage people to appreciate snakes for their beauty, uniqueness, and importance to the ecosystem. Most snakes are non-venomous, but a lot of people just fear them all, leading to the harm of many innocent snakes (and remember, even venomous ones are beneficial). We need nature’s predators, else the balance of critters in the world take a turn for the worse — such as an overpopulation of rats.

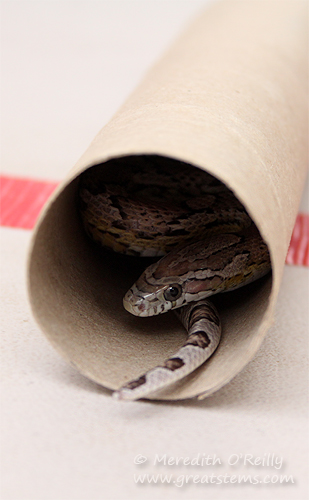
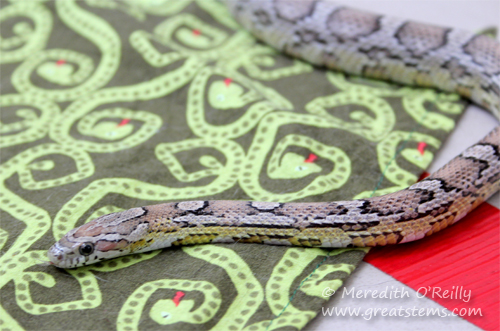
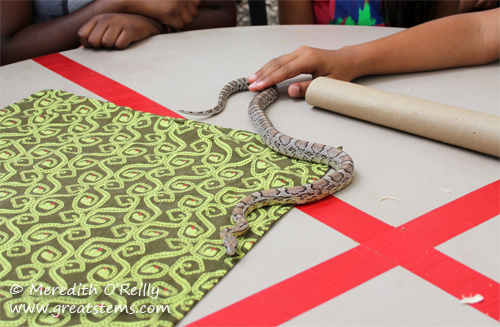
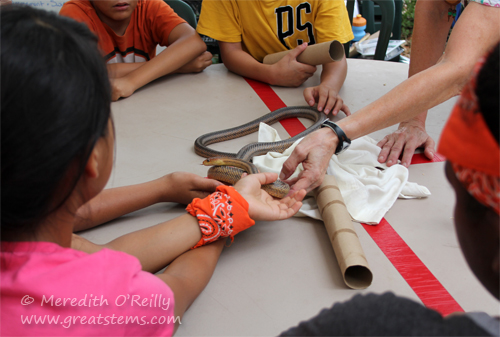
walkerA06-17-13We have two snakes, but I only brought Walker for this teaching outing at El Ranchito, a nature-immersion summer camp for youth of low-income families (Walker joined Paco, whom you’ll meet below). Walker is a rat snake/corn snake hybrid, complete with a checkered underbelly. He’s about 1 1/2 years old now, and almost a yard long. walkerC06-17-13He’s quite comfortable with being touched, having been handled by our family and guests for so long, but he still a little guy and rightfully cautious when on a big white table under trees filled with birds.

walkerB06-17-13

I told the story of Walker’s spinal issues (he has a section of his body that doesn’t constrict very well), and the kids were very good about being extra gentle with him.

walkerD06-17-13

I was very proud of Walker, and he earned himself a nice big mouse dinner. Morse, our other family snake, didn’t go to the camp, but she appeared in some of our teaching pictures — she got a nice big mouse dinner, too.

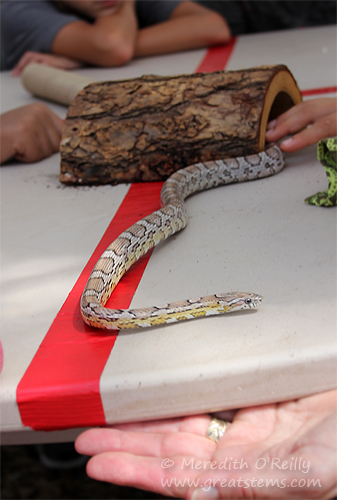
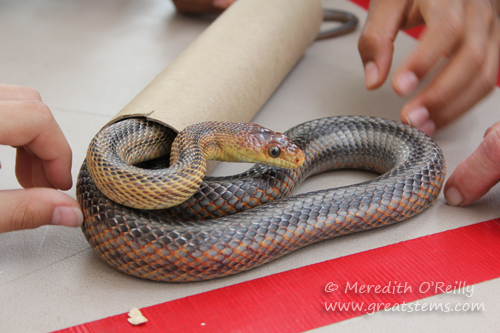
The real star of the day was Paco, a 10-year-old Baird’s Rat Snake who lives with fellow Master Naturalist Sue A. He’s been teaching with kids a long time and really puts on a show.

pacoD06-17-13pacoB06-17-13

pacoA06-17-13

Plus, at about 6 feet long and absolutely gorgeous, he knows how to impress. Baird’s Rat Snakes have a beautiful silver and salmon coloration.

pacoC06-17-13

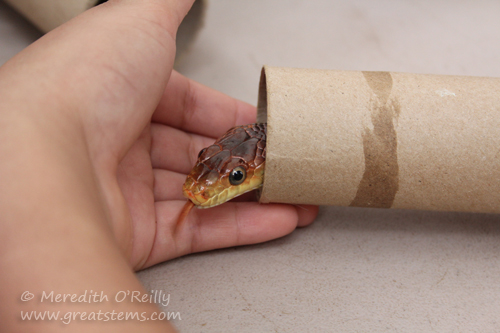
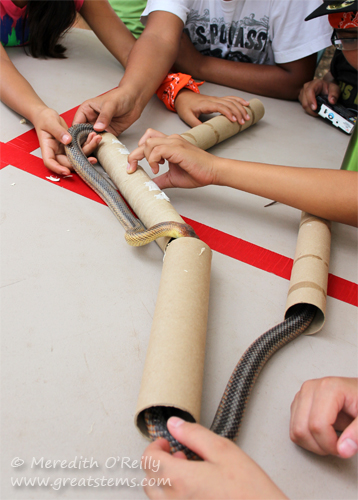
The kids lined up paper towel tubes for Paco to travel through — the effect was something akin to a pasta necklace. When not in the paper rolls, Paco traveled around people’s shoulders, and even made a couple of attempts to get to the top of the canopy above us — because above that were trees and lots of birds. Rat snakes are excellent climbers.

Let me tell you a story about our other snake, Morse, who is an anerythristic motley corn snake, also about 1 1/2 years old and well over a yard long. Looking back at older posts, I realized that we once thought she was female but somewhere along the way started calling her a he. Well, we should have paid better attention, because she is, in fact, a she, and we discovered this when — surprise — we found eggs in the habitat she and Walker shared. Alas, the eggs weren’t viable, but she and Walker have their own separate rooms now (Walker’s all the time looking for her, though). Snakes will be snakes, I suppose.

Wildlife Projects for Kids: Seed Paper

It’s been a busy couple of weeks for me. This week alone, I’ve been teaching about the wonders of snakes to kids at a summer camp (with friend and fellow master naturalist Sue), talking about backyard bird identification to a local gardening group, and then leading walks about Texas plant adaptations at the Wildflower Center’s first Nature Night of the year. Next week is more snake talk, and then Amphibians! The other exciting news is that this week on Central Texas Gardener, you can see me visiting with Tom Spencer about kid-friendly, nature-approved wildlife projects. If you have a chance, check it out!

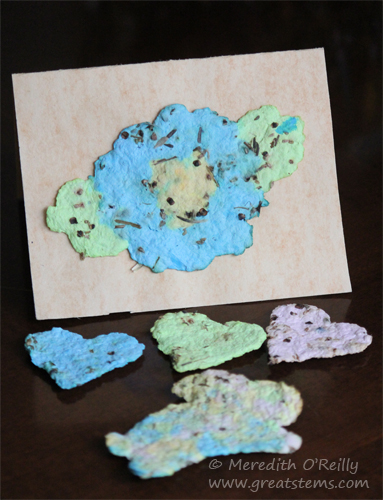
seedpaperstepsL05-12-13

One of my very favorite projects is seed paper, an easy way for kids of all ages to give the gift of nature to others. It also teaches kids about recycling, taking used paper and turning it into something else, such as birthday cards or holiday gifts — even ornaments. As the native seeds start to grow, then the gift extends to pollinators, birds, and other wildlife, and it spreads beauty, too!

What you need:

  • Used or scrap paper of assorted colors (don’t use glossy paper)
  • Water
  • Blender
  • Native seeds, such as wildflowers or perennials (think about what would naturally germinate in the upcoming growing season)
  • Cookie cooling rack or a sturdy grid
  • Window screen or other flat mesh, cut to about the size of a sheet of paper
  • Baking pan or basin to catch the water
  • Cookie cutters of assorted shapes
  • Light-colored felt pieces, cut larger than the largest cookie cutter
  • Absorbent sponge

seedpaperstepsA05-12-13

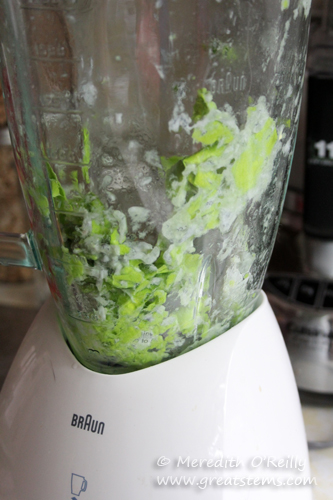
1. Start by tearing the paper into small bits, keeping each color separate. If you don’t have a lot of a particular color, you can add a few white scraps, but don’t go overboard with the white, as the resulting colors will, of course, be paler or even gray. For each color, add the paper bits to a blender and add a small amount of water. This amount will vary, but add just enough to moisten the mixture for blending without turning it to soup. Blend to a pulp.

seedpaperstepsG12-10-10

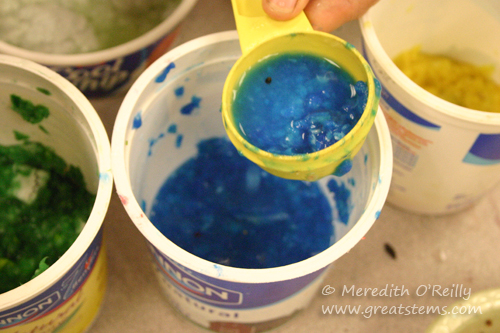
Yogurt cups or small bowls are great for keeping the pulp colors separate. Don’t add the seeds yet, however — we’ll add those as we make individual shapes.

seedpaperstepsK12-10-10

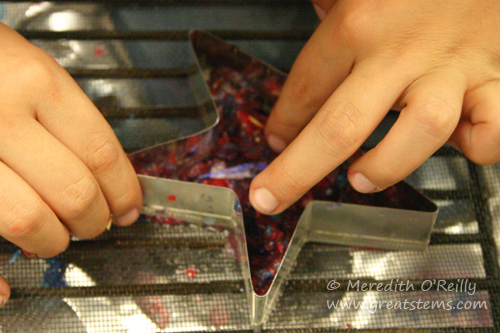
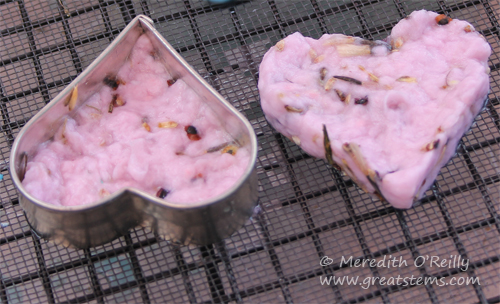
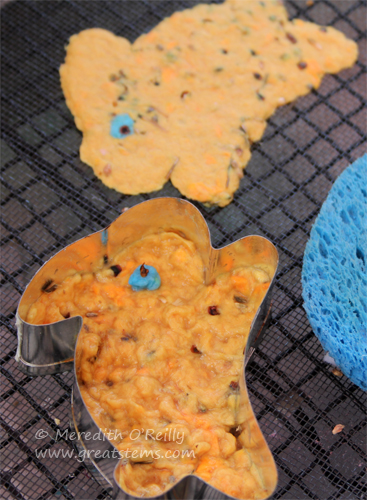
2. Set up the window screen pieces on top of the cookie cooling rack, and place the baking pan underneath (this will allow you to squeeze out excess water from your seed paper). After choosing your cookie cutter, take a small amount of paper pulp and sprinkle in some seeds, then mix it together briefly with your hands (sprinkling seeds on later is less effective — you need some paper fibers to surround the seeds and hold them in the paper). Press the moist pulp-seed mixture into the chosen cookie cutter, about 1/4″ thick.

seedpaperstepsBB05-12-13

Then gently press your fingers along the paper pulp edges as you remove the cookie cutter so that the pulp mixture doesn’t lift away from the screen or pull away with the cookie cutter.seedpaperstepsC05-12-13

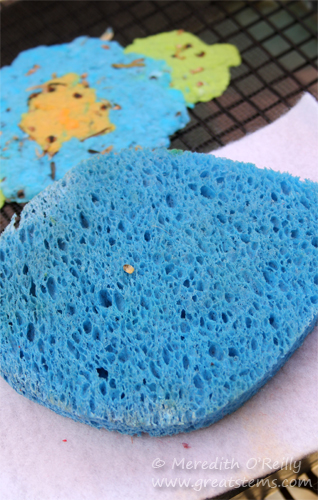
3. Lay a piece of felt on top of the pulp. On top of that place a sponge.

seedpaperstepsD05-12-13

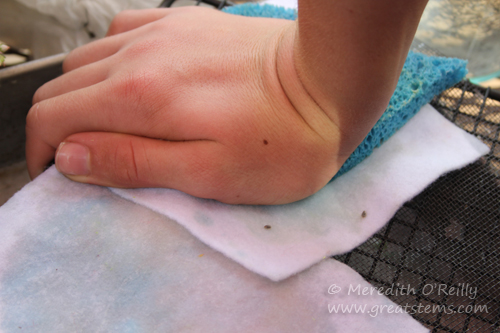
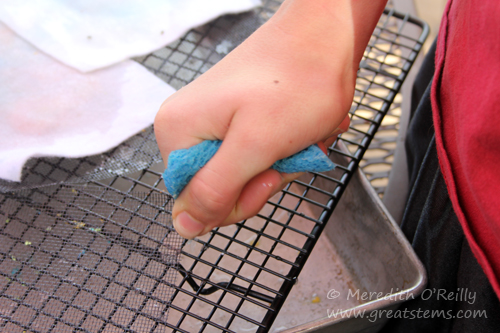
4. Next, carefully press your hand onto the sponge to squeeze out excess water. Re-position the sponge as necessary.seedpaperstepsE05-12-13

You might need to periodically squeeze out water from the sponge itself as it absorbs some of the water.

seedpaperstepsI05-12-13

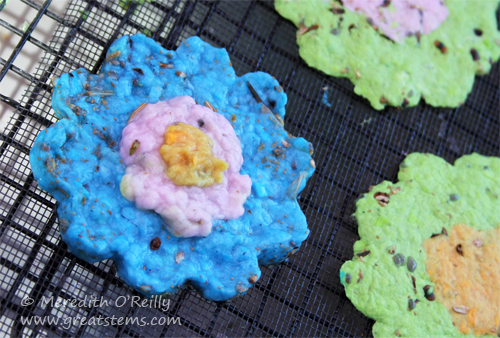
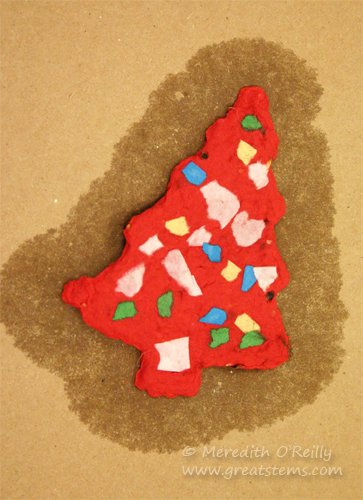
Be creative and combine colors however you like. Here you can see some flowers, one just before pressing out the water. You can even add bits of “intact” paper for decoration — scroll down to see the tree ornament for an example.

seedpaperstepsH05-12-13

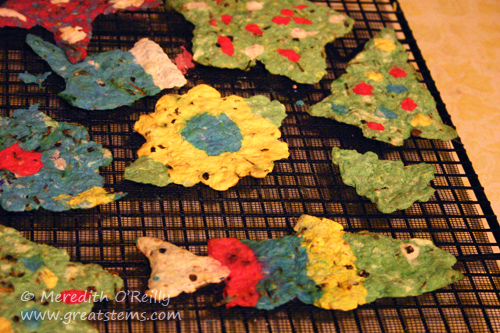
seedpaperstepsF12-10-10We’ve made bunnies, stars, airplanes, holiday shapes, and even a rainbow trout for a fisherman. Technically, you don’t even need the cookie cutter — if you want to make a lizard or a dragon or a bumblebee but don’t have a cutter for it, just create one by hand!

seedpaperstepsJ12-10-10

5. Be sure to let your creations dry well indoors– set out on paper plates or cardboard or on the window screen pieces and let them air dry for 2 or 3 days. Don’t dry them in the sun — this might encourage early germination of the seeds. Occasionally check for curling as the seed paper dries — if there is any curling, just flip the seed paper over while it is still slightly damp and gently press it down flat again. I like to flip the seed paper while it dries, anyway, whether it is curling or not.

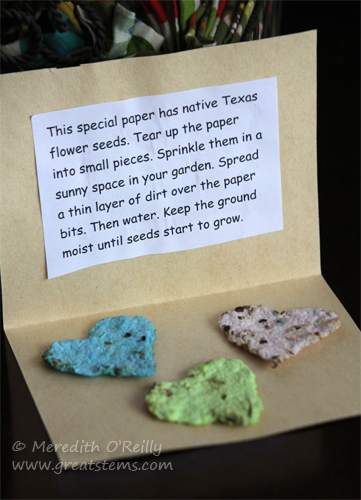
6. To create seed cards, simply use a dot or two of white school glue to attach the fully-dried seed paper to the card of your choosing (perhaps use construction paper or card stock). To create ornaments, use a hole punch or the tip of scissors to carefully puncture a hole in the seed paper for an ornament hanger.seedpaperstepsM05-12-13

7. Finally, include planting instructions with your seed gift. Of course, you will want to adapt your note to match the type of seeds you used with your seed paper. Don’t forget to mention the type of seeds in the paper if you can, as well as the recommended season for planting!

By the way, this project is easy to do with small or large groups of kids. It’s fun for an outdoor event, too. Enjoy!

To learn more about other wildlife/nature projects for kids, as well as ways to connect kids with nature, just click here!

Wildlife Project: Building an Insect Hotel

One of our spring projects was to give a gift to pollinators and a boost to the ecosystem by building an insect hotel. This type of project is becoming increasingly popular, and it was our turn to make one, by gosh.MEOinsecthotel06-04-13
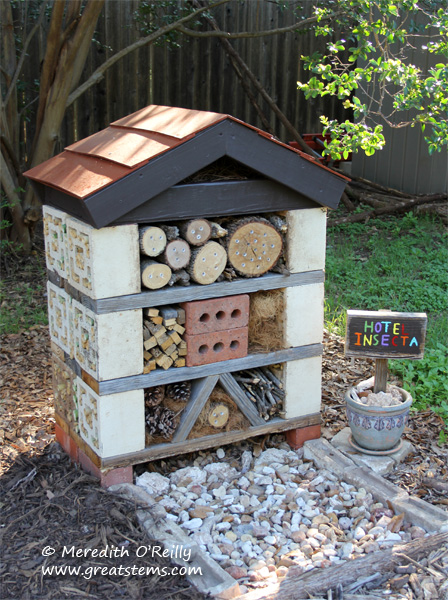
An insect hotel is a structure that offers native bees a place to build nests, a place for fireflies to lay their eggs, a place for lady beetles and butterflies and lacewings to seek shelter, and so on.
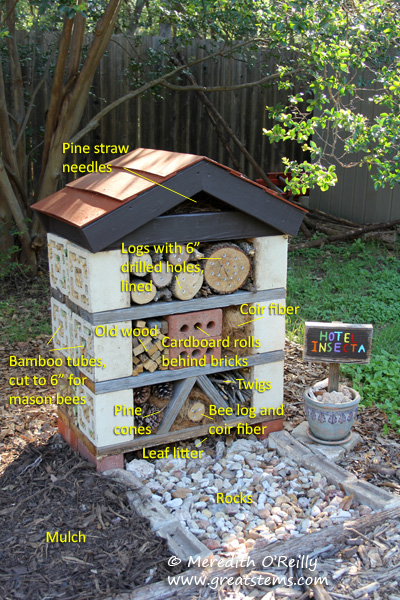
MEOinsecthotel06-04-13withtext

Part of the fun is building it with natural and re-used (untreated) materials, so making one can be super cheap. Ours cost us the price of one 2′ x 4′ piece of plywood, just a few bucks (we could have brought that price down to zero if we had called friends for a spare scrap, but rain was coming and we had to speed up a couple of steps).

Insect hotels can be done very simply, just by stacking materials such as old boards, pallets, or bricks. This makes it possible for even young kids to help create a hotel (check out this link for a huge variety of other people’s insect hotels). An adult should make sure the structure is safe and secure, but kids can help fill the open spaces.
insecthotelA05-14-13

But older kids and adults can really go to town to build the insect hotel of their dreams, so to speak. It can become a real-life math problem, a science project, and an engineering or art or architecture project all in one. Ours is somewhere in between simple and fancy. It LOOKS fancy, but it was remarkably simple — best of both worlds! So while there are lots of ways to build insect hotels, I’m just going to show you how we did ours.
insecthotelC05-14-13

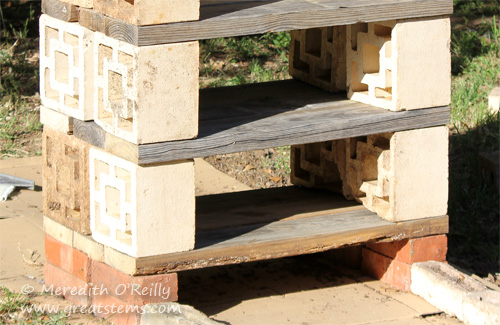
You start with what you have at home or can get for free — this makes every insect hotel unique (what a wonderful concept!). We had five things at home that made this project straightforward and easy to do. The first is that we had 12 vintage screen blocks our neighbor passed along to us a few years ago — we kept them until we could figure out a perfect project for them. We also had an assortment of bricks, decaying wood from one of our raised vegetable beds that was in need of repair, scrap pieces of 2×4 in the garage (for the roof), and lots of natural materials from our garden and yard (sticks, leaves, etc.).

The vintage blocks set the stage for the design, as they also set the height of the shelves. We spaced them just far enough to allow for potential partitions (we would use more decaying wood and some bricks to create these). To add just a bit of additional height, we used two layers of bricks as the base, then cut the veggie-bed wood to size to create the shelves. The reason for the height from the bricks was to be able to add leaf litter underneath the insect hotel to give toads a place to find shelter, caterpillars a place to overwinter, and lizards a place to lay eggs. I should probably mention that we also removed grass and laid down cardboard as a barrier to weeds (the cardboard will break down quickly but will block out light nicely for a while to keep weeds at bay).
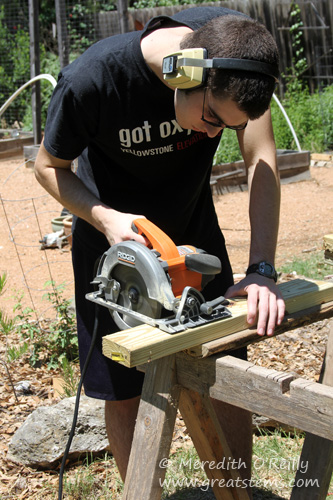
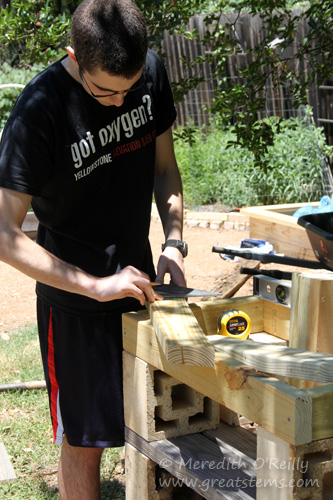
insecthotelB05-14-13The roof was the only part where we used new wood, that 2×4 plywood I mentioned, plus some scrap wood lengths we had in the garage.
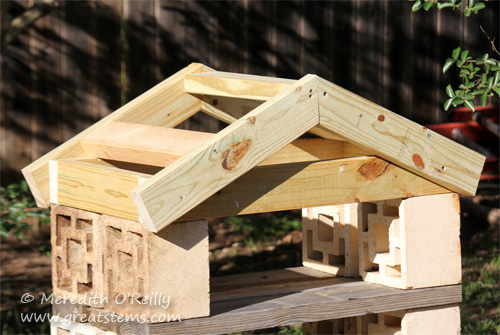
insecthotelD05-14-13

You can see the basic roof design my kids and husband created to fit the hotel. This is the only piece that involved nails of any sort — everything else is stacked only.insecthotelE05-14-13
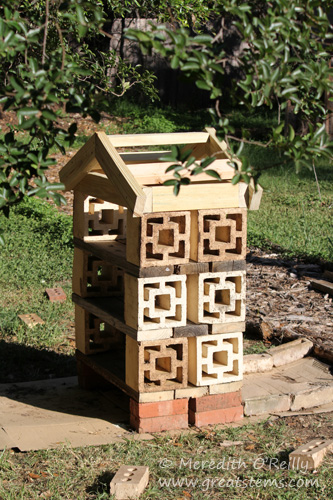
insecthotelFG05-14-13

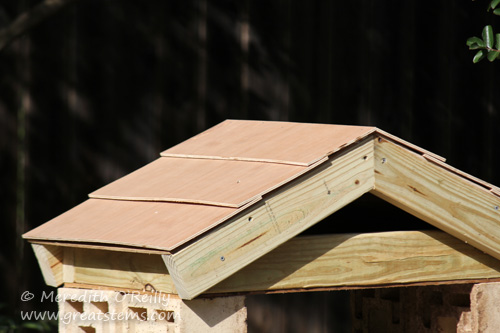
The plywood was used to make shingles of a sort. A bit of caulk at the top filled the seam.
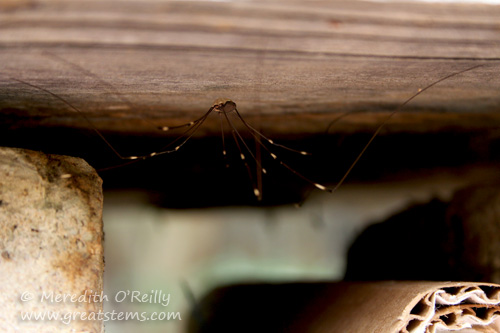
insecthotelFH05-14-13

Already at this point, a harvestman and a tiny orbweaver spider had moved in. Clearly they were eager for bug feasts to come.
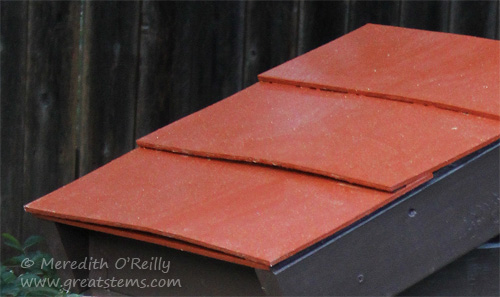
insecthotelJ05-14-13I painted the top section using leftover paint from our house’s exterior — this makes the insect hotel fit the setting nicely, as it matches our house and the color scheme of our garden’s decorations. Of course, it rained that very night, so in the picture it looks dirty. Rain came again for a few days after that — I was so glad the roof was done.
insecthotelI05-14-13

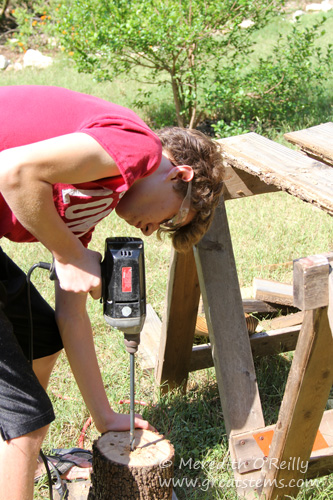
For filling the spaces, our priority was to create places for native bees to build their nests. We collected logs from the yard for this, using a chainsaw to cut them to an appropriate length. Following mason bee nest box instructions, we drilled holes 6″ deep into the wood (the deeper holes allow for female bee eggs — shallower ones produce male bees). So that we could add homemade paper liners to better protect the bees (again, following the advice of experienced mason bee keepers), we used a 3/8″ drill bit rather than the traditional 5/16.”insecthotelN06-04-13
insecthotelM06-04-13

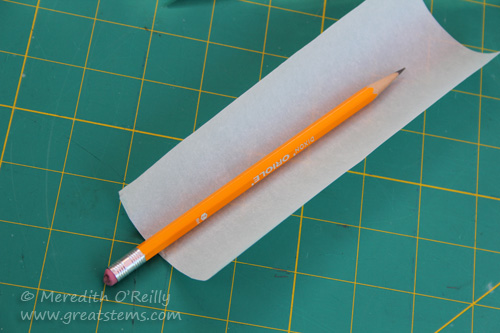
To make liners for the tubes, we cut parchment paper to about 3″ x 6″. These we rolled tightly with a pencil, then inserted them into the holes (they unrolled nicely inside to make a good liner). The liners bring the hole diameter to about the 5/16″ preferred by mason bees.
insecthotelG05-14-13

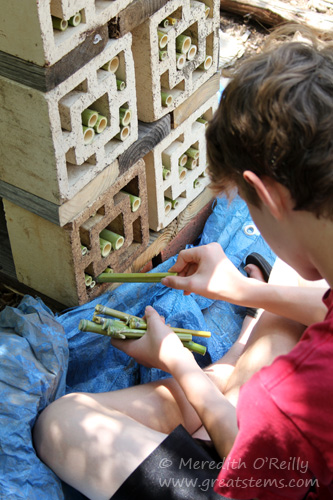
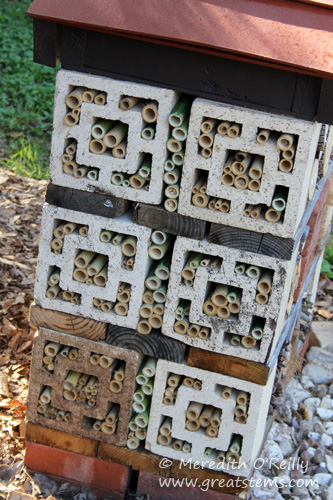
The screen block was a perfect place to add additional places for nesting bees and other critters. A neighbor on our street is always happy for us to cut down the running bamboo that is invading her yard from her nearby neighbor’s property, so we gathered bamboo, trimmed off the branches, and sliced the bamboo into 6″ lengths of all diameters to fill the holes.
insecthotelK06-04-13

Here we were casual about it — there are lots of different sizes for many species of insects interested in using the bamboo. Some were cut with the bamboo joint at one end, so they are open only from the opposite end (nice for shelter or nesting), while others are open at both ends, allowing an insect to pass into the main hotel structure if it desires.insecthotelH05-14-13
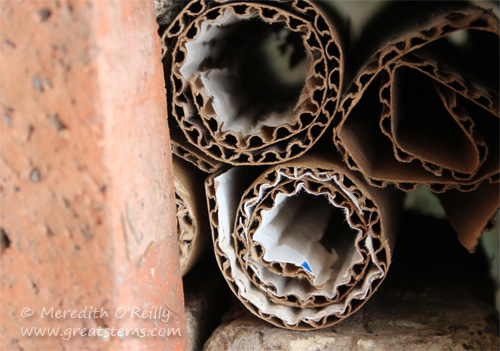
On the middle shelf of the insect hotel, we created partitions with bricks, then inserted rolled corrugated cardboard as lacewing shelters. insecthotelO06-04-13
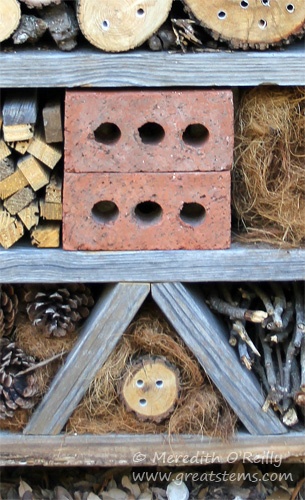
Additional bricks, with the holes open from the front, protect the cardboard and insects while allowing easy passage for the critters to enter and exit. We also made “A”-shaped partitions simply by cutting more veggie-bed wood to size and sliding it in — no nails required.

Other materials used were decaying wood slices for firefly larvae, loosely placed coir fiber as a general shelter place for small insects, and twigs and pine cones and other wood bits for additional shelter. We filled the roof section with pine straw needles. Though we intended it for insects, it wouldn’t surprise me if Carolina Wrens or other birds will nest in the roof’s pine straw one day. They might think an insect hotel is a perfect place to build their home — convenient food on the spot!
insecthoteIJ05-14-13

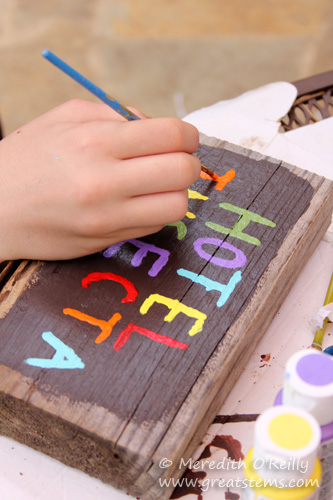
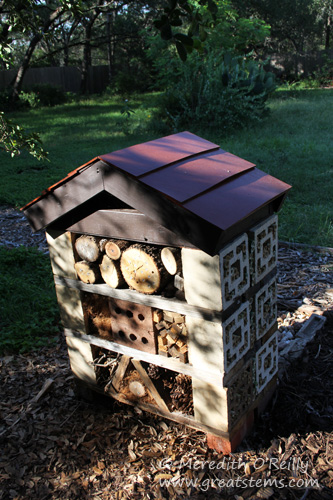
Of course, there was one more finishing touch needed. A grand-opening sign! We made use of some more rotting wood from the old veggie bed and some more outdoor paint, including outdoor acrylic, that we had on hand. We attached a supporting piece of wood to the back, then stuck the sign into a plant pot with some rocks (see top photos above).
insecthotelL06-04-13

View from the back

The back of the insect hotel duplicates the front half, mainly because we liked the front so much.

We’re already seeing evidence of bees building nests, and other critters (including more little spiders) have moved in. What a simple but rewarding project! Though we could have finished this in just a day or two, we spread it out over time due to occasional rainstorms. The most time-consuming part, honestly, was drilling the holes in the logs. You have to take a lot of breaks to let the drill and drill bit cool down — they get hot!

To see a couple of other nifty Austin insect hotels, visit Sheryl’s tall, well-planned structure at Yard Fanatic and Vicki’s clever use of an antique bottle rack to make her uniquely awesome Bee B&B at Playin’ Outside. Another gorgeous insect hotel is Gail’s pollinator condo at Clay and Limestone in Tennessee. Remember to also check out the link at the top to get even more ideas!
Standing Cypress Love

I finally updated our list of plants growing in our garden. We’re up to 157 native species and counting! While I’m at it, let me mention that I’ve got a brand new page dedicated to wildlife projects for kids of all ages. These can be accessed any time from the sidebar. I’m feeling so productive!

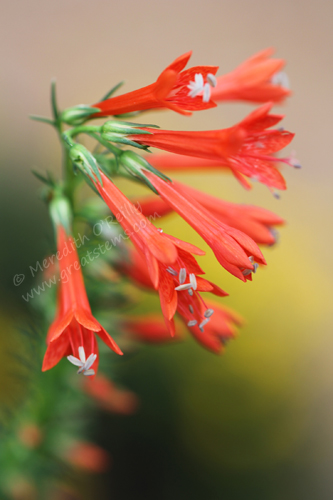
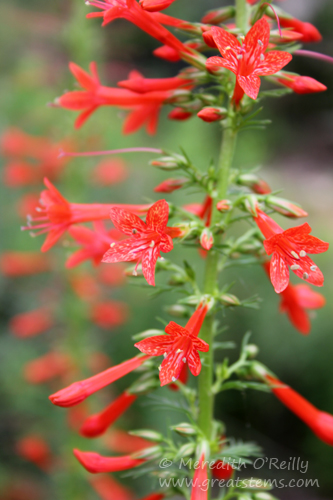
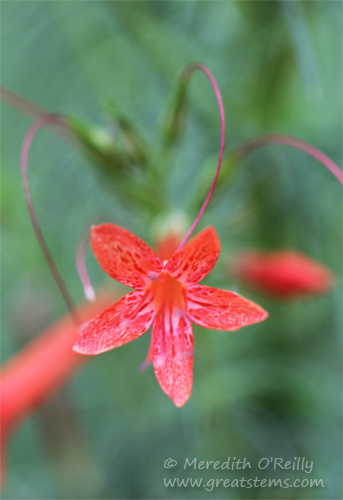
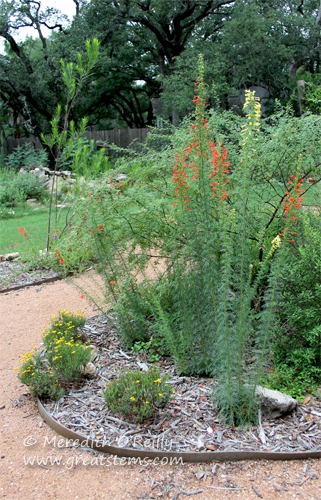
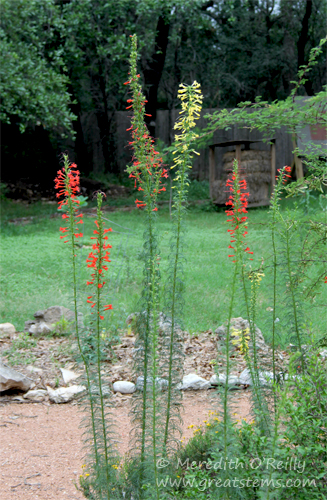
standingcypressA05-2013I have to show off the current eye-catcher in the garden, Standing Cypress, Ipomopsis rubra. Tall spikes of brilliantly-colored flowers draw your attention quickly — show stoppers, they are!
standingcypressD05-2013

standingcypressB05-2013

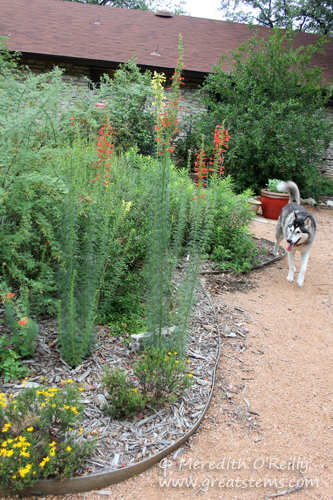
I grew these from seed, simply tossing them all over the front and back yards (which means I have them here, and there, and everywhere!). They are fun little biennial plants. Don’t expect blooms the first year — Year One will simply bring you small rosettes. Year Two is the exciting year — the little rosettes suddenly form growing stalks that keep growing… and growing and growing… and then they stop.

standingcypressG05-2013

Most of my Standing Cypress bloom stalks are taller than me, and there are quite a few that have reach 6-foot in height, making it fun to measure them against the men in our family. To give you a bit of a size perspective, I present to you in the photo above our Loki, who is much taller than your typical Husky (think wolf-size).standingcypressI05-2013

The red tubular blooms make this flower a favorite of… you guessed it… hummingbirds.standingcypressE05-2013

While I was outside taking photos, I could hear the familiar “buzzing” of lighting-fast hummingbird wings — I could tell our garden visitors were annoyed that I was standing near their beloved red blooms. Lucky for them, there are plenty of other flowers in bloom around the garden (and feeders, too). So they might have been annoyed with me but certainly not lacking in alternatives. While we have Standing Cypress all over the place, too, those in shade have not yet opened their buds (they are just really, really tall at the moment).

standingcypressH05-2013

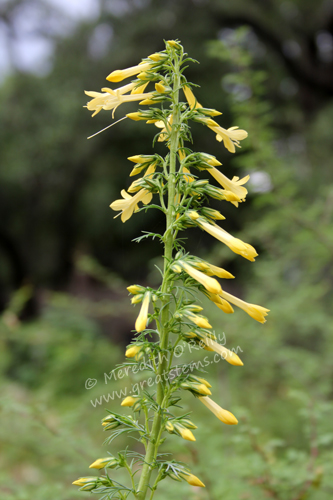
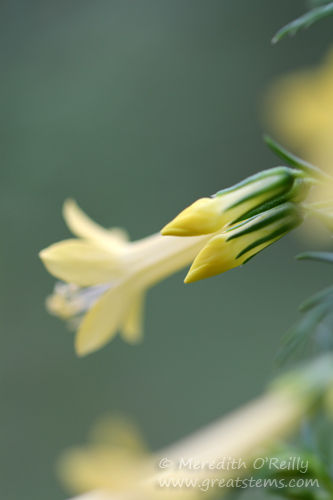
Standing Cypress is generally considered a plant with red blooms, so we were pleasantly surprised to see that we got a few yellow specimens. What a treat!

standingcypressF05-2013

With luck, these lovely plants will naturally reseed, yellow ones included. standingcypressJ05-2013

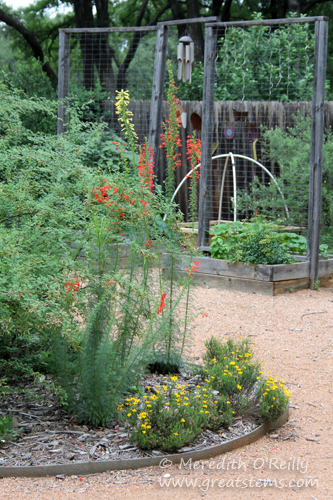
Such a nice pop of color! That’s Damianita out in front. In this spot, later in the year, the White Mistflower and Lindheimer’s Senna will also add their own color. Hopefully some of the Standing Cypress will still be producing blooms at that time for a beautiful color medley.