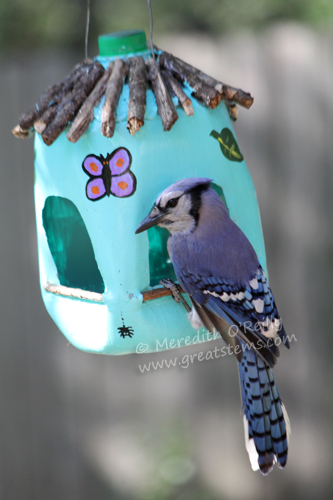
Wildlife Projects for Kids: Milk Jug Bird Feeders

milkjugfeedersm05-30-13

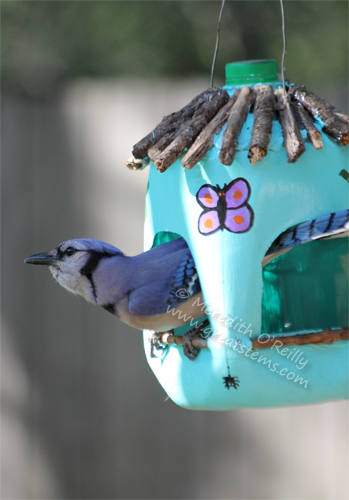
Here’s a fun bird feeder project that you can do with kids of all ages. Depending on the age of the children, adults might have to help with cutting or working with wires, but decorating can be all kid!
milkjugfeedersn05-30-13

What I love about this project is that it gives a plastic milk jug a new purpose, while simultaneously helping wildlife, giving kids a fun activity to do, and connecting kids with nature.
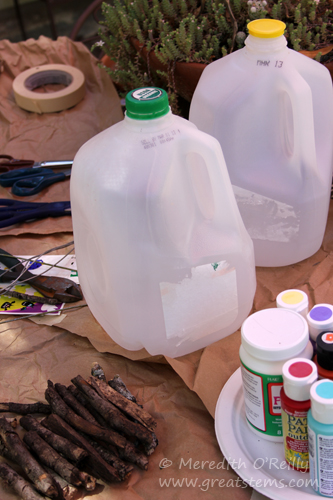
milkjugfeedersA05-30-13Materials can vary, depending on what you have on hand and how you want to decorate your feeder. The one thing you’ll need for sure is a milk jug. Oh, and birdseed!

Materials:

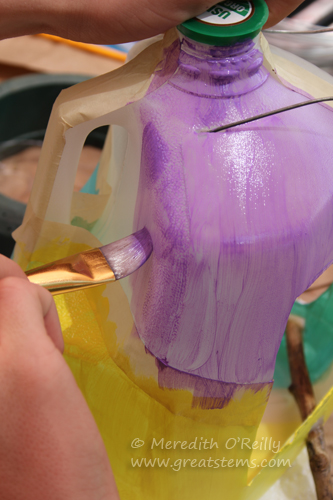
  • Milk jug with cap
  • Possible decorations: stickers, bottle caps, milk jug caps, Sharpies or other permanent markers, outdoor acrylic paint, tape for making sharp edges
  • Possible tools: scissors, wire cutters, pliers, paintbrushes, garden pruners
  • Perch or roof materials: sticks cut to desired length
  • Possible adhesives or sealant: non-toxic outdoor white glue, Thermoweb Zots, Outdoor ModPodge
  • Possible hanging materials: bendable thick wire, wire clothes hanger, twine, thin rope
  • Birdseed, such as black oil sunflower seed

Steps:

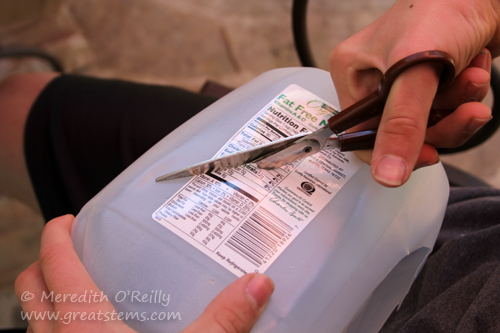
1. Wash the inside of the milk jug and cap with soapy water. Rinse well. Try to remove the label — some will peel off easily, but others might be difficult (you can always choose to paint over the stubborn ones, or cut them out).
milkjugfeedersab05-30-13milkjugfeedersb05-30-13

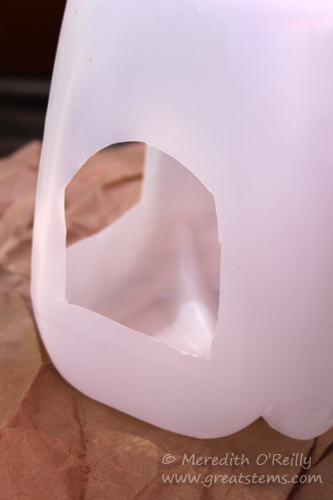
2. Use scissors to cut “windows” into your milk jug. We liked using the larger sides opposite the handle. Don’t go too low or you will lose seed storage space. If you want to put in a perch, make sure you don’t go too wide with the window, either. Adults will need to help with this step for younger children.
milkjugfeedersc05-30-13

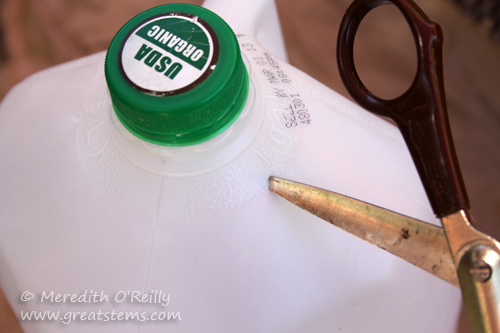
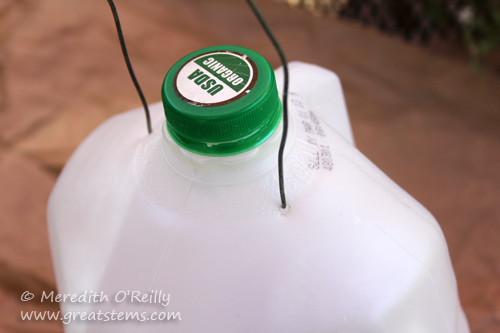
3. Using the pointier end of the scissors, carefully puncture two holes near the top of the jug for the hanger. Try to place the holes in the thicker plastic near the cap. Older kids can probably safely do this, but younger kids will need adult assistance.
milkjugfeedersd05-30-13

milkjugfeederse05-30-13

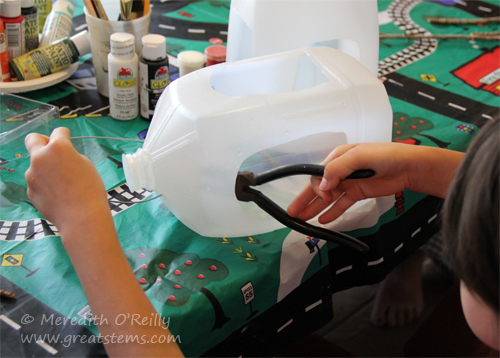
4. Cut your hanging material to your desired length and insert it into the holes. If using wire or a wire clothes hanger, use wire cutters to cut the length and pliers to twist the wire inside the milk jug to secure it. Adults will likely need to do this step, including twisting the wire. If using rope or twine, tie a secure knot inside the milk jug.

5. You don’t need to add a perch, but if you want one, there are different styles you can do. Again, parents might need to help younger children with this step.
milkjugfeedersfa05-30-13

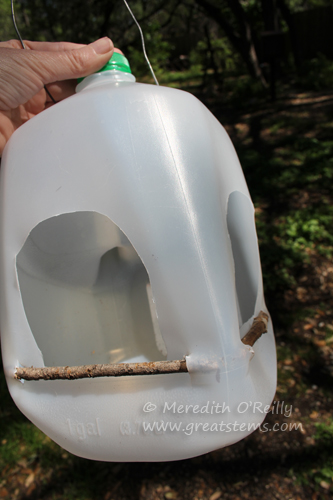
A resting perch along the lower edge of each window is a very attractive addition to the feeder. To do this, carefully cut slits to each side of the window — the slits should be a little wider than the thickness of the stick. Use garden pruners to trim your sticks to a length just beyond the slits (and trim off any little branches, too). Then maneuver the stick into each opening. Glue into place, including on the inside for extra stability.
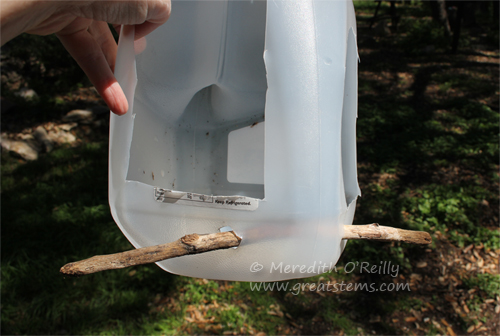
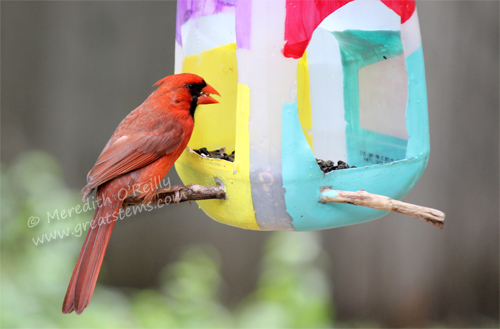
milkjugfeedersfh05-30-13Another option is to create a long perch that goes through the corner. Cardinals especially appreciate this perch style (as seen in one of the first photos above). Again, glue it into place.
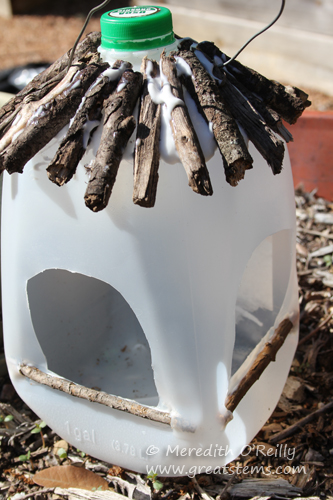
milkjugfeedersfg05-30-136. Before adding paint or other colors to your feeder, glue on any materials you desire. You can add a roof with small sticks, as shown, but be warned that it’s a challenge to adhere the sticks to the milk jug. You have to use a lot of glue, which can substantially add to your activity time because you have to wait for the glue to dry, possibly overnight. If you have the time, then go for it. We used Outdoor ModPodge to glue these sticks on.
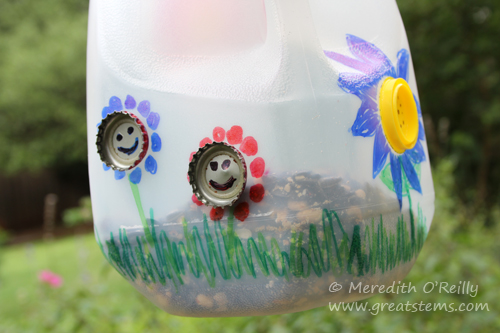
milkjugfeederss05-30-13To adhere caps to the milk jug, consider using adhesive dots (such as Thermoweb Zots). To apply, press the cap first onto several dots (don’t touch the dots with your fingers); the dots will naturally lift off the paper. Then press the cap into place on the jug.
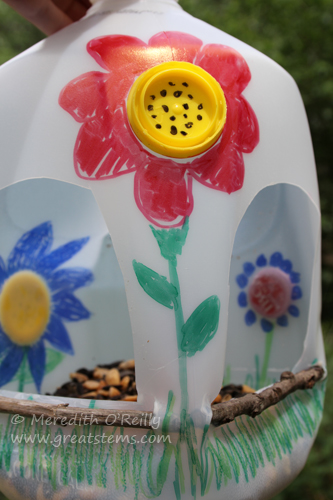
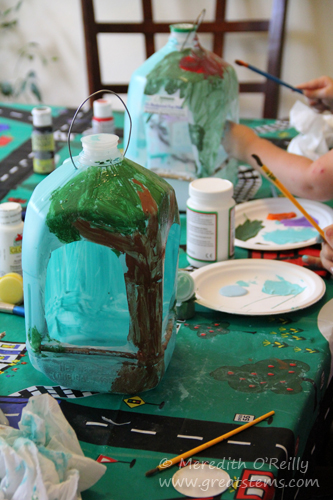
milkjugfeedersr05-30-137. Decorate your jug with stickers, permanent markers, or paint, letting everything dry in between stages (note: Sharpies and other permanent markers will eventually fade in the sun — if using these, keep your bird feeder in the shade).milkjugfeedersi05-30-13
milkjugfeedersg05-30-13

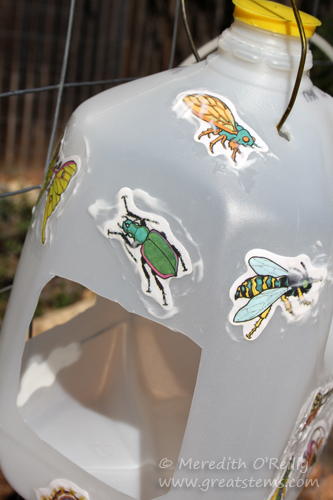
To create straight edges, use masking tape.milkjugfeedersh05-30-13If using stickers, place a thin layer of outdoor white glue over them to help secure them — the glue will dry clear.
milkjugfeedersj05-30-13

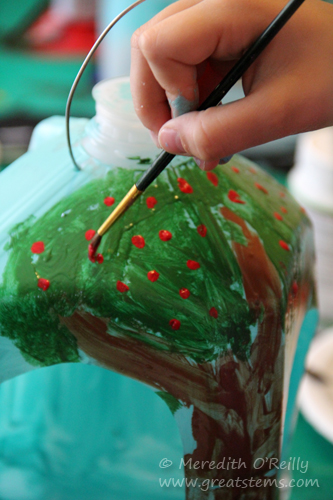
Because of the plastic used in milk jugs, adhesion is ever the challenge. For painting, we used outdoor acrylic paint with an Outdoor ModPodge layer over it to “seal” it — however, be forewarned that the result will feel mildly tacky to the touch. If you choose a different glue or sealant, be sure to check toxicity before using it with kids or letting wildlife near it. Also, younger kids might tend to go a little thick as they apply paint — this is fine but expect some of the paint to peel off when the feeder has been put to use by birds and squirrels.
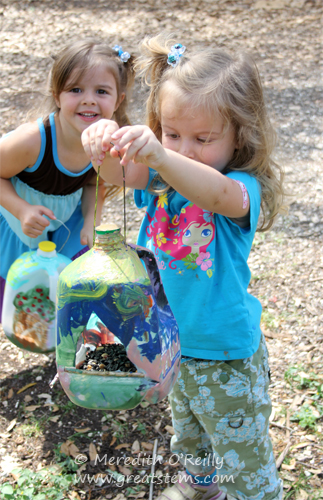
milkjugfeedersp05-30-138. Finally, fill with birdseed and hang outdoors. It might take a couple of days for the birds to find your feeders, but squirrels might be happy to show them where it is!
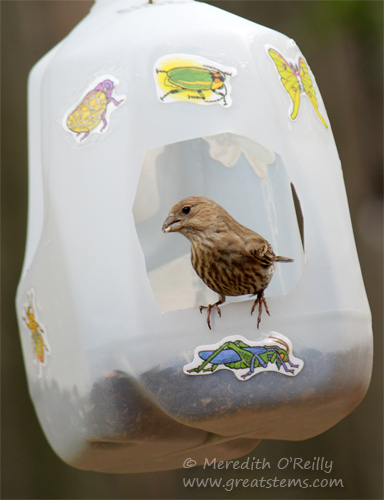
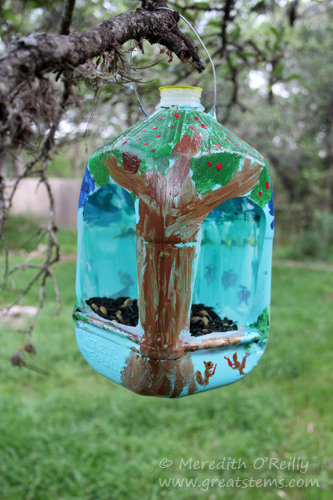
milkjugfeedersl05-30-13 milkjugfeedersk05-30-13 milkjugfeederso05-30-13

Prefer a birdhouse instead of a feeder? To convert this project to an easy birdhouse, simply cut one circle window out of one side of the milk jug, rather than two windows. To make the inside floor less slick (for baby bird leg growth safety), adhere a few tiny twigs or a few pine needles to the bottom.

Interested in other nature/wildlife activities for kids? Visit this page

A Pearl of a Vine

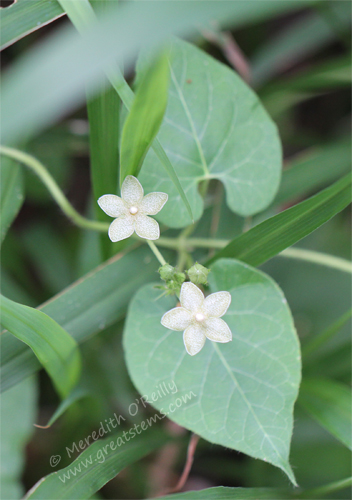
Once again, nature has brought me a gift — one of my favorite vines, and one that I’ve only ever seen in the wild. So I guess it’s fitting that I found it in the wild portion of my yard. Thank you, wind or mammal, whichever of you that brought this seed to my garden!

pearlmilkvine05-29-13

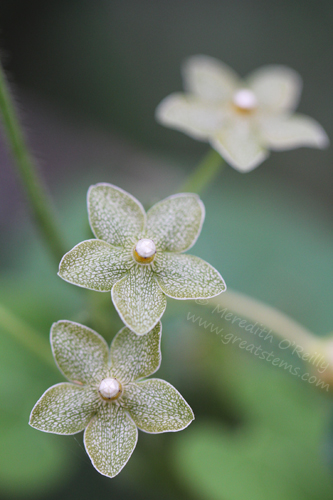
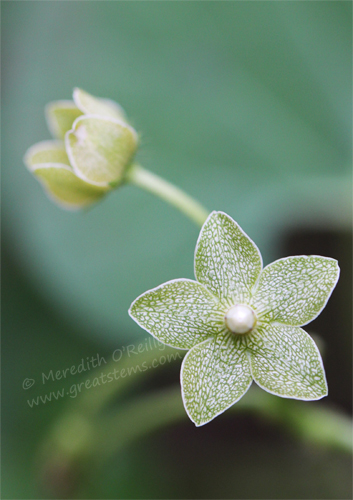
This lovely plant is called Green Milkweed Vine (Matelea reticulata) by some, but I prefer to call it by its other common name, Pearl Milkweed Vine. That shiny little center spot looks too much like a pearl to not include it in the name.

The vine will, in fact, ooze a milky sap if a leaf is broken off. If you are wondering whether it is a Monarch/Queen host plant, given that it is a Milkweed, some online sources indicate that it is indeed one, albeit a minor food source for them, perhaps. Personally, I haven’t yet seen a caterpillar on it.

pearlmilkvineB05-29-13

This vine is more dainty than bold, and it’s easy to pass right by it when walking in the woods. But once you catch a glimpse of its shiny little pearls, it’s mesmerizing. Mine is currently twined around a bunch grass — and annoyingly, some hackberry sprouts — but it’s growing well. I haven’t actually found the base of the vine yet — I’m so protective of it that I barely want to mess with the tangle.pearlmilkvineC05-29-13

The leaves of the Pearl Milkweed Vine are heart-shaped, and when it’s time to go to seed, this dainty vine will actually produce a whopper of a seed pod, much like its Milkweed cousins. Inside will be many seeds with silky fibers to aid in dispersal. I can’t wait!

NWF Demo Habitat Created for Austin ISD

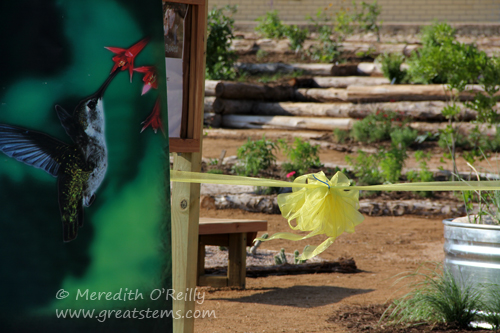
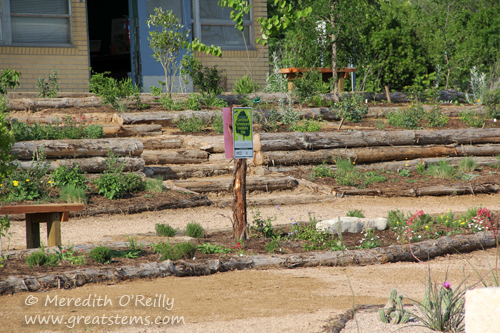
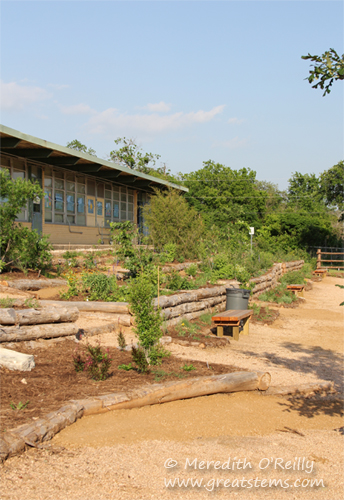
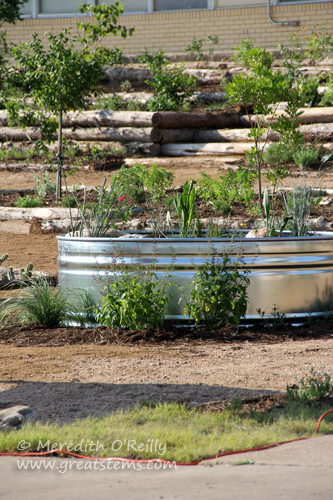
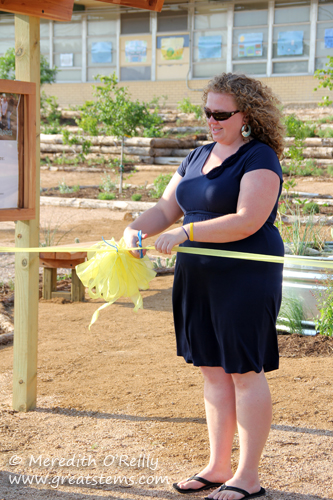
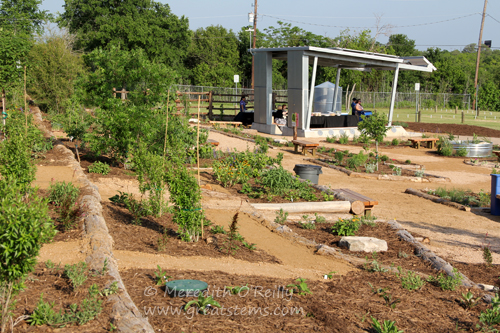
On May 16 a very special event took place here in Austin, the ribbon-cutting ceremony to officially open a large demonstration schoolyard habitat for Austin Independent School District. This project, led by the National Wildlife Federation, was created at AISD’s Science and Health Resource Center in South Austin.

.demohabA05-16-13

The habitat is intended to serve as a field trip location for students of all grades in Austin and other local school districts, a place to train science teachers in outdoor education and field investigation, a place to instruct AISD employees about proper maintenance of a habitat, and a place to give living examples of the wildlife-friendly native plants that students and teachers can use on their own campuses.

demohabD05-16-13

Why do outdoor-education sites like this matter? Schoolyard habitats have been shown to improve children’s academic success in reading, mathematics, science, and problem solving. There are physical and emotional health benefits, as well. Students who spend quality time outdoors are less at risk for obesity or diabetes. Additionally, they have improved self-esteem, are better behaved in the classroom, and experience relief from stress they might be experiencing at school or at home. In a nutshell, time spent outdoors connecting with nature makes kids happier, healthier, and better students. Add to all that the fact that as students directly experience the wonders of nature, they are more likely to become environmental stewards as adults.

demohabM05-16-13

This demo habitat was made possible in part from a grant from Toyota USA Foundation, as well as NWF’s partnership with AISD. Marya Fowler, Senior Education Manager for National Wildlife Federation, along with other members of the regional office, rallied additional support from the Austin school district, local businesses and environmental organizations, members of the community, and many volunteers. Anne Muller, the AISD Outdoor Learning Specialist, also consulted on the project and provided on-site attention to the young habitat throughout its development.

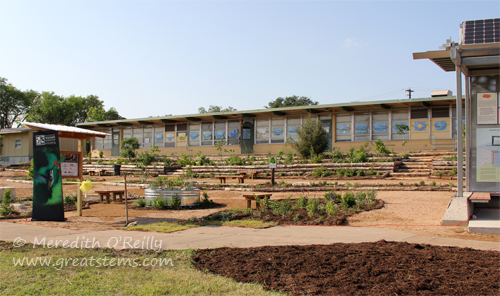
demohabO05-16-13 The habitat was designed by Environmental Survey Consulting, an Austin company known well for their design of the butterfly gardens at the Wildflower Center.demohabL05-16-13 The list of native plants is long, and all the hardscape materials came from local sources. Different ecological examples are displayed, including meadows, woodland habitats, and even a full-sun xeric area. The site includes benches, a water feature, and a rain collection system. Already present was a solar-power learning station, making this quite the science center. Additionally, there is built-in space for educational signs and an additional shade structure, to be added in the future.
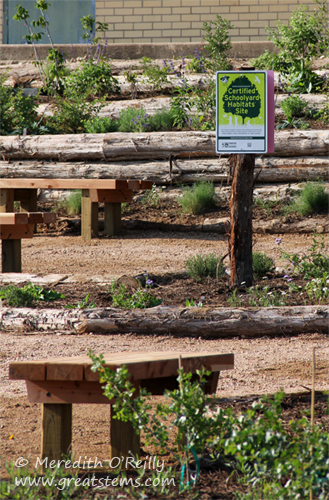
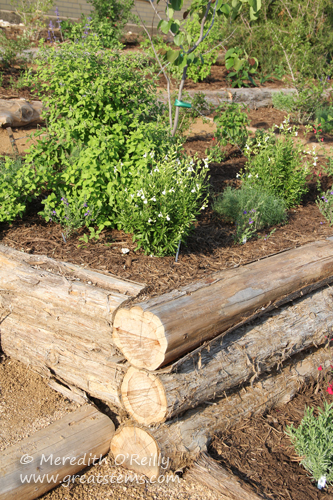
demohabG05-16-13This project could not have been done without the work of dedicated volunteers. Over many workdays spread throughout several months, Habitat Stewards, Master Naturalists, neighbors, AISD, and other community volunteers tackled the challenge of creating pathways, moving dirt and rocks, planting hundreds of plants, and more. Additional work was provided by Environmental Survey Consulting.
demohabC05-16-13

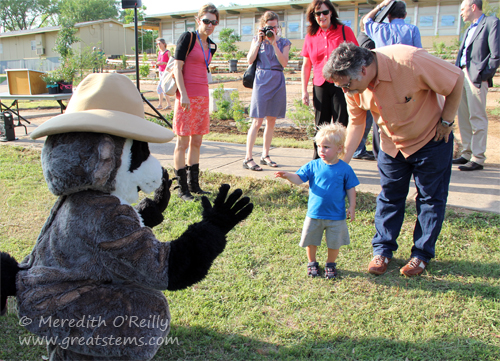
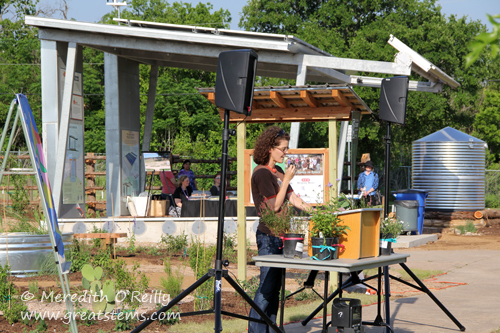
More than 100 people attended the ribbon-cutting ceremony, including representatives from NWF, AISD, the Children in Nature Collaborative of Austin, Austin Habitat Stewards, Capital Area Master Naturalists, Native Plant Society of Texas, and other groups, as well as many students, teachers, and families.demohabR05-16-13demohabK05-16-13

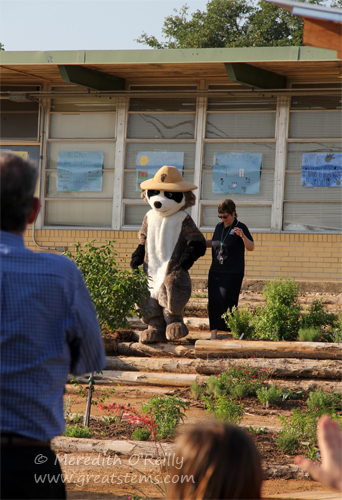
demohabI05-16-13 Even Ranger Rick made a surprise appearance!demohabFF05-16-13
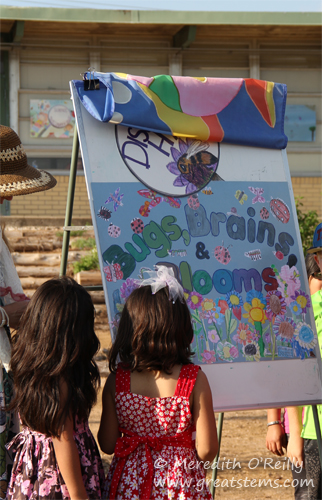
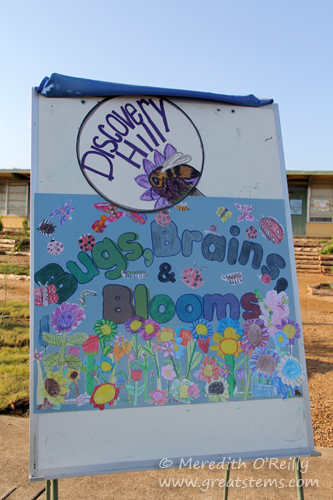
Students from the nearby Pleasant Hill Elementary unveiled their chosen name for the habitat, “Discovery Hill: Bugs, Brains, and Blooms.” It’s perfect.demohabH05-16-13 demohabB05-16-13

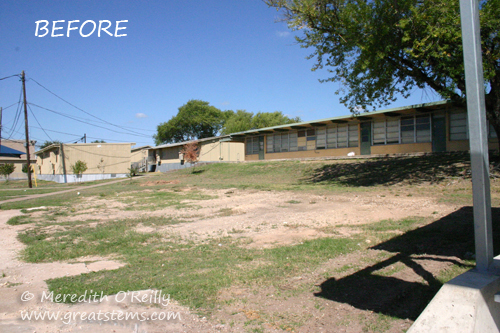
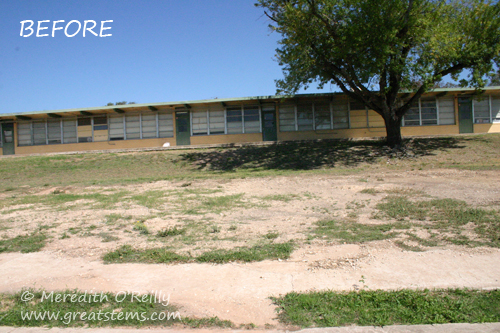
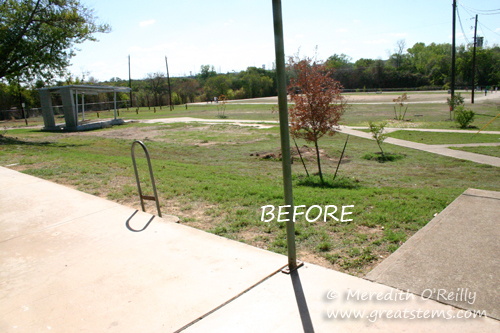
To give you an idea of how remarkable a change has taken place, take a look at the following Before and After pictures. Note that the Arizona Ash tree seen in the Before pictures was removed as part of the installation process. Arizona Ash trees are not native to Texas and are not long-lived — for this reason, the tree was removed so that other native trees could take its place.

demohabP05-16-13demohabQ05-16-13

After:

demohabJ05-16-13

demohabR2011

And After:demohabE05-16-13

I love to report on such beautiful and successful transformations. This habitat is going to enrich the lives of many thousands of students in the years to come. But let’s not forget the wildlife that will benefit, too! Already butterflies, birds, bees, and other creatures have found the habitat, and it won’t be long before this young habitat is truly a haven for wildlife.

Note: For more information on the project and its development, please visit http://rockstoroots.wordpress.com/. If you’d like to make a tax-deductible donation to National Wildlife Federation to help with the next stage of the project (including educational signs and a shade structure), links are provided there.

Wildlife Inspiration

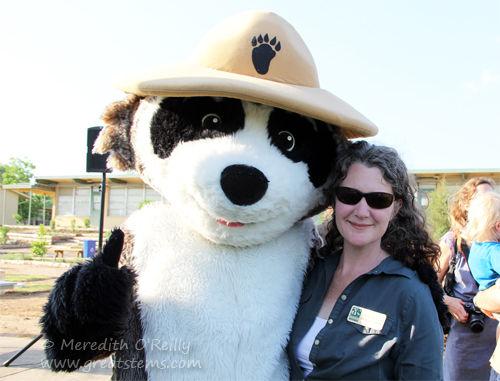
When I was a kid, I adored Ranger Rick magazine. My love for all things nature was already strongly in place, but Ranger Rick introduced me to creatures I’d never seen before, amazing facts about all sorts of wildlife, natural sciences, and gorgeous photography. The stewardship I do for the environment today, including the volunteering I do on behalf of the National Wildlife Federation and other environmental organizations, is due largely in part to the effect that Ranger Rick had on me every time I opened that magazine. Frankly I still adore Ranger Rick, and I keep a collection of magazines here for my kids and visiting children to enjoy.meowithRR05-16-13

I got the chance to have my picture taken with Ranger Rick a few days ago at the ribbon-cutting ceremony of a spectacular NWF-orchestrated demonstration habitat for the Austin Independent School District. I don’t think I need to tell you how meaningful this was to me!

Fledged

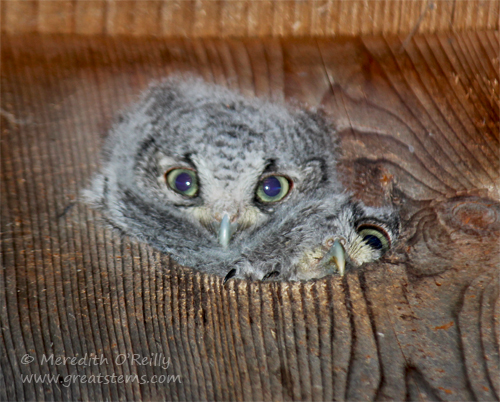
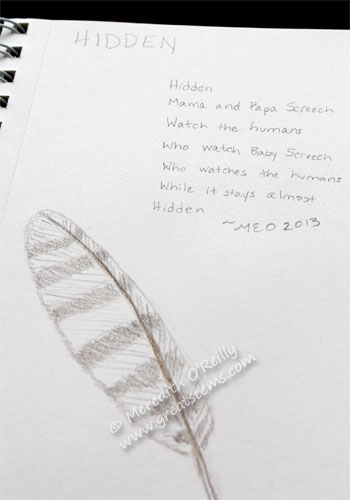
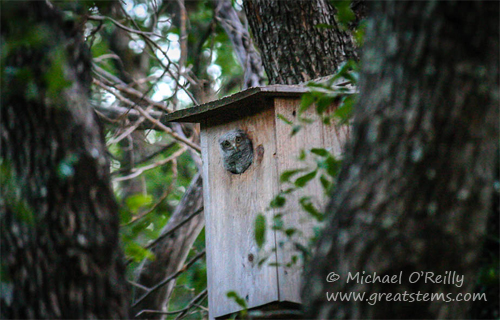
This is a mostly happy story of our owls, with a little bit of “awwwww” mixed in. Our adorable owls recently fledged, always a sad but proud time for us. It might have happened on Mother’s Day (we weren’t home that evening), but I think it actually happened the night before, because that night we could tell the babies were starting to lean wayyy out of their box. So that I (nor Mama Owl) don’t feel hurt, I’ll assume it was the night before Mother’s Day.

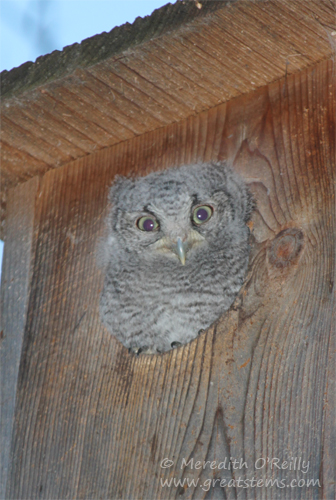
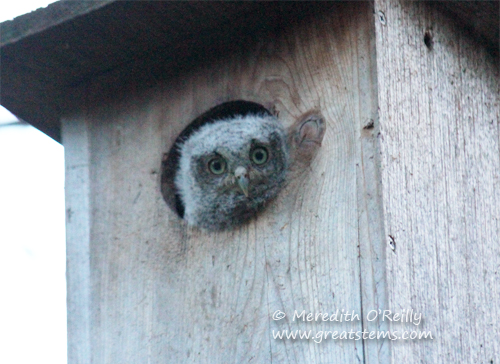
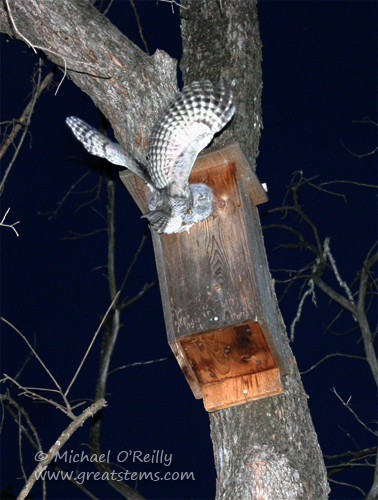
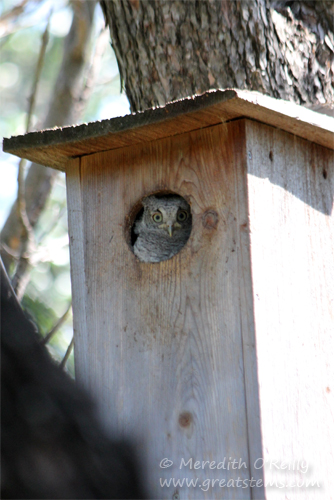
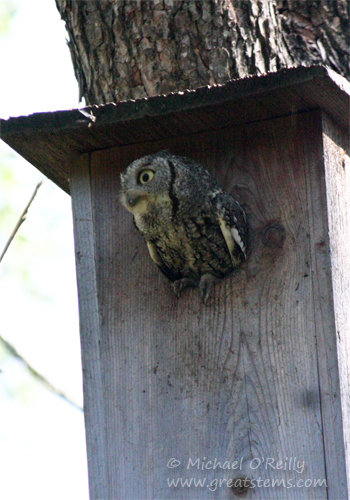
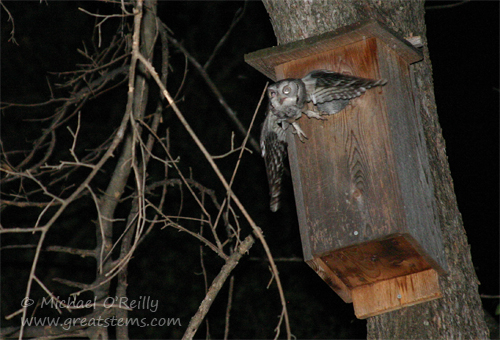
prefledge05-11-13Let me show you the last few pictures we were able to get of the owls before they fledged, and then I’ll show you the big event of the day.prefledgea05-11-13 Taking an afternoon peek…prefledgeab05-11-13 So used to my presence that I get to take a close-up… prefledgee05-11-13Parent leaning way out, moments from flying off…
prefledgec05-11-13

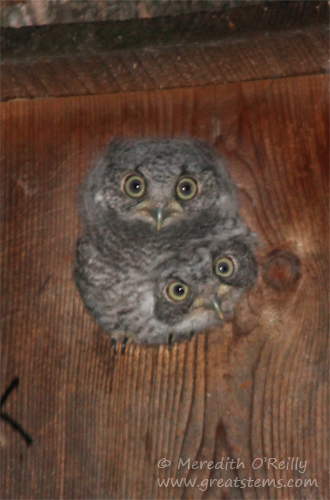
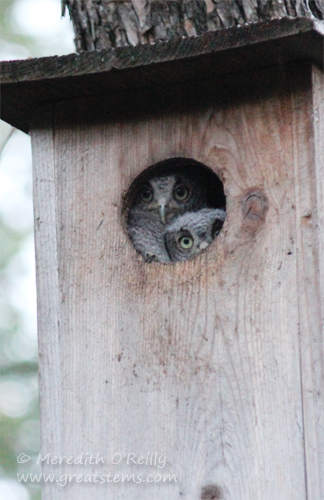
Peekaboo pair…prefledged05-11-13 Dinner time, parents hard at work…

prefledgeb05-11-13

Smushed sibling, determined to get a look outside….

The nest box has been empty for a few days now, and as usually we didn’t get to see their big venture into the “real world.” But we wished them well and knew they’d become fierce hunters in their own right.

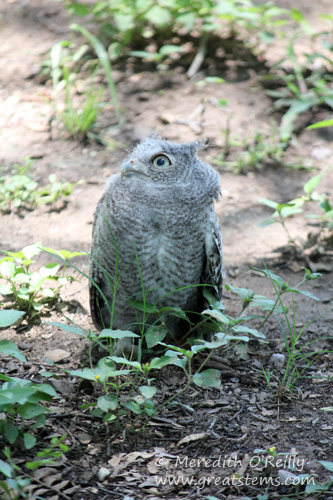
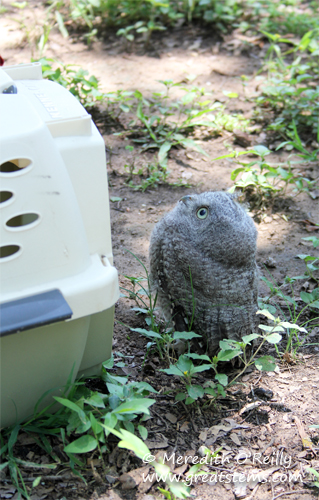
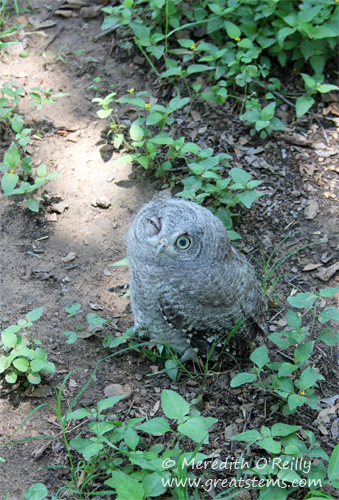
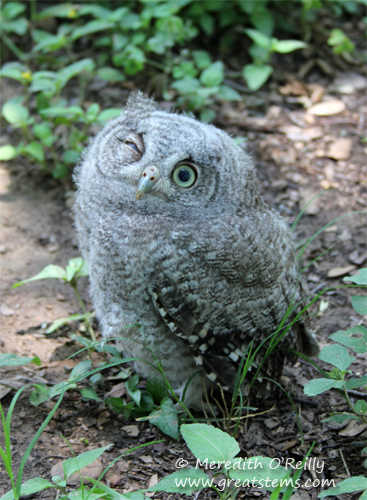
Today, however, my neighbor contacted me to say that he found a baby owl on the ground in his yard. I wasn’t home at the time. But he watched it fly over toward our front yard, so he assumed it was fine. When I got home, I walked over to where he thought the little owl had landed, but I didn’t see any sign of it in the trees or shrubs. As my neighbor and I were talking, however, I saw what looked like an odd, round rock near the base of a tree. It was the little owl, sleeping.

fledgea05-17-13

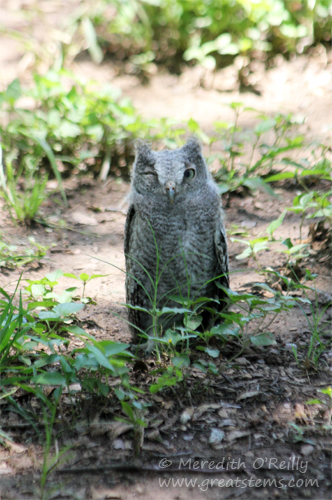
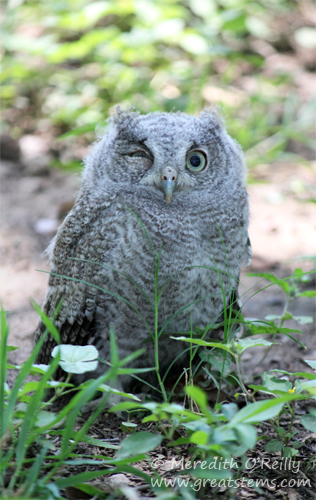
Of course, it woke up when we came a little closer.fledgeb05-17-13 Normally, you’d let a healthy baby owl stay where it is so that mama and papa can continue to care for it. But when we looked at the little owl, we realized it was having trouble opening one eye.
fledgec05-17-13

We also realized that it wouldn’t stand a chance against the neighborhood cats, especially if it was staying on the ground. I called Wildlife Rescue, and they wanted us to bring it in so they could assess the eye. If it wasn’t too bad, they’d put in some antibiotic drops and have me bring it back to its parents. If the eye needed monitoring, they’d care for it until it could be released.fledgef05-17-13What a cutie, even with one eye closed!fledged05-17-13

It being the middle of the day, the sleepy little owl stayed calm while we talked quietly to it and took a few pictures.fledgee05-17-13 Then it was time to get all packed up and ready to go. I brought our wildlife carrier over (yes, yes, it’s a cat carrier, but don’t tell the birds that), and we placed it close by. Then my neighbor gently guided the little owl in — it simply walked right inside. How sweet was that!
Since I had a meeting, the little owl snoozed in a dark bathroom in my house until I got back, then my friend and fellow Habitat Steward Jan and I drove him over to Wildlife Rescue. They decided the eye needed to be monitored, so we had to leave him there. Luckily, someone else had just brought in another pair of screech owl fledglings, so our little owlet will get to have other fuzzy owlets by his side. They were thawing mice to feed them as we left.

The wonderful folks at Wildlife Rescue tell me that they will try to release him near our area — something they do for raptors when possible so they are close to their original home. Maybe we’ll get to see our little buddy again someday! If not, take care, sweet little owl!

Wildlife Projects for Kids: Making a Nature Journal

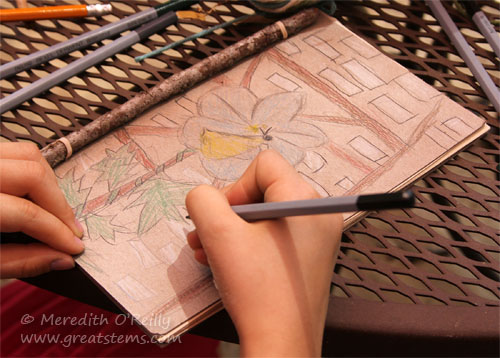
Oh, how I love making nature journals! A nature journal is simply a place to record one’s observations of nature. It might include sketches or drawings, written descriptions or notes, poems, photographs, natural objects such as leaves or flowers, or scientific data such as lists or wildlife tallies. There are no rules when it comes to nature journals! This activity is great whether you are a kid or an adult. We should all keep one. Trust me on this.

naturejournalL05-06-13

Nature journals help us see, understand, and appreciate the natural world around us. They help us tap into our senses, develop our observation skills, and discover our creative side. Very importantly, they help us slow down and relax, and that can be hard to do in this busy world, no matter your age. Kids might be kids, but they experience stress, too. Often their schedules are so packed with school, homework, studying, dance classes, music classes, sports, and other activities that they don’t have much downtime — many parents put a lot of pressure on their kids to always achieve. Some kids stay indoors because of their parents’ worries, and they eventually develop these same fears. Of course, many kids are inside glued to their televisions and video games. Point being, kids today often don’t get much time to be outside to just explore.

naturejournalE05-06-13

Time spent outdoors helps kids develop an appreciation for nature that will last a lifetime. We want them to love and respect the Earth so that they will protect it as adults. But time spent in nature also helps kids relax and enjoy themselves and just be kids!

naturejournalJ05-06-13

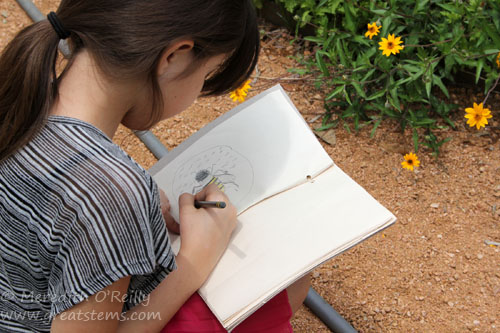
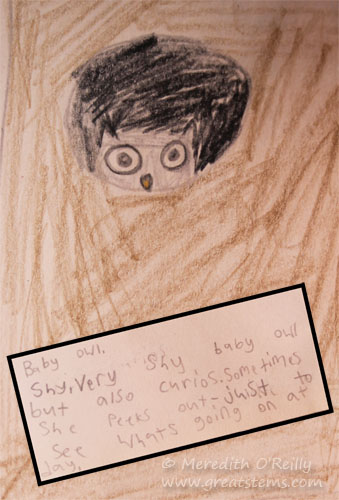
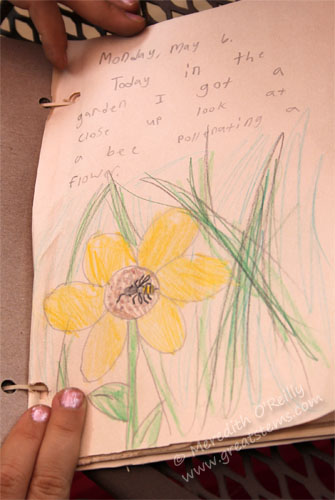
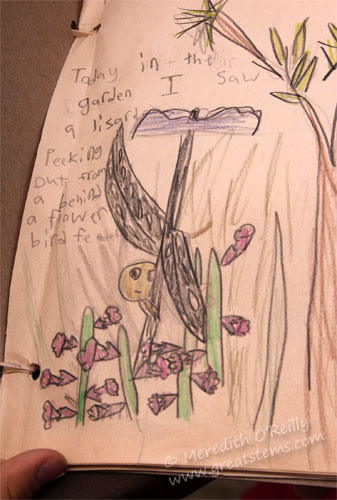
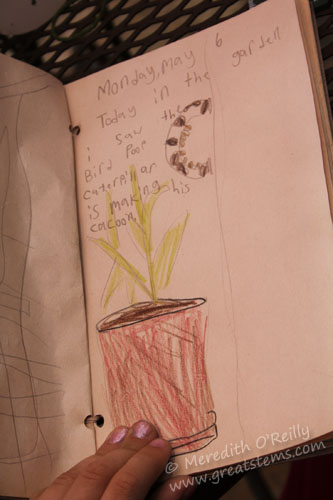
Journals are a way to encourage this deeper love and understanding of nature. For kids, they can be a place to draw pictures of or write about what exciting things they have seen, such as an insect with unusual markings, tadpoles swimming in a shallow creek, a woodpecker tap-tap-tapping, or a fragrant bloom that they caught a whiff of.

naturejournalK05-06-13

Grown-ups see nature journals as having multiple benefits for children — sparking imagination and creativity; giving a “secret” boost to academic progress and scientific thinking; helping children make connections between their lives and the natural world around them; helping them study interactions between wildlife and flora or between animals of the same or different species; and giving opportunities for reflection on what was observed in the past to what is being observed now. Plus, it gives children a chance to slow down or even sit still. Parents might have a different reason for wanting that, of course, but when children slow down, they can engage their senses and awareness (and keep from startling nearby wildlife away!).naturejournalI05-06-13

But frankly, nature journals just plain make you feel good. You observe and record, and you accomplish, while at the same the experiencing the fascinating, exciting, and simultaneously soothing natural world around you.

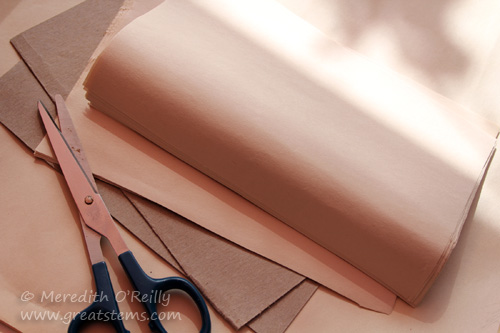
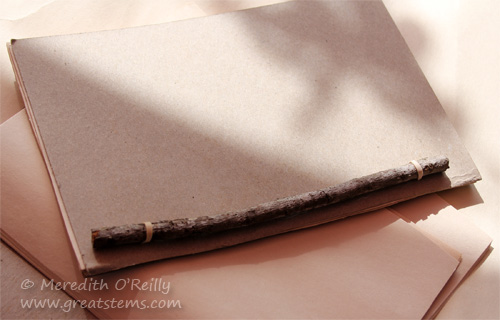
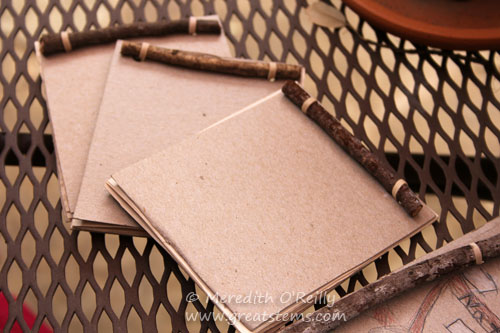
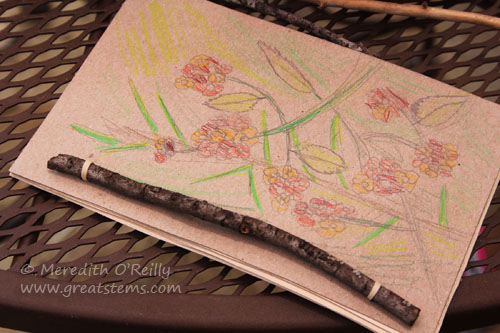
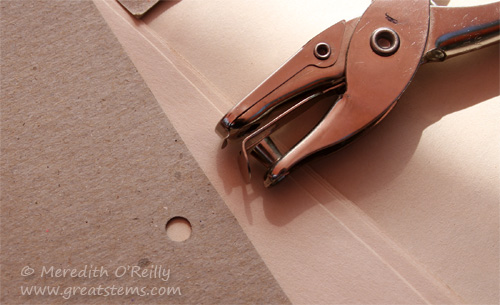
Nature journals are super easy to make with a just a few materials you likely have around the house. All you need is some paper, thin cardboard or a thick paper such as cardstock, a rubber band, a stick (appropriate for the size you make your journal), scissors, a hole punch, and possibly a ruler or pencil if you need it.

naturejournalinstruxB05-06-13Start by cutting the cardboard and paper to the size you’d like the journal to be. If you need to, use a ruler and pencil to keep things straight.
naturejournalinstruxA05-06-13

Next, punch two holes on one side of one piece of cardboard, where you’d like the hinges to be. Don’t get too close to the edge, but don’t go too far away from it, either, else you have trouble opening and writing in the journal. Then align the cardboard with sections of paper and/or the other piece of cardboard to punch matching holes on the rest of the journal pieces. You want everything to be lined up as perfectly as possible, especially the holes (you can always trim edges later if you need to). When you are done, stack everything up with the cardboard on the outside as the cover.
naturejournalinstruxC05-06-13

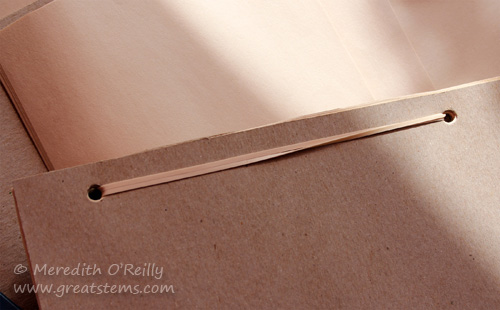
Take the rubber band and loop one end over the stick, then through a hole. Stretch the rubber band along the back and through the other hole, looping it on the other end of the stick.

naturejournalinstruxD05-06-13

And that’s it! Time to gather pencils and other drawing tools!

naturejournalH05-06-13

By the way, journals don’t have to be large. Perhaps it would be handy to have one that fits in a pocket. Younger children might find it rather fun to have a mini-journal.

cloudedsulphur05-06-13

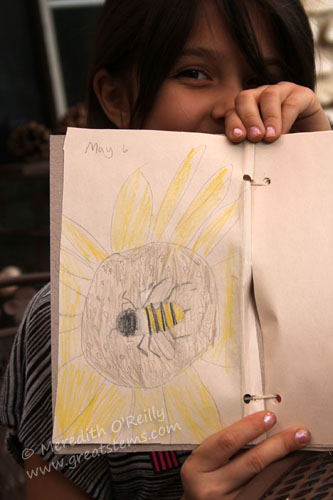
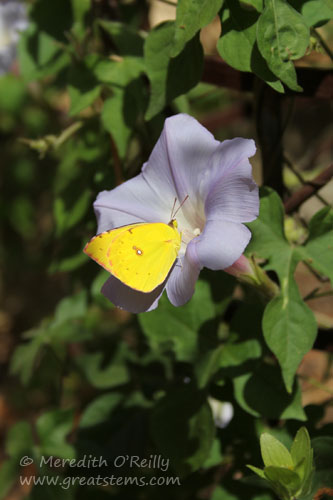
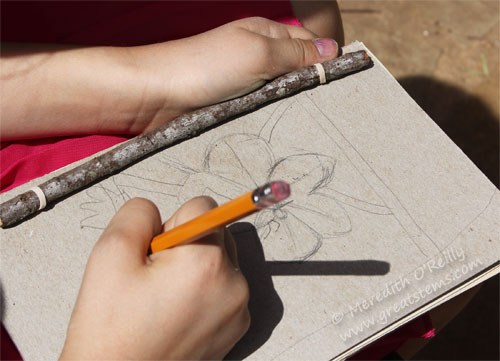
Let kids decorate their nature journals how they’d like, and give them the freedom and encouragement to spend time outside, letting them put whatever they want inside their journal. It might be easier for some kids to get started if you point out things they might not see at first, such as a tiny spider on the tip of a flower or the heavy pollen sacs on a busy bee. Note details, such as lobes or veins on a leaf or long antenna on an insect. Once you get them started, they’re likely to see things you didn’t notice!

naturejournalDD05-06-13

Be encouraging as kids explore art — some might feel frustrated at first. It’s all about fun and not perfection, but not all kids see it that way. Give them positive comments about about their work, pointing out details you especially like. To advance their skills (and possibly yours!) teach them how to create simple sketches that they can color in or add detail to later if they like. Kids might need your help with vocabulary, too — whenever you can, teach kids the names of plants and animals they see (it’s okay to tell them when you don’t know the names yourself — perhaps you can find out together!).

naturejournalABB05-06-13

If you go hiking or camping, be sure to take your journals with you! Sometimes it’s easier and quicker to just take a single pencil with the journal, do simple sketches and notes, then finish coloring or adding details at home (or inside the classroom, if you are doing this activity with students) — whatever works for all of you.

naturejournalF05-06-13

Remember, there is no set way to use a nature journal. Kids can take notes or draw, write a poem or song, make a list, tape or glue in an object they found — whatever moves them. How does that moment in nature make you feel? Write it down! Kids also might have fun using their nature journal to make a field guide. It’s a great way for kids to memorize and share the names of plants and animals, simply by writing them down as they learn them and including a drawing for the ID. They can even include a map, if appropriate.

naturejournalC05-06-13

Some kids might want to do tree or leaf rubbings in their journal, or press and glue down a flower or leaf. Kids with access to a camera might want to include some of their photographs in their journal. In fact, kids often surprise adults with their keen eye and photography skills — if you haven’t done this, give kids a chance to use a camera. Some people feel using photos takes away from the purpose of a nature journal, but I think that a nature journal should be anything you want it to be. Yes, I do love the inspiration and creativity that comes with pencil and paper, but a nature journal is personal. Let kids decide how they want to use the journal, and rejoice in what they do, learn, see, and share.

MEOnaturejournal05-16-13

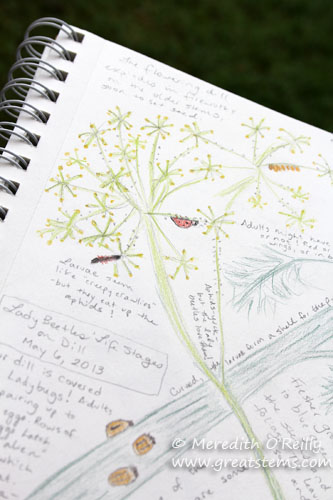
I keep a nature journal, too, as do my teens. Mine is a spiral-bound one, a straightforward sketch pad. There are prettier ones out there, but it’s all a matter of personal preference. If kids want a sturdier journal, take them shopping to let them pick out their own. Some might prefer lined paper or blank paper or a particular journal size. Even a 3-ring binder works.MEOnaturejournalB05-16-13

Finally, encourage kids to add something to their journal regularly. They are creating something memorable, a valuable keepsake that lets them experience again and again joyful or remarkable moments in nature. I know naturalists who still look back to journals from their childhood. Hang onto those journals long after they are all filled up!

Interested in other nature/wildlife activities for kids? Visit this page


Dill Power

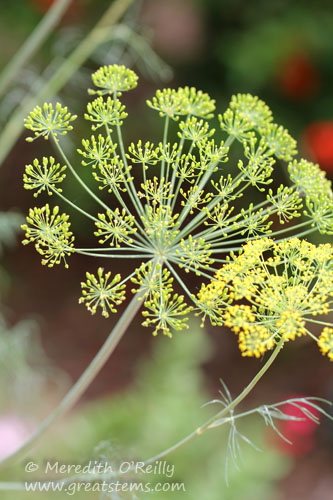
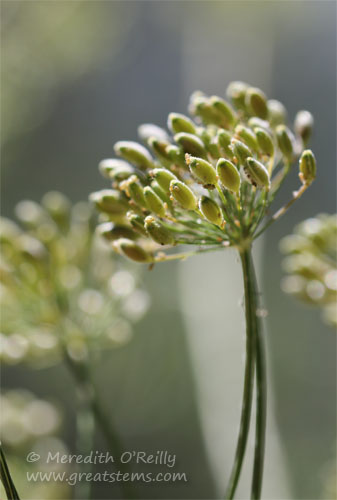
Here at Great Stems we grow dill, partly for cooking but mostly for wildlife.dill05-13 It being May in Texas now, this cool-season herb is overgrown in our garden and not as pretty as it once was. dillseeds05-06-13The blooms are giving way to seeds, but that’s not the problem. Aside from being long and lanky, much of it is now covered in aphids.
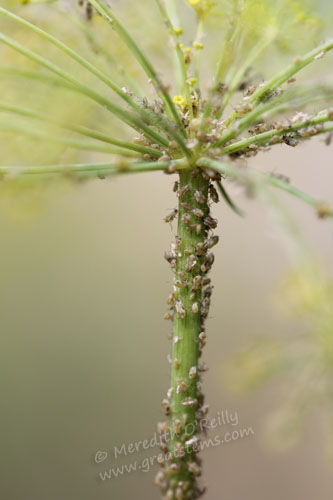
aphidondillB05-13These pest bugs seem to suddenly show up by the hundreds, thanks to females that can produce live young without the presence of a male (when fall weather approaches, the females will produce males to allow the formation of eggs for overwintering). The aphids aren’t noticeably affecting the dill, but the tiny pests and plant legginess made me long to at the very least give the plant a good trim. But as soon as I took a closer look at the plant, I ceased the consideration of that idea — the dill is supporting a beautiful population of wildlife I do want.
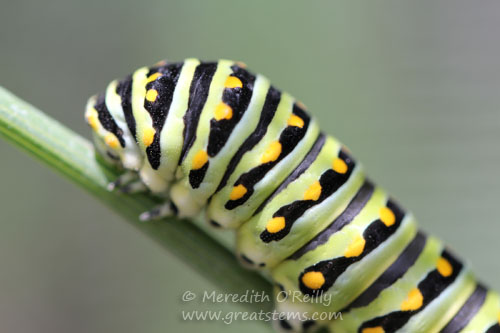
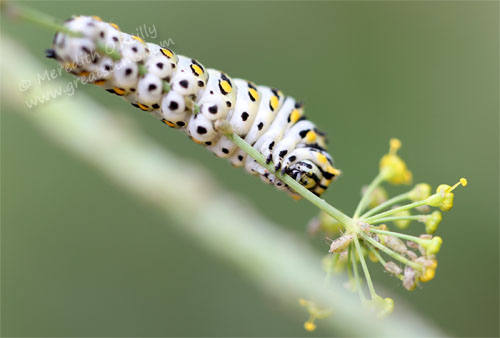
blackswallowcat04-21-13The biggest are the Black Swallowtail caterpillars. Gorgeous, they are.
blackswallowcatB04-21-13

Anyone else adore the little gripping legs of caterpillars? Those stubby-looking ones in the abdominal area are called prolegs, but they aren’t true legs. The true legs are up near the head, in the thoracic area, and those are the legs that will be retained for adulthood. See them? Back at the other end, on the terminal abdominal segment, some caterpillars (including Black Swallowtails) and other insect larvae have an additional pair of prolegs, called anal prolegs.

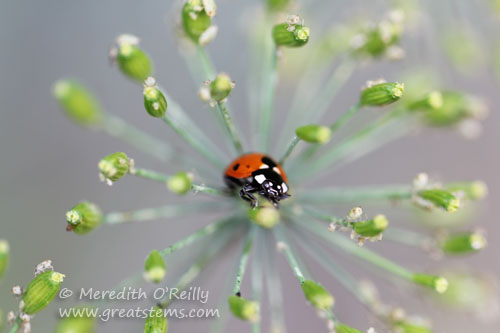
ladybug05-13Lady beetles, popularly called ladybugs, dominated the rest of the dill. They are fierce consumers of aphids, and they have found quite the feast on my overgrown herbs.
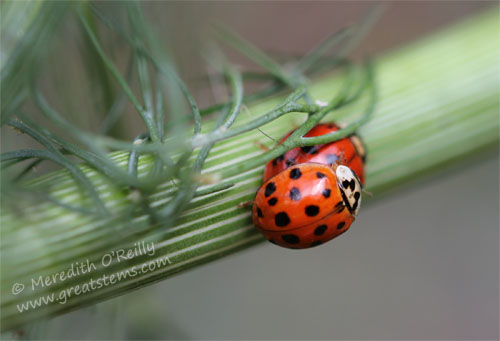
ladybugsmatingC05-06-13Many male and female lady beetles have paired up, and “in the mood,” they’ve been busy.
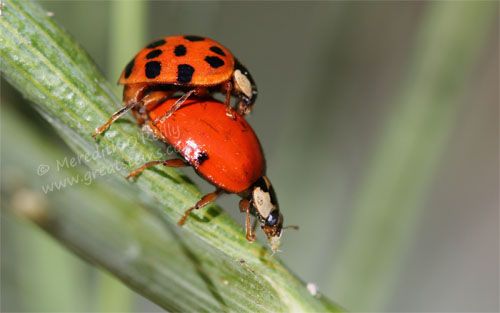
ladybugsmating05-06-13Actually, the females didn’t really stop to mess around, so to speak. The one above, for example, kept eating aphid after aphid, regardless of the male attached to her.
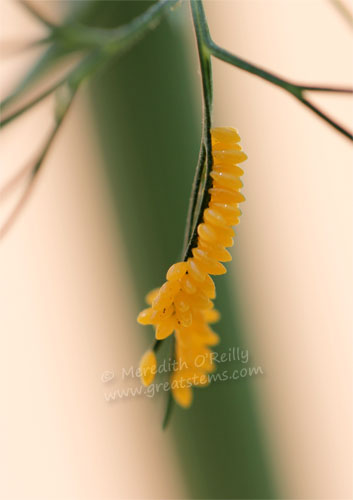
ladybugeggs05-06-13The result of happy lady beetle love? Happy lady beetle eggs, and lots of them.
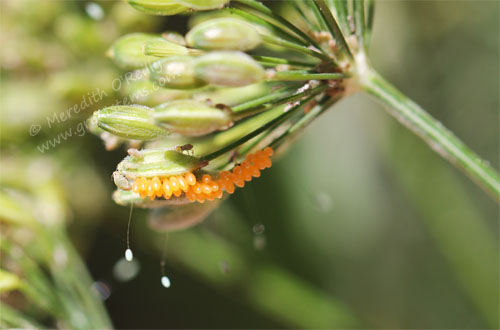
Edit: I’m fairly confident that most of these lady beetles are the darn invasive variety, Harmonia axyridis, the very ones responsible for the decline of many of our native species. Frustrating. But let me continue, as the basic concepts I talk about here are still the same.

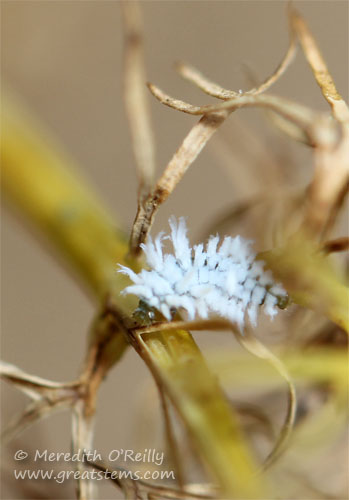
ladybugeggslacewing05-13Here you can see both lady beetle eggs (the orange ovals) and lacewing eggs (the individually placed white eggs dangling from threads). I hope the lady beetle larvae emerge first and then skedaddle away before the voracious lacewing larvae arrive. But I’m not too worried, as there are plenty of aphids for them all.
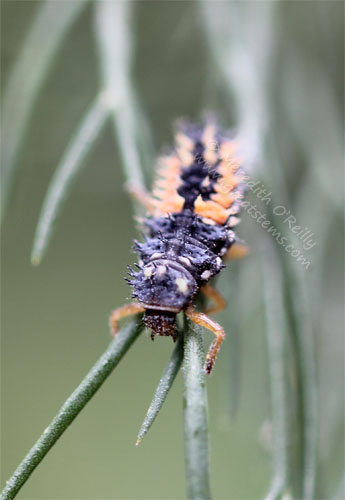
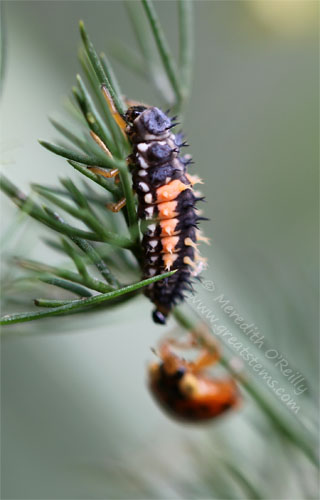
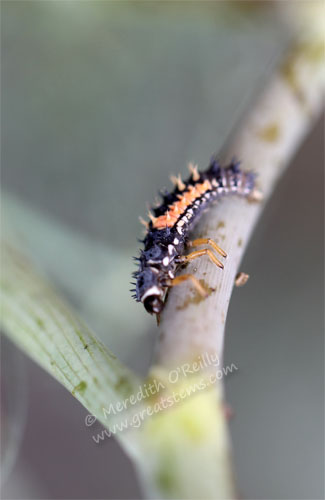
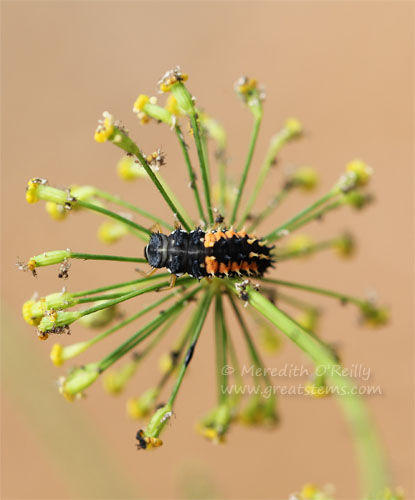
ladybuglarvaD05-06-13Ladybug larvae are rather alien-like in appearance, but they are gentle little things — well, not to aphids.
ladybuglarvaeC05-06-13

Hey, look at those great legs (or should I say, great stems? hohoho)! I guess my interest in insect legs doesn’t stop with caterpillars.ladybuglarva05-06-13

As it turns out, I have a lot of ladybug larvae on my dill. A LOT. And that’s a good thing.

ladybugsB05-06-13

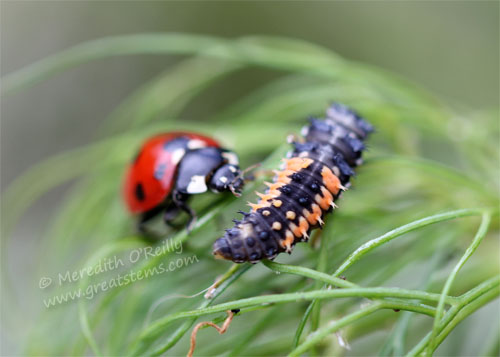
Even so, it wasn’t easy to get a picture of both adult and larval stage together. In fact, right after I took this picture, the larva fled the scene, while the adult seemed to give chase. I have no idea whether there was a threat of predation, but I do know that adult lady beetles consume other insects and larvae, in addition to aphids.ladybugsC05-06-13

ladybugpupaeC05-06-13

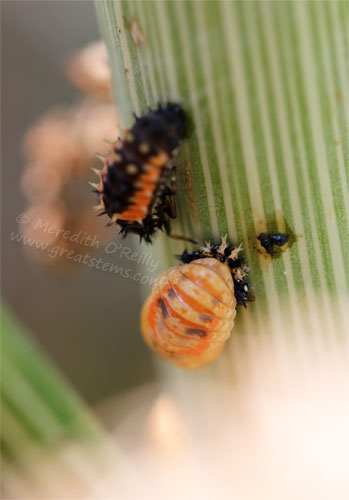
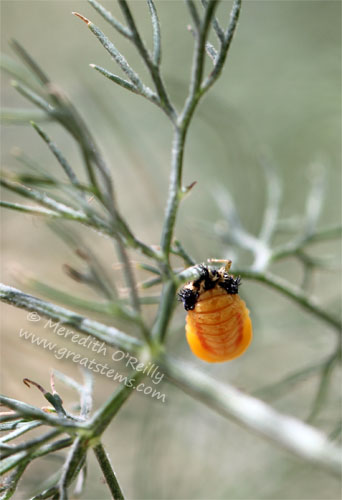
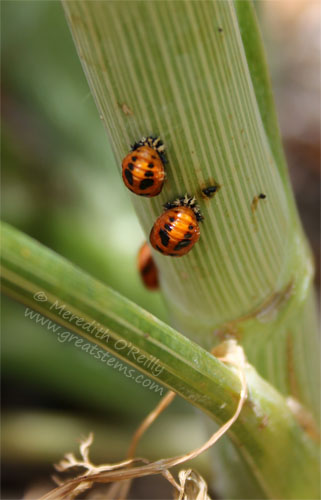
When the lady beetle larva is ready, it will enter its pupa stage. Over the next several days, a complete metamorphosis will take place, and eventually an adult lady beetle will emerge. Above you can see one larva already in pupa stage, the other just starting.ladybugpupaB05-06-13

ladybugpupa05-06-13

The base of the dill was a popular spot for pupae. Once the adults emerge, it will take a few hours for their exoskeleton to harden and darken. Then it’s time for an aphid feast and getting a new ladybug cycle underway.

mealydestroyer05-13

Oh but there’s more! This mealybug destroyer wanted its fair share of aphids, too. Mealybug destroyers (Cryptolaemus montrouzieri) are also members of the lady beetle family. They aren’t native to the states (they were introduced  from Australia in 1891 to do exactly what they do — eat mealybugs, aphids, and scale insects), but they seem to be helpful without affecting native populations of lady beetles. They actually look like larger versions of the mealybug pests they are known for eating — this is called aggressive mimicry.

There are other insects taking advantage of the aphid feast offered by the dill, but I’ll stop here. The dill, getting uglier by the day (its prime time is during cooler temperatures), gets to stay, too beneficial a haven to remove.

Bob and Weave

While we haven’t settled on a name for our parent owls yet, we’re going with Bob and Weave at the moment. They’ve been with us a few years now, and members of the family should have names — why we haven’t done this before, I have no idea.

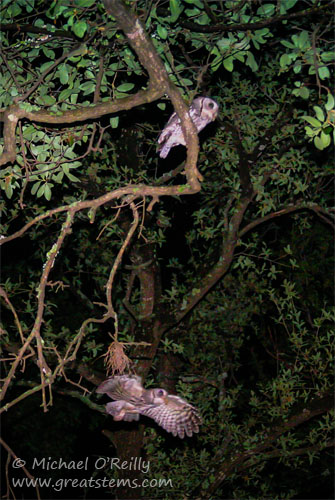
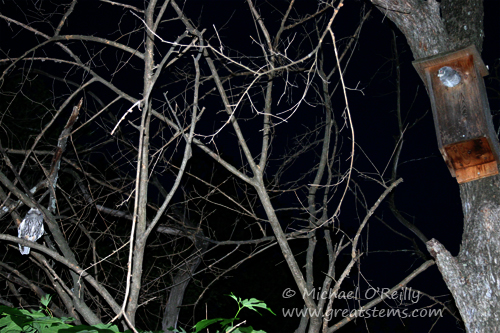
screechowlparents05-009-13

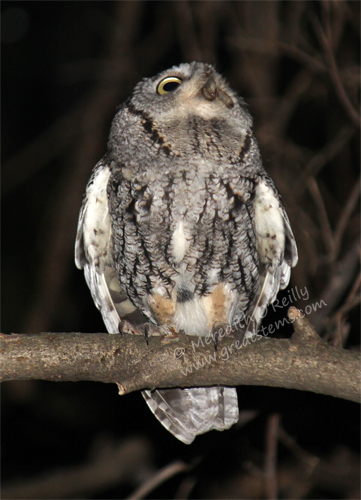
My husband and I have been enjoying sitting outside during the transition from dusk to dark, watching as baby owls poke their heads out of the nesting box and waiting for Bob and Weave to swoop in with the first meals of the night. Both of us were there last night with our cameras, but then I wanted to kick myself when I discovered that my camera battery was dead. So I instead got the binoculars and used my “owl eyes” to spot the parents and study the owlets’ behavior to help my husband capture pictures with his camera. This one is my favorite — Bob and Weave being the great parents that they are! I’m reasonably confident that Mama is on the upper branch, and Papa is the one swooping in. Bob seems to be smaller and darker than Weave. Can you see that both have food ready for the babies?

One owlet was sticking so far out of the box last night that I worried a sibling was going to shove it out the door. I’m hoping this rainy weather we’re having will keep them in the box another couple of days. We’re having fun watching all this!

Owlets!

I can’t help but share more owl pictures. The countdown to fledge time is here, and very soon our little group will leave their nest. Then I’ll be sad but proud, too — proud of them for getting so big, proud of Mama and Papa Owl for taking such good care of their babies, and proud of us for building the nest boxes a few years ago.

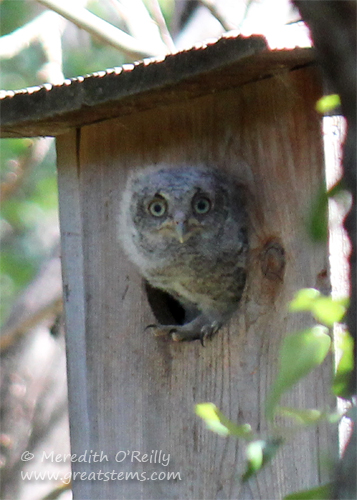
screechK05-07-13Taking pictures of owlets is an interesting process. We have to be very careful to start by taking pictures far across the yard, in case they get skittish and disappear as we approach. We also have to be fast but discreet as we take pictures, and we just have to hope they don’t come out blurry. As the sun goes down, we’re challenged by the decreasing available light, and then comes full darkness. All the while, you can’t move very quickly, or the owls will hide themselves away in a flash.screechA05-07-13
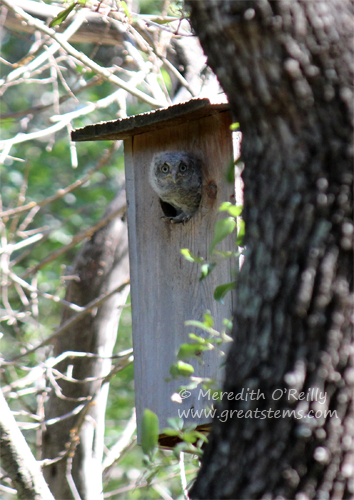
This little screech owl was brave enough to fully sit in the doorway of the nest box. It spent a lot of time during the day just looking around at the big, big world. For such a little owl, it has some big talons! Here’s a closer view:

screechB05-07-13

I guess having big strong talons helps you “claw” your way to the top, literally — and before your siblings have a chance to get there. We still don’t know the exact number of owlets we have, but we now know that it’s at least two.

screechE05-07-13At this point in the photo sequence, you can see that the sun is going down. After a late afternoon nap, one of the owlets peeked out to start looking for mama. Its eyes would track everything that moved — birds, bugs, dogs, and us.
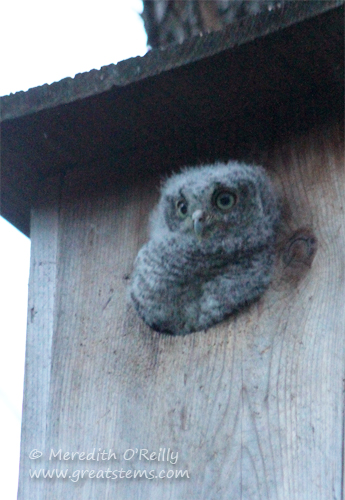
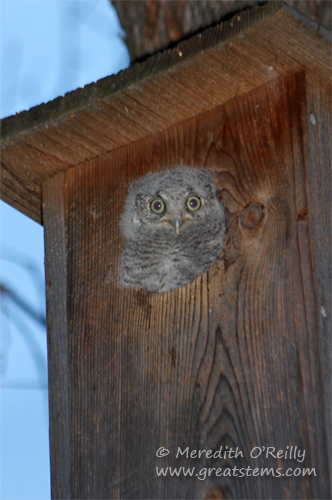
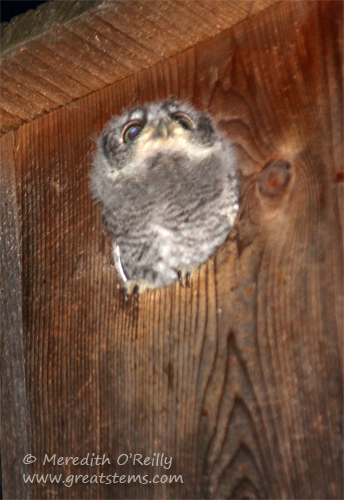
screechC05-07-13

I love the classic “bob and weave” movement that owls do, and this owlet did it like a pro. Of course, what it is really doing is triangulating, improving its 3-dimensional view to better target its, well, target. This will be important when it starts hunting for food on its own.

screechD05-07-13

As it got darker, the owlet began more energetic searches for mama and papa. Of course, anytime I moved the camera to my face, the owlet stared at me instead.

screechG05-07-13

But then it would look for its food delivery again. Then finally, the evening mealtime began.

screechL05-07-13

Can you see the food in mama’s mouth? Or is that papa? I never know.

screechI05-07-13

Here Mama/Papa Owl and Owlet watch each other from a short distance.

screechF05-07-13This time, Mama/Papa has brought what appears to be a cutworm. Yum? Well, I suppose cutworms are to baby owls as chocolate is to me.
screechJ05-07-13

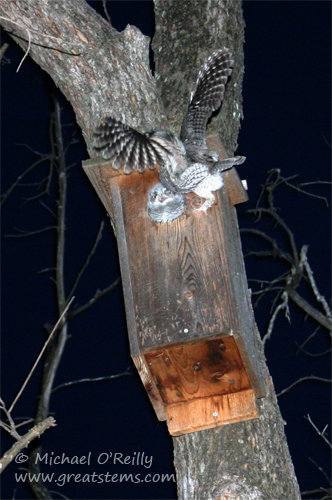
Even though one owlet seemed to hog the doorway, Mama/Papa Owl would push it back into the box when they flew in with food. Why? Because there were more mouths to feed!

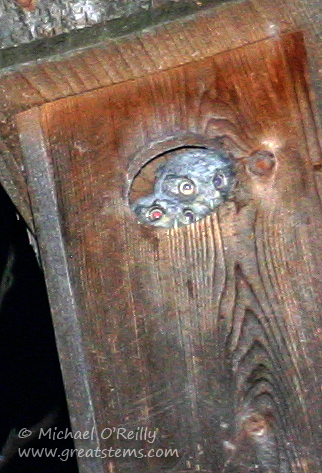
screechH05-07-13Here’s our glimpse of two owlet siblings. I hope we’ll be able to get a better picture before they fledge, but the owlets will have to share the doorway — I’m not sure they’ll want to do that! Could there be more in there? Whooooo knows?

By the way, we thought it was time we named our mama and papa owls. After all, they’ve been a part of our family for a few years now. I actually think “Bob” and “Weave” sound like good names. Michael suggested “Woody” and “Hooter” but that is so NOT going to happen. We’re open to suggestions!

Wildlife Projects for Kids: Nesting Materials

In the springtime, mama and papa birds busily collect materials to build their nests. Different bird species will use all sorts of materials to construct a well-supported and often cushioned place for their eggs and future young. Kids and grown-ups can easily gather materials to help out parent birds, setting them out in homemade or purchased containers. What a fun project!

nestingmaterialsB05-06-13

eggnestingmatsB05-06-13

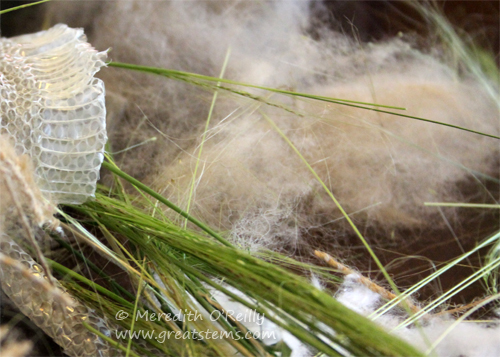
Dog fur is one of my favorite materials to use, perhaps because at my house it’s so readily available (and the dogs are content to share, as they enjoy getting brushed). But I love the fact that Titmice and other birds will sometimes steal clumps of fur directly off sleeping dogs outside — it certainly makes a nice soft lining for nests. Be sure you haven’t used flea treatments on your pets if using this material for nesting options.

nestingmaterialsD05-06-13

When gathering materials, remember that natural is best, of course. Consider the following:

  • Dog fur (free of flea treatments; cat or rabbit fur works, too)
  • Dry grasses (free of pesticides or herbicides)
  • Hay or straw
  • Real cotton fiber
  • Feathers
  • Tiny twigs
  • Leaves
  • Pine needles
  • Sheep’s wool
  • Plant fluff and seeds
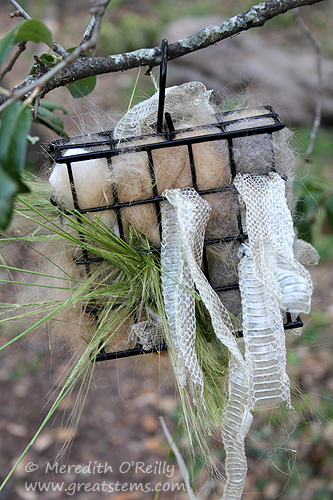
  • Snake skin (if you have pet snakes, for example)
  • Coconut fiber

Note: Some people provide thin strips of cloth or pieces of yarn. Natural materials really are best. If you choose to provide cloth or yarn, do so responsibly. Stick with yarns made of natural fibers, such as wool or cotton — these will break down naturally in the environment. Keep the pieces short — 3 or 4 inches — longer pieces can wrap around a bird’s foot or wing or neck, causing death or serious injury. Please do not use acrylic, nylon, or other man-made materials. If using strips of cloth, again stick with natural materials. Keep the cloth less than 5 inches long, cut into 1″ strips.

Never use dryer lint, which can contain harmful residues or retain moisture. Also, avoid any other synthetic materials.

nestingmaterialsA05-06-13

Snake skins? you might ask. Believe it or not, some birds decorate, so to speak, their nests with snake skins. It is believed that they do this to keep would-be predators away, especially mammalian predators. Birds that have been seen using snake skin include Titmice, Blue Grosbeak, and especially Great Crested Flycatcher. I imagine others do it, too, if not for predator avoidance then just because it makes a handy material.

craftstick nestingB05-06-13

craftstick nesting05-06-13

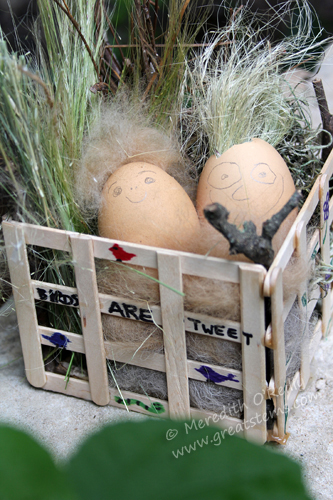
It’s easy to be creative with holders — the important thing is to have fun! Here are some ideas:

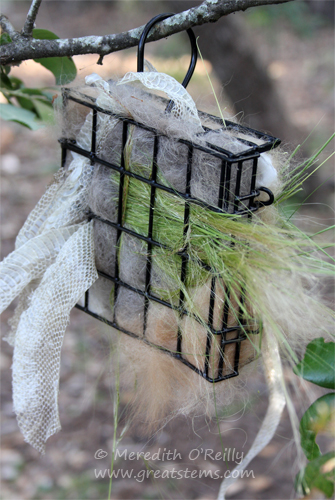
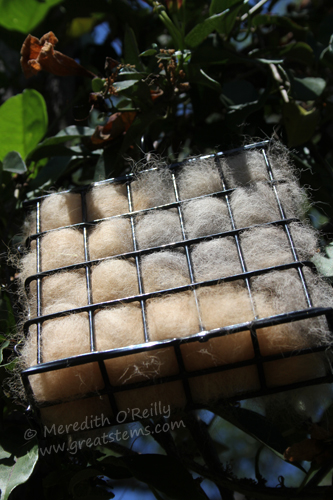
  • Suet container
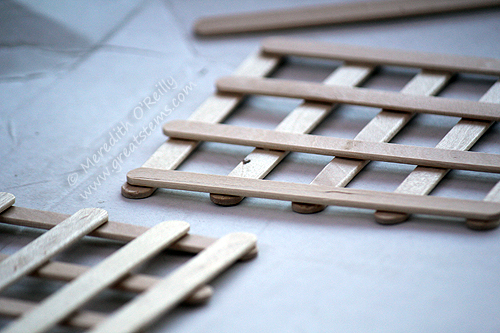
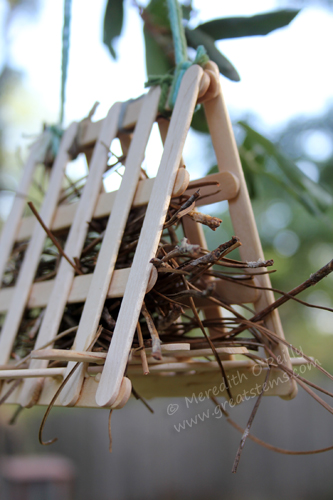
  • Homemade box of twigs or craft sticks (use outdoor, non-toxic glue)
  • Grapevine ball or wreath
  • Small or medium-sized basket
  • A bowl or saucer or small bucket
  • Twine to make a loose ball
  • Cardboard egg carton, with holes cut out
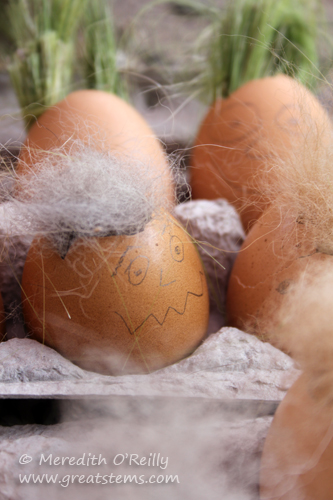
  • Eggshells to make little people
  • Strawberry basket
  • Hollowed-out coconut shell

Whatever you choose, think about bird safety. Can birds land and fly away without getting trapped? For this reason, never use mesh bags — they can trap feet and legs or be a strangulation hazard.

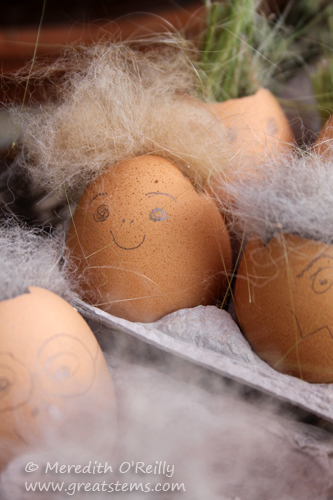
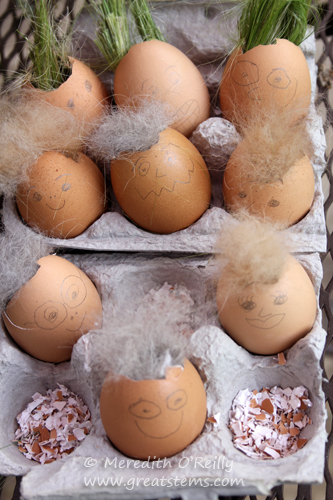
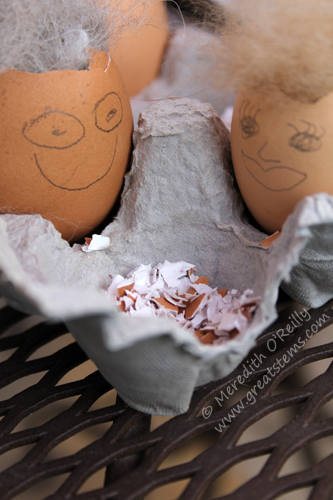
eggnestingmatsD05-06-13We had fun making eggshell “people.” Eggshell people are multi-purpose. Obviously they can serve as holders for different nesting materials, but the eggshells themselves can be beneficial as a calcium source for female birds, who need the mineral in order to lay eggs with strong shells, boosting the survival rate for their young. In the wild, birds might consume snail shells for calcium or even the discarded eggshells from their own nest.

eggnestingmatsC05-06-13To make eggshell people, simply carefully crack eggs as you make breakfast one morning — create a small hole toward one end of each egg. Be sure to save the small broken pieces. Rinse the egg shells and broken pieces, then sterilize them by boiling them for 10 minutes, baking them at 250 degrees F for 20-30 minutes, or microwaving them for 2 or more minutes (with more eggs, lengthen the time). When the eggshells are cool and dry, fill them with dog fur, grass clippings, or other materials. To make a face, paint on fruit or beet juice, or just use a pencil to make a light drawing (FYI: today’s pencil “lead” doesn’t actually contain lead, but large quantities of the carbon-based graphite could irritate birds’ GI tracts (think parrots chewing on pencils); however, a minute amount isn’t a concern).

eggnestingmatsA05-06-13

Crush the smaller broken pieces until they are seed size. Set them out in a small bowl or egg carton, or just sprinkle on the ground — possibly near a bird feeder if you have one. As birds remove materials from the eggshell people or if the shells get broken, just crush those up, too. Then compost the container. Voila!

nestingmaterialsE05-06-13

One extra tip — make sure a bird can easily pull the materials out of the holders. Sometimes suet feeders, for example, can clamp items in too tightly, especially if you overstuff them. Give materials a test pull!

craftstick nestingC05-06-13One final note — have fun!

Interested in other nature/wildlife activities for kids? Visit this page