Pollination Fascination

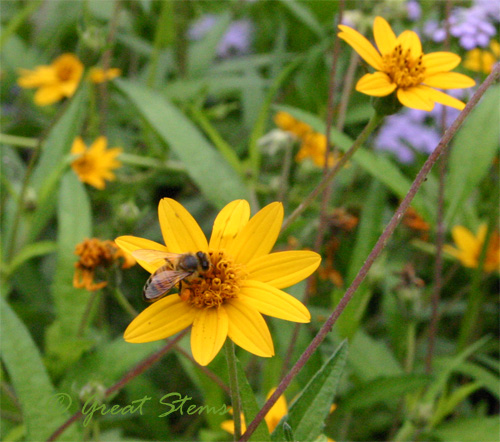
While taking a stroll near the butterfly garden, the sound of busy bees caught my attention, and I realized that my little pollinating friends had moved from the pumpkin flowers over to a nice big batch of native plants, and my gardener’s heart did a little pitter-patter.

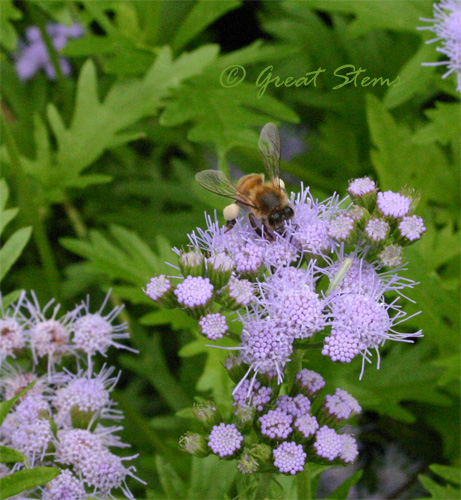
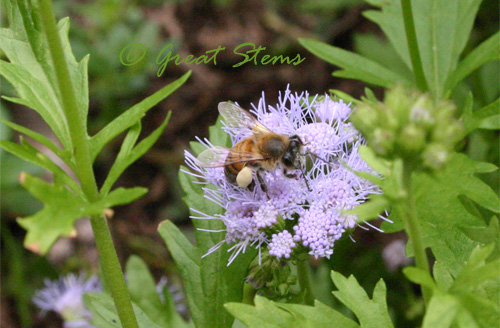
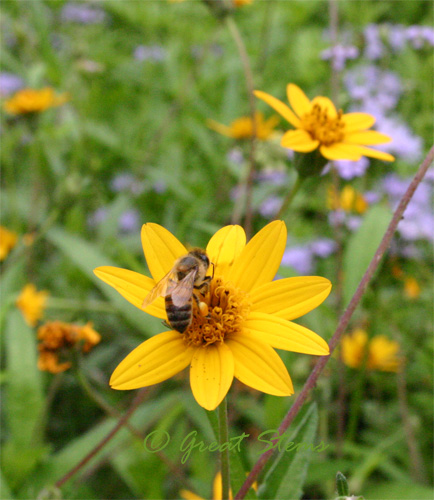
But in observing them, I realized something I’d never noticed before. Gregg’s Mistflower produces white pollen.

beeonmist10-07-09.jpg

My mind was boggled. In all my years watching wildlife, I never knew that pollen could be anything but yellow?

beeonmistb10-07-09.jpg

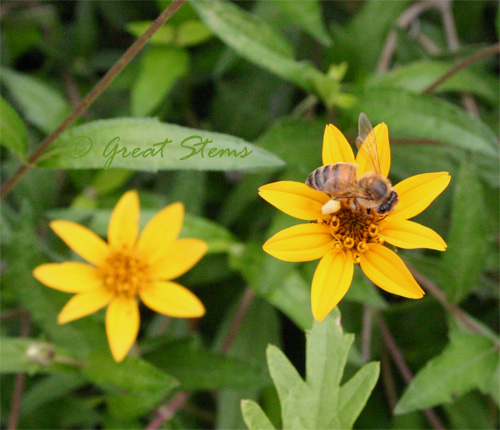
beeonmistc10-07-09.jpgIn the same patch of flowers, the honeybees on the Zexmenia had bright orange pollen baskets on their little legs.

beeonzex10-07-09.jpg
beeonzexc10-07-09.jpg
This little bee has been to both Mistflower and Zexmenia. His pollen is pale orange.

beeonzexb10-07-09.jpg

I was fascinated. Today was a day where nature just had me reeling.

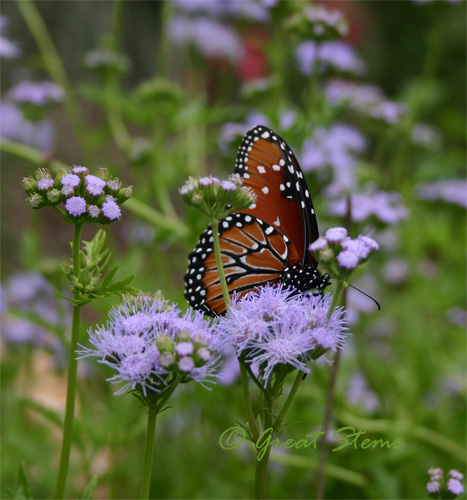
When I could tear my eyes away from the bees, I noticed a beautiful male Queen butterfly keeping me company.

queenb10-07-09.jpg

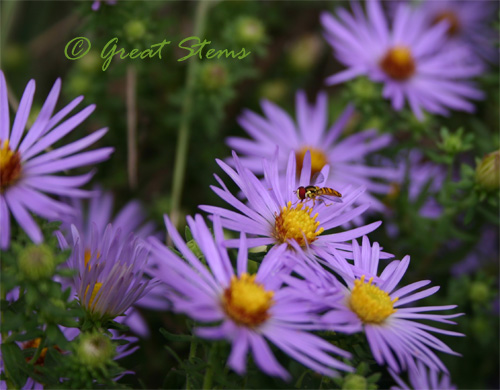
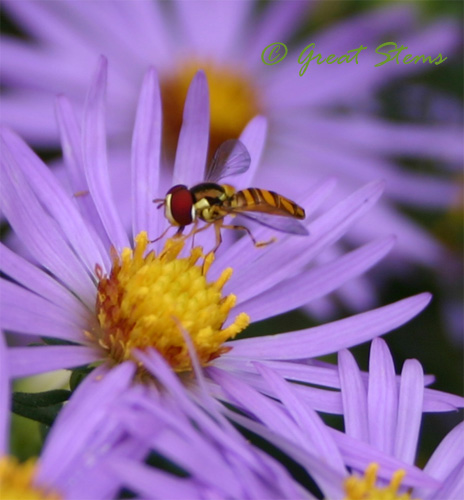
And on the Fall Aster, newly blooming just on the other side of the Gregg’s Mistflower, little hoverflies enjoyed a feast without getting the attention of the bigger bees nearby. 
 

hoverflyb10-07-09.jpg
hoverflyc10-07-09.jpg
Sure enough, these little flies can hover. Someone sure came up with a brilliant name for them! (Hey, guess what hoverflies eat? Aphids! Yay!)

Pollination inspiration, here’s my poem for the day:


Flyby

© Great Stems


Fly little fly

Fly little bee

Queen be flying

But not Queen Bee


The $40 Disappearing Fountain

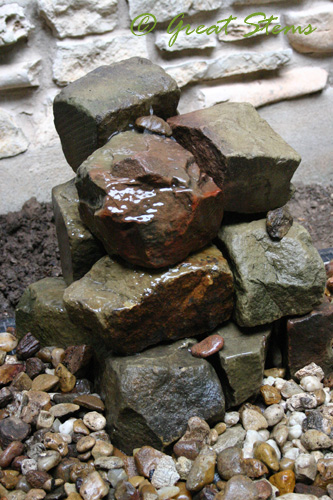
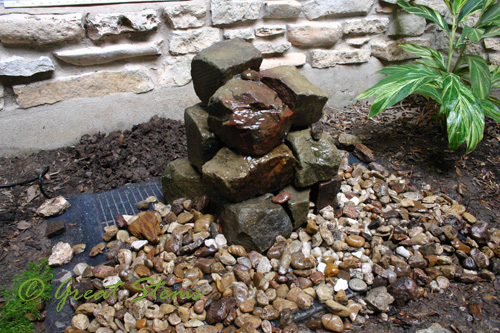
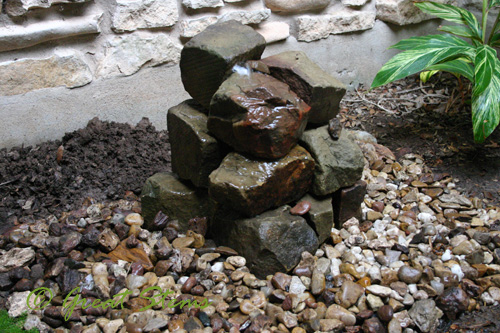
fountaing10-03-09.jpgFor some time, we’d been wanting a little fountain in one of our front entryway beds, a sort of zen moment of trickling water as one approaches our front door. But getting a classic planter-style container with reservoir would have cost us more than $500, and it wasn’t really my style anyway. So I wanted to see how cheaply we could make a disappearing fountain using as many materials from home as we could. We could have probably made it for $21, but we decided to be “practical” and buy a couple of other items. It actually cost us less than $40 — I rounded up for the sake of the title. I’m not counting the cost of the electrical outlet, as we were going to be putting one out there anyway, not just for a fountain, and we already had a bunch of those parts anyway.


fountainh10-03-09.jpgMoney spent:
We bought a large tub normally used for mixing cement ($11), as well as a small 130 gph pump (about $21). We also ran out of window screen, so I bought some more aluminum screen material ($7), but the rest will be used for plant containers, so I’m not really sure whether to add the cost in — regardless, that’s still less than $40. We seriously considered not using the basin and using other items we had at home, but in the end, we decided this might be best. 

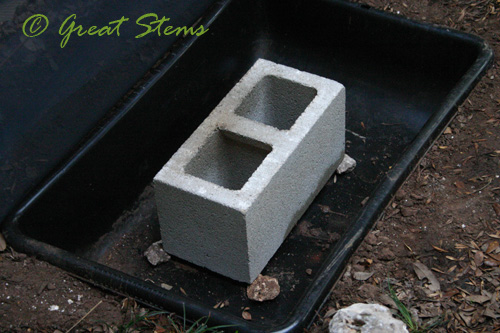
Materials gathered: An old grill from our neighbor’s uncle’s junk he was having hauled off, leftover block-style rocks from our other neighbor that we had used to circle a tree in the backyard, a concrete block, and little colorful rocks we found in the backyard.

At this point, I have to give out kudos to my 12-year-old son. This was more or less his pet project, and while I gave some guidance in regard to the plan (he had some rather far-fetched ideas and I had to bring him back to Earth a bit), he did the bulk of the work.

The first step was to dig out the plants from the area and give them new homes in the front yard (that really did a lot to make our front yard better, too). And then the hole for the basin was dug. The basin we chose turned out to be ideal for the job — the rock under the soil would have prevented the use of a deeper reservoir. (Please ignore the plastic edging in these photos — it came with the house, and at some point it will go away, because I can’t stand it.)

fountaina10-03-09.jpg

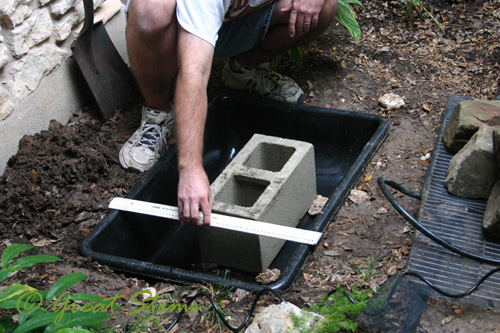
The concrete block is there to support the weight of the rocks on top of the grill, and we stuck some rocks underneath to let water flow. The ones we settled on are in the leveling picture below.

Dad helped with the leveling (and he also got to play electrician to put in the outdoor outlet).

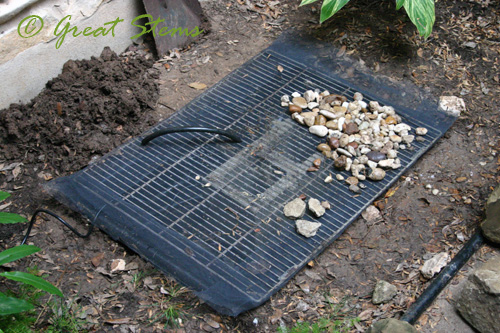
fountainb10-03-09.jpgWe wrapped the window screen around the grill and cut a little hole for the pump tube.

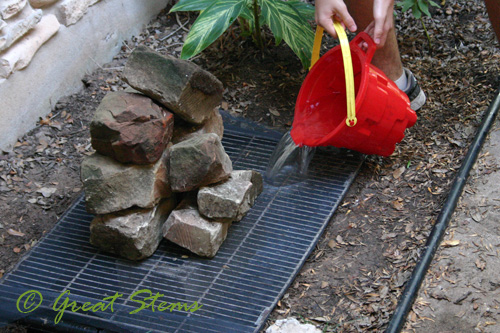
fountainc10-03-09.jpgThen we poured in some water collected from the recent rains (the change in rocks in the images had to do with some adjustments we made regarding the pump placement).

fountaind10-03-09.jpgAnd the rest was just building the rock feature and collecting the little rocks for the base. Simple as that! Here’s a picture of the rock work in progress…

 
fountainf10-03-09.jpg

I love that it’s a little rock statue, and while I envisioned something like it, it came out even better than I imagined. Now I just need to choose some plants to go around it! I’ll probably end up spending more on those than I did on the fountain itself…

fountaini10-03-09.jpgThank you to my son for all his hard work and dedication to getting the job done, and thank you to my husband for the electrical work that I’m sure he’ll get finished soon (hint, hint).

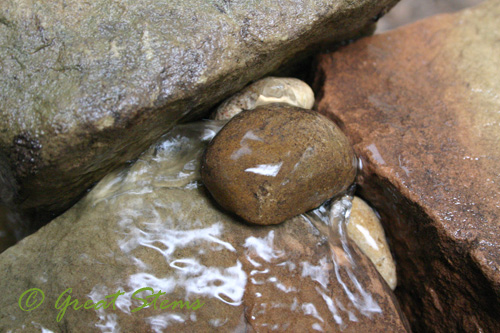
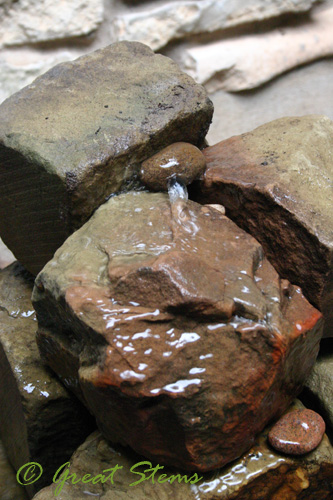
Now, I should point out that disappearing fountains are technically a no-no during our city’s Stage 2 water restrictions. We’ll turn it back off when water is an issue again, but right now we have so much rainwater gathered that we actually have to find a place to put it all — the grounds are saturated and the bins are overflowing. This fountain is only going to be filled with rainwater from the roof or gray water, NOT hose water. And I think it looks wonderful whether water is flowing or not, so when it has to be turned off, it’s still going to make me happy. The water just gives that nice trickling sound, and I’m hoping we’ll see some wildlife visit on occasion, too.

 fountaine10-03-09.jpg

Love It or Leave It: Horseherb

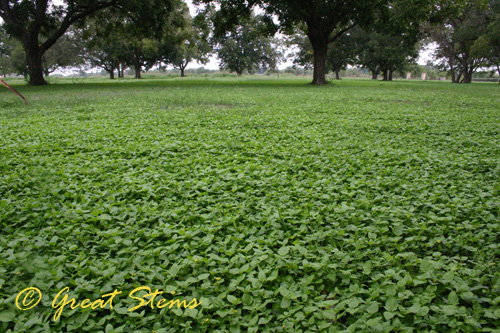
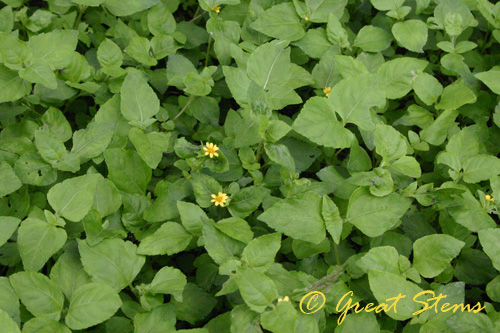
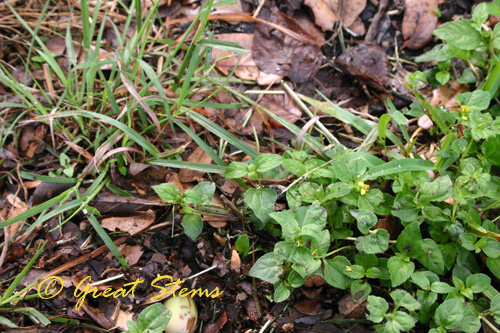
Ah, Horseherb (Calyptocarpus vialis), also called Straggler Daisy. There doesn’t seem to be much of a gray area on this one. People either truly love this little groundcover or hate it with a passion. I’m of the former variety. I adore this little plant.

horseherba10-02-09.jpgWhy do I love it? If you’ve ever walked past a field of horseherb, you are presented with an incredibly lush sea of green, with the daintiest of little yellow flowers throughout to catch your eye. I’ve seen some gorgeous fields, and each time I was mesmerized by the beauty and serenity of the scene. 

horseherbc10-02-09.jpg

Field of horseherb at Hornsby Bend

I almost don’t want to walk on it — it’s so pretty in appearance — but for a non-lawn groundcover, it can withstand some foot traffic. It only needs water in the worst of droughts, and it loves shade and sun.

Horseherb is also native to the southern U.S. on into Central America, and it makes a great alternative to the exotic and water-hogging Bermuda and St. Augustine grasses. I’d love to see it replace Asian jasmine, as well — now THAT is a plant that will take over a garden bed and yard. Horseherb is considered semi-evergreen, blooming most of the year except in cold winter areas, and if you like you can mow it, or you can let it grow to its typical max height, which is about 8 inches. But as bonus, horseherb also attracts small butterflies, including sulfurs and skippers. And think of all the happy little lizards that will zip underneath the foliage!

horseherbb10-02-09.jpg

It’s an eco-friendly solution to having a lawn without having to resort to heavy chemicals or fertilizers or ridiculous amounts of water to sustain it. Lawn irrigation tops the list on where our municipal water goes, and the time for water conservation is now, especially in Texas.

Why do some people want to leave it? Well, in some yards it can be a big nuisance. For those who keep a grass lawn, horseherb is a competitor, and it can be difficult to get rid of. And it can spread into garden beds, though I’ve found that so far it doesn’t bother much with my well-mulched beds. In fact, one of the characteristics of this plant is that it supposedly doesn’t do well in areas that have heavy leaves that take a long time to decompose. It spreads by both seeds and runners, which means that if the goal is to remove all of it, you’re going to have a challenge. In a wildflower field, I have to imagine that it would be another competitor, but it’s going to depend on the goals you have for your yard or area.

But for now I prefer to embrace its desire to spread. What I loathe is the Bermuda Grass and St. Augustine in my yard. I loathe the unnamed weeds that dominate my backyard. I love my buffalograss in the back, but it too is losing to the weeds, and in the drought, the buffalograss was dead most of the time, so I didn’t end up loving it as much as I wanted to – I loved it when I could see it.

horseherbd10-02-09.jpg

What would you choose: spotty grass or spreading horseherb? 

Will I regret it? Some gardeners are going to shout out an absolute yes to that question. But I do regret having Bermuda and St. Augustine (not that I planted it; that was the previous owners), so it’s not a big deal to switch from frustration with the grasses to frustration with another groundcover, unless I’ve got all three to deal with at the same time. At least horseherb is native. But I’m going for the complete wildscape, and I have a lot of ground to fill and a lot of grass to get rid of. In those bed areas I want to keep maintained, I’ll do my best to keep horseherb in check. And love it everywhere else!

So how about you? Do you prefer to love it or leave it?

The After Bird Bath

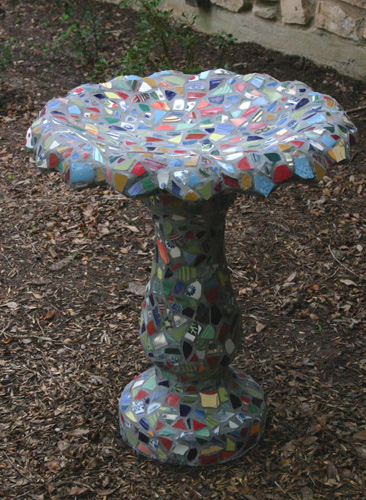
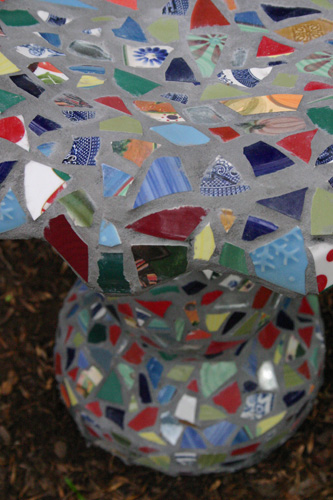
It took longer than I had planned (doesn’t everything), but the bird bath is finished! Well, it’s got another day to cure before I put water in, so maybe it’s not technically finished, but close enough for pictures! Here’s the After Bird Bath.

birdbatha09-28-09.jpgI apologize for the darkness of the photos — there’s a thunderstorm brewing out there. I’m crossing my fingers for rain, even though the bird bath hasn’t finished curing. I might go out and put a temporary cover on it just in case.

birdbathb09-28-09.jpg

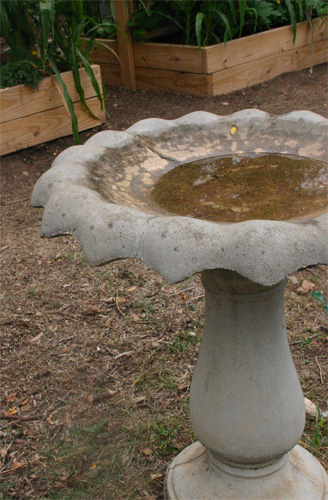
Here’s the Before Bird Bath. We got this for free from someone on Craigslist. It had cracks in the top, was ugly, and was barely functional.

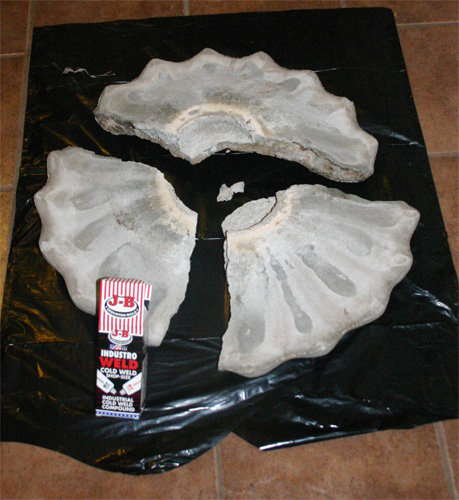
birdbath09-09-09.jpgDuring a recent rainy week, my exterior painting got put back on hold, so I decided it was a good time to make the bird bath prettier. And because life likes to play its little jokes, the top part broke into three pieces when we moved it indoors, adding another day’s delay in getting started on the main project.

birdbathd09-28-09.jpg

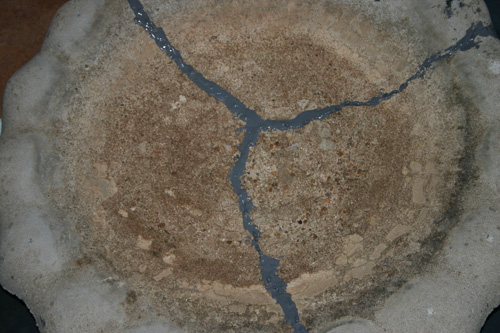
I searched for a non-toxic adhesive that was strong enough for concrete and found JB Weld Cold Weld Compound. I spoke to a person at the company to make sure it was the best choice for repairing a birdbath, and she was confident that it was safe enough for my feathered friends and strong enough to hold the heavy concrete together. So I glued the pieces back together, and I’m pretty certain that if the bird bath breaks again, it won’t be in those glued cracks, but elsewhere in the concrete.

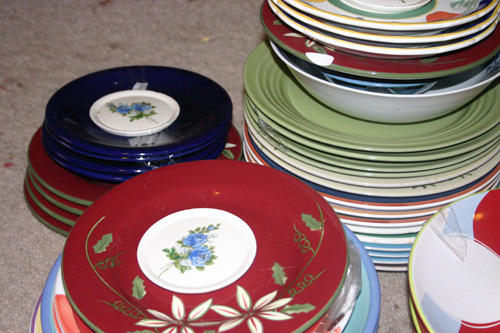
birdbathh09-28-09.jpgFor the pieces, I spent several days scouring the local Goodwill outlet for colorful plates I could break. What I learned while breaking them was that some plates are just too thick and porous to be useful, so in the future I will be more selective in my choices. I originally was going for color, but then later I started going for a certain thickness. Ideally all the pieces would be similar thickness, but I had to work with what was available.

birdbathi09-28-09.jpg

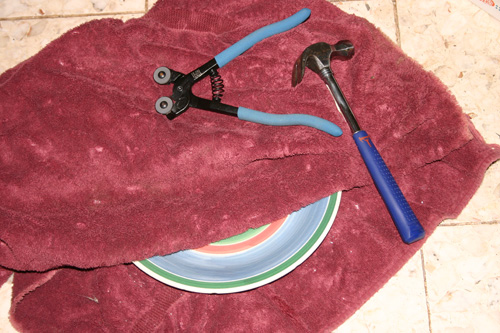
I used a hammer to break the dishes in an old towel (with safety goggles on). The towel keeps the pieces contained. I kept tile cutters on hand in case I need them to trim a piece. But mostly I used the hammer.

birdbathg09-28-09.jpg

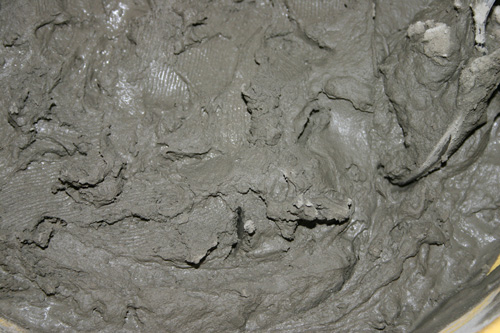
Then came time to adhere the pieces to the bird bath. I did my best to research what materials to use, but there’s a lot of conflicting information out there. Ultimately I decided to use thinset to adhere the mosaic pieces to the concrete. I chose Versabond because it was readily available and says that it’s appropriate for outdoor use, but some people said they don’t like it. So time will tell. Wear a dust mask when mixing this product, due to the cement dust. Follow the bag instructions — the goop will be thick like peanut butter.

birdbathe09-28-09.jpg

Depending on the area, I used a putty knife, a plastic knife, or my gloved fingers to spread on the thinset, then placed the mosaic pieces at random, working in small sections at a time. Other times I backbuttered the pieces (spread thinset directly on the back of the mosaic piece) so they would stick better. The downside to using thinset is that it sometimes would be thick between the pieces (where the grout also needed to be), but I tried to pay attention and make sure that the thinset wasn’t too high up.

birdbathf09-28-09.jpg

This process took a couple of days. It’s a lot of work making something look random! Also, I ran out of thinset toward the end and had to buy more. Should have bought the big 25-lb bag.

I don’t have pictures of the grouting process, because I didn’t want the camera near the mess, and I was mostly alone when I worked on this project. But I chose a sanded grout, though again I did my research. I ruled out using more of the thinset as grout.

When mixing the grout (again, with mask), the texture of the goop is different — it will be less thick and wet than the thinset was, and it will be more gritty. Follow the instructions on the container, then smear it into the crevices between the pieces. After the recommended number of minutes, take a damp sponge and begin to clean up the pieces — the grout will become smoother between the pieces. I had to do this several times as I went along, and then, grumble, I ran out of grout (right toward the end again) and had to rush to the store to get more. Should have bought two boxes from the get-go. The grout is a messy process, but it’s very rewarding when you see the finished look.

To seal or not to seal? I searched and searched for information, but the gist of it is that grout sealers are almost all toxic and will break down over time when in water. Since this is for a bird bath, bird health is my main concern, so at the moment I have not sealed the bird bath. I found only one sealant that is considered semi non-toxic, but the woman I spoke to at the company said that it will break down in water over time. A woman at a grout company said she didn’t think I should seal it at all. I’m going to read more, but I’m erring on the side of caution for my birds.

The After Bird Bath is outside near a yaupon and a window. The birds can enjoy a safe spot for splashing, and I can enjoy watching the birds. And now I get to choose plants to grow at the base! Nothing too big, so cats won’t hide nearby.

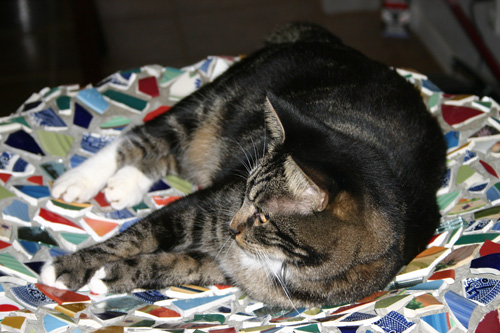
While I was working on the bird bath inside the house, my cat kept wanting to lay in the top and dream of catching birds, as if I built this for her. Wrong, Tooga!

birdbathc09-28-09.jpgHere’s a general list of materials I used:

Concrete bird bath

(JB Weld for repair if needed)

Versabond

Bucket and tool for mixing

Putty knife and/or other knife for spreading

Sanded grout (when pieces are more than 1/4 in. apart)

Hammer

Old towel

Dishes to break, or tile pieces

Tile cutters if necessary

Water for mixing and cleaning up

Sponge (not too big)

Rags or cheesecloth for buffing

Safety goggles

Dust mask

Rubber gloves

Paper towels for handy clean-up


It was a long project, but we love the results. Hopefully the birds will, too!

Setting the Urban Example

I’ve been posting so much on Texas habitats that I realized today how much I miss blogging about my garden — after all, it’s my baby. But soon, soon — for now I have one more Austin locale to share.

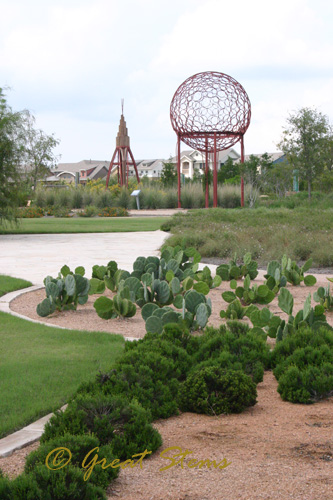
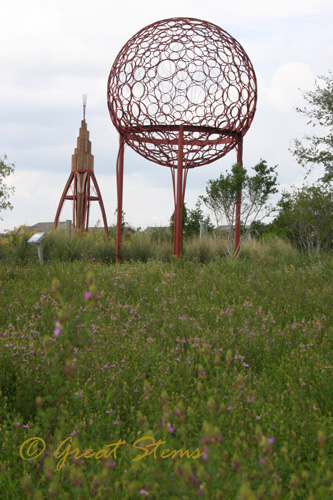
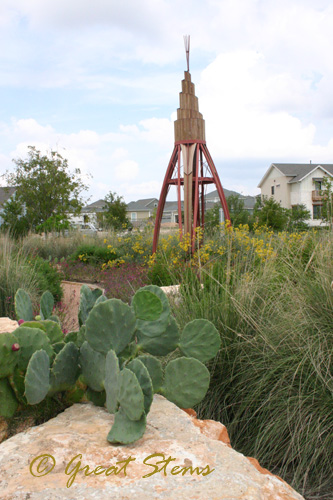
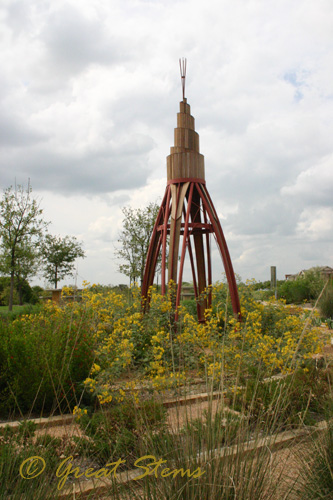
A bit of history — for many years, Austin’s airport resided fairly close to downtown; it was the Robert Mueller Municipal Airport. It closed in 1999 with the opening of the Austin-Bergstrom International Airport, and the old airport sat untouched for many years. Today it has been replaced with a new community, including shops, homes, and parks, and it is home to the Dell Children’s Medical Center of Central Texas. Of course, this is a commercial development (Mueller), so I’m not going to chat it up too much, but I’d like to say that I appreciate what I saw in my visit to the demonstration garden last weekend (yes, along with Hornsby Bend and Rockport — I told you it was a busy weekend!).

Basically, the concepts are simple — think green and sustainability. Builders and developers are making use of recycling, solar energy, native plants, high numbers of trees in parking lots, commuter service, bike paths, and more. In partnership with the Wildflower Center, large areas have been preserved as natural habitats, and homeowners are encouraged to plant native plants, educated with beautiful and/or wild examples shown in the community’s demonstration garden, prairies, and ponds.

Enjoy the tour, a bit of a zoom-in/zoom-out look!

Damianita and Prickly Pear…

muellera09-19-09.jpg
Gregg’s Dalea…muellerb09-19-09.jpg
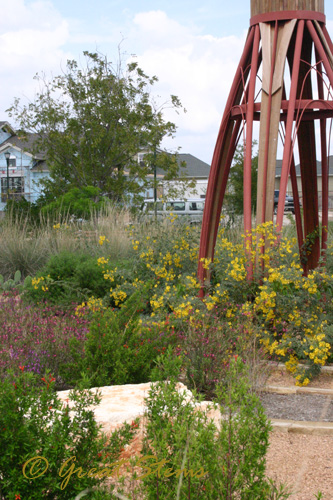
Prickly Pear, Lindheimer’s Muhly, Salvia, Lindheimer Senna…

muellere09-19-09.jpgLindheimer Senna…

muellerc09-19-09.jpg
Flame Acanthus, Lindheimer Senna, Salvia

muellerd09-19-09.jpg
 
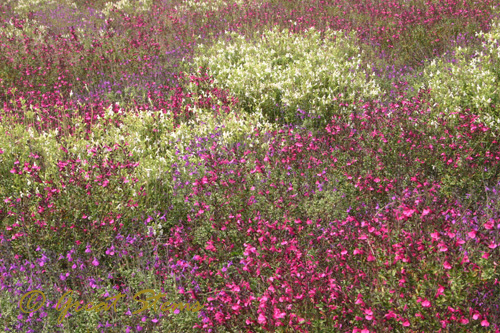
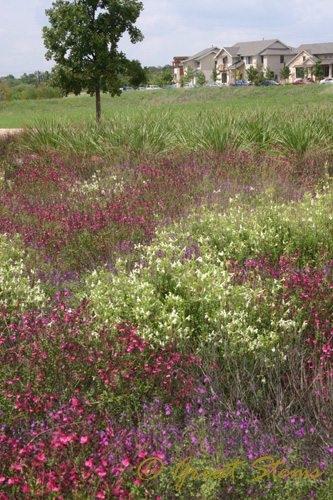
I fell in love with this mixture of Salvia greggii colors.

muellerf09-19-09.jpg
muellerg09-19-09.jpg
 
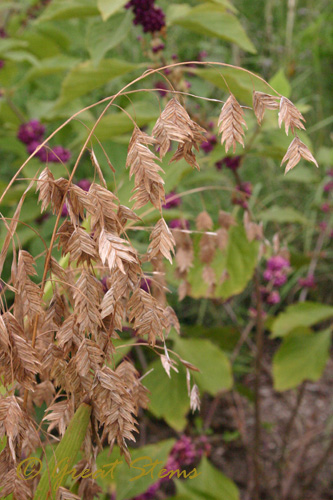
Inland Sea Oats in front of American Beautyberry…

muelleri09-19-09.jpg
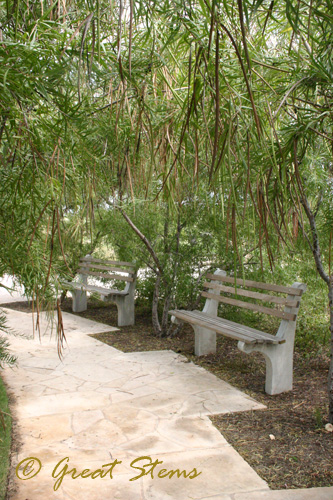
Walkway under Desert Willows…

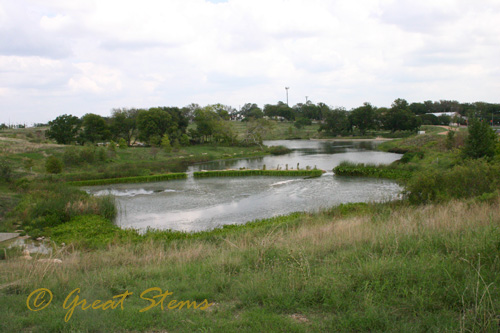
muellerl09-19-09.jpgA view of the three ponds, surrounded by native grasses…

muellerj09-19-09.jpg
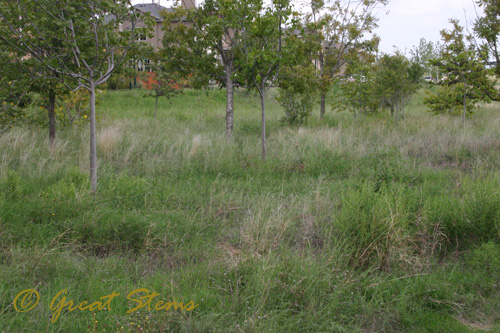
 One of the grassland prairies… 

muellerk09-19-09.jpg

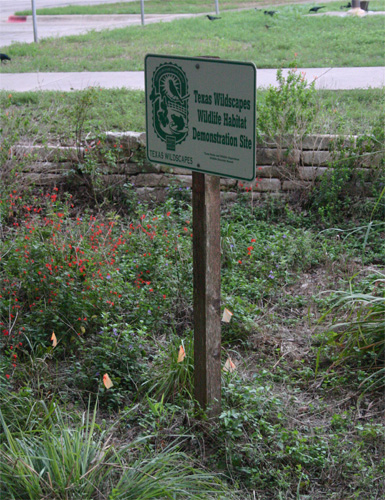
Among the walkways in the demonstration gardens, native plants are all sorted and identified in lists, and the plant species are far more numerous than I’ve shown in these photos — this is just a sampling. In addition, there are signs that teach about certain aspects of native gardening. What an excellent way to educate residents and visitors about plants they might like to grow!

Given that this area was once an airport and was destined for development of some kind, it is nice to see such strides toward thoughtful, green building and the restoration of native plants in place of the parking lots and runways I remember.

The Remarkable Hornsby Bend

Last weekend was a busy wildlife weekend for me. Just before zooming down to the Rockport Hummer/Bird Festival, I visited another bird paradise much closer to home. I almost didn’t post about it, simply because it was difficult to capture pictures of the birds without a zoom lens, and due to circumstances mentioned below, the migrant birds were relatively few. But this wildlife habitat, the lands and waters of Hornsby Bend, is so remarkable that I wanted to draw attention to it, especially for anyone in central Texas or visitors to the area. Birding binoculars are highly recommended!

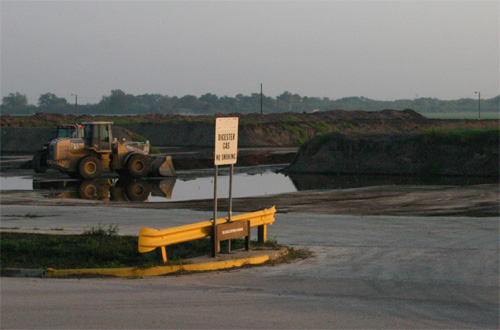
hornsbym09-19-09.jpgHornsby Bend is an area along a “bend” of the Colorado River, southeast of Austin, Texas, near the airport. Once home to dense forests and thickets, a man named Reuben Hornsby settled there in 1832, clearing the land for agricultural uses. Today it is home to the Hornsby Bend Biosolids Management Plant, which deals with — yes, that’s right — our city’s poop. But this is a particularly good thing, because the Hornsby Bend plant combines the treated solid wastes with residential yard trimmings (picked up curbside) to make Dillo Dirt — a nutrient-rich compost. The plant also houses the AWU Center for Environmental Research, which studies urban ecology and sustainability.

hornsbyl09-19-09.jpgBut Hornsby Bend is so much more — 1,200 acres of marshes, woodlands, pastures, and riparian (river) areas. Because of the incredible biodiversity along the food chain and its multiple habitats, it has become known nationally as one of the best birdwatching sites in Texas, especially during times of migration. More than 360 species of birds have been sighted at Hornsby Bend. Migratory shorebirds, wading birds, and landbirds, some from the Arctic or from the southern tip of South America, stop at the ponds of Hornsby Bend as they travel to and from their winter habitats.

hornsbye09-19-09.jpg

Though Hornsby Bend is best known for its birds, the native plants along the shores of the ponds and river provide excellent butterfly and dragonfly viewing as well.

hornsbyf09-19-09.jpg

Members of Travis Audubon and other organizations survey the birds and other wildlife frequently year-round, but the peak months to view migrating birds are August and September, with wintering birds arriving in October through December. March and April are the peak months for spring migration.

Due to recent rains in Central Texas, the normal shorelines of the lagoons were underwater, so during my visit to Hornsby for Habitat Steward Training, there were very few migrating shorebirds, despite it being a peak month for migration through the area. Audubon viewers did note 57 different species that day, however, including various grebes, kingfishers, vireos, hawks, egrets, swallows, orioles, and many, many more. But with the cold front incoming this week, the birders at Hornsby said that many other species would be arriving, and they expected local birdwatchers to flock to the ponds (pun intended) for species viewing. Our group did see many barn swallows enjoying the insects near the ponds, and several duck species.

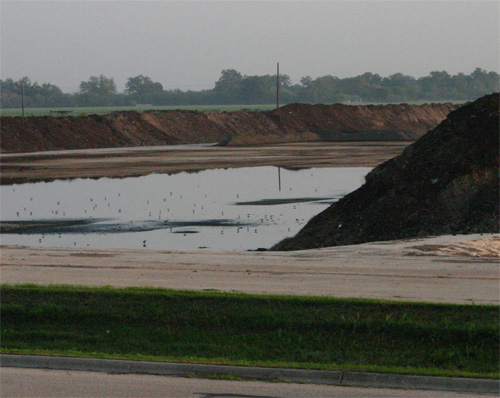
hornsbybarnswallows09-19-09.jpgNear the wet grounds by the compost, many least sandpipers and other species scooted about for insects.

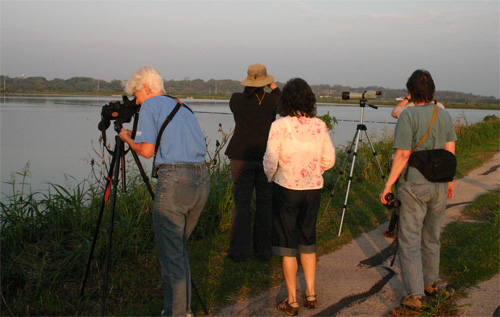
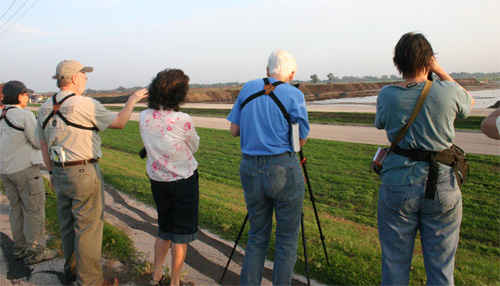
hornsbyb09-19-09.jpgAnd humans studied them from afar.

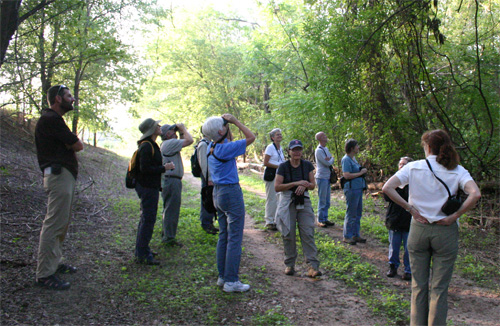
hornsbyd09-19-09.jpgThe wooded areas along the river provided opportunities to see tree-perching birds. A quiet walk along the paths allowed us to listen to the beautiful songs of many a bird, including the white-eyed vireo.   

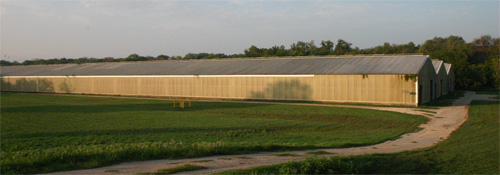
hornsbyk09-19-09.jpgAnother treatment area, these long greenhouses will also provide winter shelter to area birds. A red-shouldered hawk reportedly has hunted in there, in fact.

 
hornsbyg09-19-09.jpgNear the main building at Hornsby Bend, viewers can enjoy butterflies, hummingbirds, and other wildlife visiting the demonstration habitat. Hummingbirds are particularly fond of the thriving Tropical Sage (Salvia coccinea) among the many plants in the gardens.

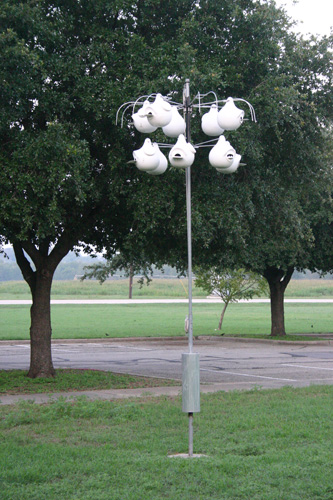
 hornsbyc09-19-09.jpgAnd there are purple martins, too, though they are absent in September.

 hornsbyi09-19-09.jpg

A few words about Dillo Dirt. The Dillo Dirt program was created in 1989, the first such program in the state of Texas, and one of the oldest in the nation. The natural process of creating this compost produces temperatures up to 170 degrees Fahrenheit, which kills human and plant pathogens. The compost is further cured and screened before becoming the final Dillo Dirt product. Rather than wastes filling a landfill or being dumped into rivers, this incredibly beneficial compost returns organic material to the soils of Austin yards, pastures, golf courses, and other landscapes. 

hornsbya09-19-09.jpgBack at the main building, the Habitat Steward Trainees listened to three speakers. The knowledge I gained this day was tremendous, from the history of the soil in the Austin area to the how’s and whys of organic matter, and from butterflies of Central Texas to urban wildlife, such as coyotes and raccoons. A great day, and a great place to visit.


Rockport Hummer-Bird Festival 2009

When the fall migration of hummingbirds begins, many people all over North America feel sad that their little friends will be absent from their gardens for a few months. But down south, the mass migration results in opposite, delighted feelings for the dedicated residents of Rockport and Fulton, Texas. To them, fall migration along the Central Flyway means that the little buzzing flyers will make one more major pitstop in the tiny coastal towns to rest and refuel before beginning their 500-mile flight nonstop across the Gulf of Mexico toward their winter habitats.

(A word about these photographs — try to find all the hummingbirds in each photo. Some of them are sneaky! Look for the vibrant throat colors to distinguish the males from the females.)
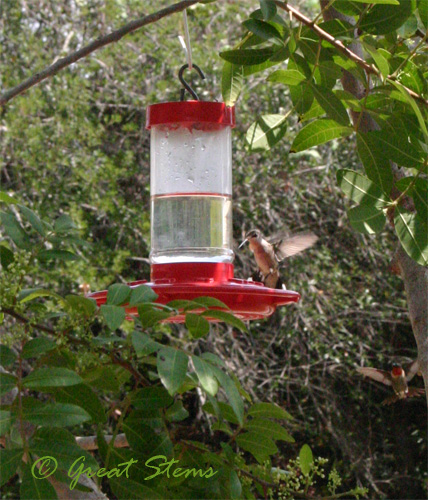
rhfc09-21-09.jpg

The town of Rockport is so enamoured with their feathered visitors that many years ago they began an annual event, the Rockport Hummer/Bird Festival, held each September unless a hurricane shows up and causes a cancellation (like Ike in 2008). This year was our first time attending the festival, and it was quite a relaxing, pleasant day (with an exception, noted farther down in this post). The event included many speakers and vendors, but the highlights were the hummingbirds themselves, and many kind Rockport residents opened their yards to festival visitors for hummingbird viewing. This year there were 25-homes on a self-guided tour, and for a fee, visitors could take a guided bus tour to many other private homes and grasslands areas.

A birdwatching festival is quite interesting and different from the perspective of one who’s been to all sorts of festivals, from family-filled celebrations of peaches to flowers, to Renaissance times, to chaotic state fairs. For one thing, it’s very quiet, as it should be if one hopes to observe the little birds without scaring them away. And another is that birdwatchers, while all ages, boast a higher percentage of an older crowd. My boys were two of the four children I saw at the festival, though to be honest we were there only on the last day of the event.

rhfe09-21-09.jpg
rhfl09-21-09.jpgRockport isn’t just about hummingbirds — hundreds of species of birds are year-round residents or migratory passers-through, and birdwatchers excitedly converge with binoculars in hand to enjoy the sheer numbers and to hopefully catch a glimpse of a rare species. At any given home on the hummingbird tours, there might be as many as 100 or more hummingbirds zooming about the feeders.
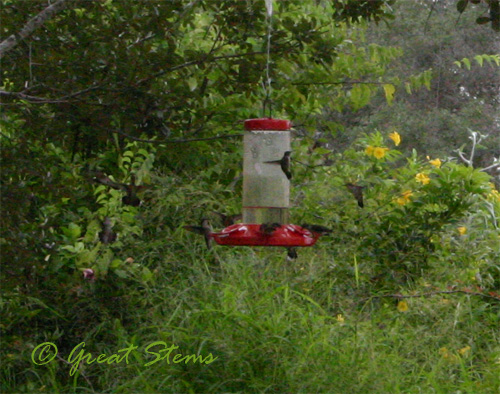
rhfj09-21-09.jpg

To help attract the birds, the town encourages residents to plant bushes and vines that are hummingbird favorites. There are a lot of Esperanza, for example. And there are other native plants, such as sunflowers and this pokeweed, that are enjoyed by other birds. If you look closely, you can see a remaining berry or two — the plants have been well-stripped by visiting birdies.
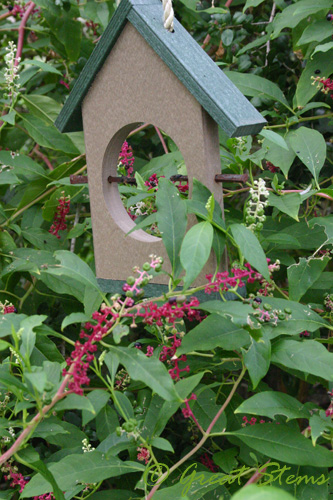
pokeweed09-21-09.jpg

Along the self-guided tour, I felt drawn to those homes with wildscapes — native, flowering plants and small or large ponds helped draw in the wildlife. Of course, they had many a hummingbird feeder as well. At one home, my son counted 19 feeders, just in the backyard.
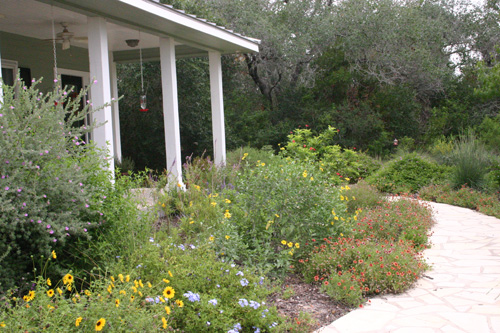
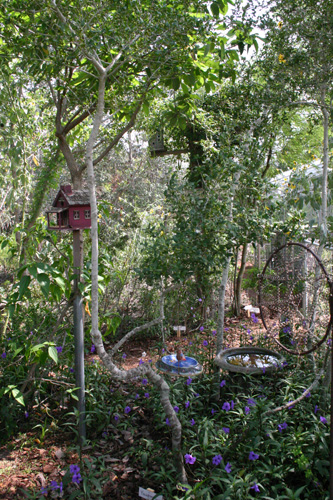
rhff09-21-09.jpg

 
rhfb09-21-09.jpgrhfd09-21-09.jpgBut there were a variety of landscapes on the tour, and there was even a school garden, planted and maintained by students and teachers. 

Experienced birders would sometimes call out when they spotted a particular species or another type of bird, such as an oriole. And we saw a beautiful Great Blue Heron, a Great Egret, and a large duck family, among other birds, scouring residential ponds for food.

At the festival, we enjoyed learning about the art of feeding hummingbirds from expert Sheri Williamson, author of an excellent field guide called Hummingbirds of North America. Sheri also went with a few of us to select homes on the tour, and it was wonderful to have a hummingbird expert on site to describe features and behavior of the hummingbirds and to answer any questions, of which it’s just possible that I might have had one or two… or three.
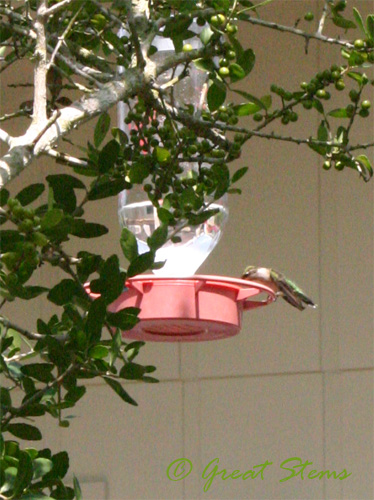
rhfh09-21-09.jpgIt was thoroughly entertaining watching the antics of the territorial hummingbirds. Their behavior is different at migration time — because the birds need to build up their energy stores, there is more willingness for many, but not all, of the birds to share a feeder from time to time. Despite the many feeders about a yard, the hummingbirds might swarm a particular feeder, as if they think that because others are that feeder, it must be good food. But territoriality is hard to resist sometimes, especially for the males. The vibrant color of the throats of the male birds was impressive, though Sheri said that these feathers are post-mating season, and thus less vibrant than at other times. Pretty cool. 
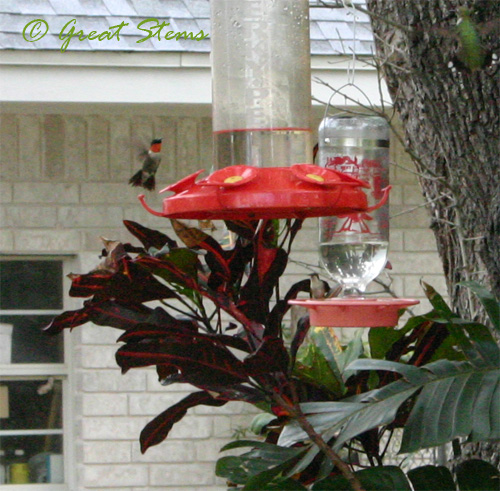
rhfi09-21-09.jpgSometimes the camera captured behavior my eye didn’t notice at the time. In the photo below, you can see two males squabbling, while another bird moves in to get some nectar.
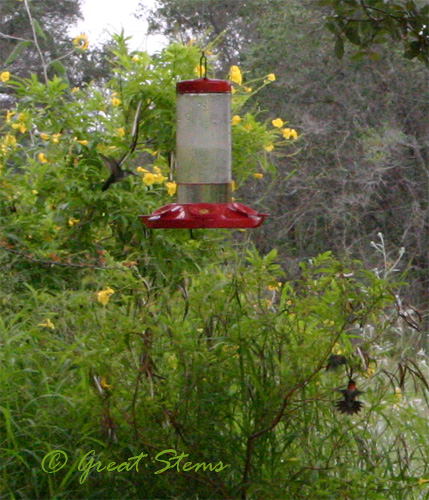
rhfk09-21-09.jpgThe majority of the hummingbirds that pass through Rockport are ruby-throated hummingbirds, but several species have been sighted, and in all more than 500 species of birds have been documented.
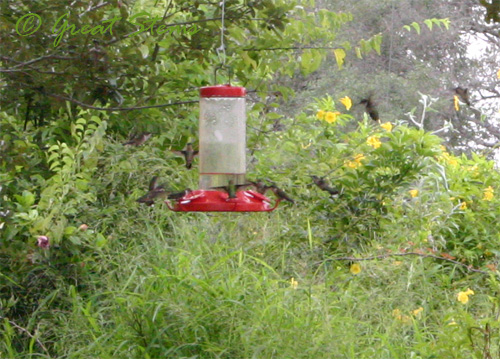
rhfg09-21-09.jpgThere was another creature that threatened to bring downfall to the festival this year, the heat-seeking, blood-sucking, mass-attacking mosquito. It was unbelievable the numbers of mosquitoes everywhere, and they swarmed every person by the hundreds. The mosquitoes were so bad at the very first house we stopped at that, that our hummingbird viewing would have come to an end before it started if we hadn’t decided to just go ahead and use some loaned icky chemical spray that I would never touch at home. But we were having to do a ridiculous and constant “Mosquito-Slapping Dance” until we finally used the spray, and if a green person is going to that extreme, you know it’s bad.

After using the spray, we could actually focus on the hummingbirds, until we went tried to get back in the car. This act required particularly quick moves and skill to minimize the number of mosquitoes that joined us in the vehicle — they hovered around the nice warm car until we showed up and opened the door, thinking we wanted them to join us inside. At one house at least fifty mosquitoes flew into the car, and we couldn’t get them out until we were on the highway and could roll the windows down enough to send them out, if we didn’t manage to smush them first. Note to self — avoid coast just after the first fall rain, haha.
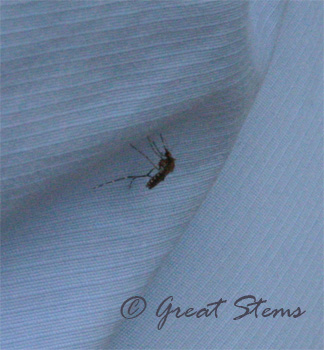
mosquito09-21-09.jpgI have a much more disgusting picture of a mosquito, but I decided it wasn’t nice to share it on a garden blog, so I think I’ll gross out family members on the family blog instead.

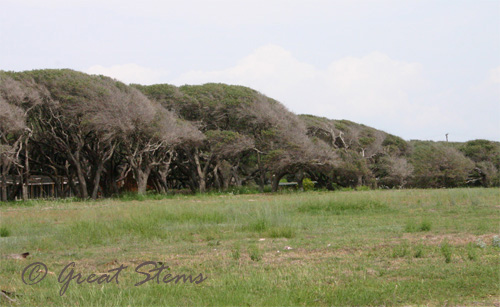
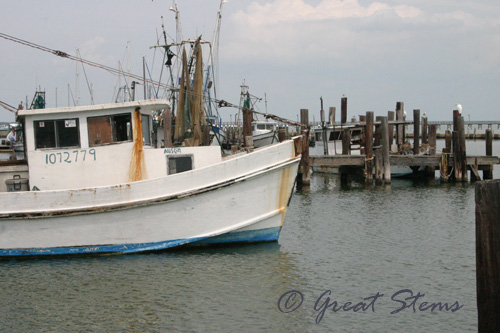
Rockport itself is an interesting coastal village. Near the water, the strong ocean winds have shaped the oak trees into quite the odd shapes. You can tell that salt and drought have taken their toll on the health of those trees.
 
rockportoaks09-21-09.jpg
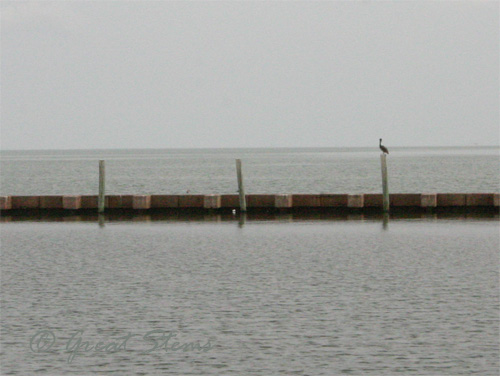
rockportboat09-21-09.jpgOutside of Moon Dog, where we had lunch, a lone pelican rested peacefully. It was quite the contrast to the zooming hummingbirds at the inland homes. 
pelican09-21-09.jpg
Back at the festival mall, we enjoyed visiting the vendor booths, but my grand plans to buy a couple of hummingbird feeders fell through — after looking around, I decided to stick with my favorite brand, HummZingers, but they didn’t have any there. I did get Sheri Williamson’s field guide, though. There were many jewelry, art, and other vendors, but we were looking for something that just “spoke to us,” as my husband put it. So we bought a buzzard, because that’s what one really goes to a hummingbird festival for, right? But even my husband wanted this buzzard — its head bobbles a bit in the wind.
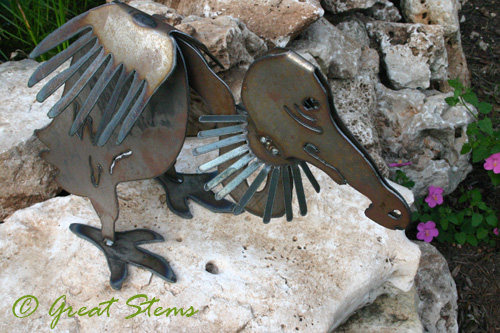
buzzard09-21-09.jpgWe’ll stick it somewhere particularly ominous for visitors passing by. 
Goodbye Cantaloupe Thing

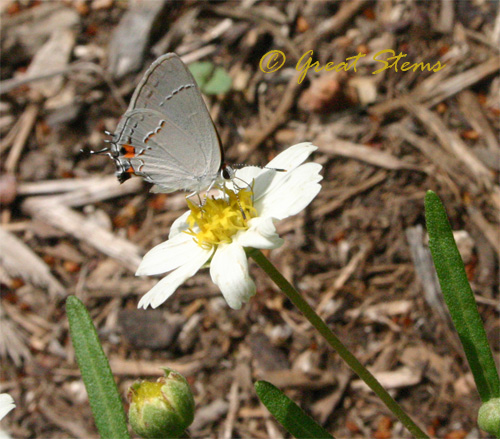
Due to some exciting goings on, my next few posts will be bird-related, so I thought I best put out a veggie garden update. But first I want to share some thrilling butterfly news — the Monarchs, Queens, Swallowtails, and Gulf Fritillaries, among others, have finally returned to the garden! You can believe I’ll be out there with my camera. I did manage to capture a picture of my first Gray Hairstreak butterfly. I was happy to see her on the Blackfoot Daisies — those flowers are often ignored by the bigger butterflies, who go straight for the Lantana or Mistflower. I read that Gray Hairstreak caterpillars will eat bean plants. Oh well, guess I’ll share.

grayhairstreak09-18-09.jpgBut back to the “farm.”

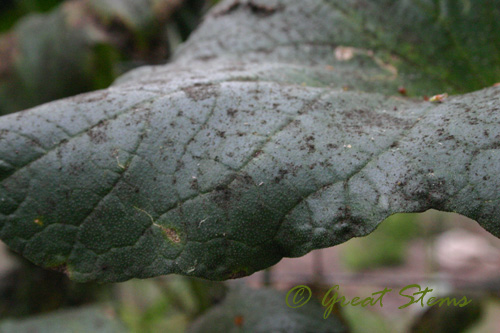
The cantaloupe experiment has finally come to an end, and it’s report time. It’s kind of sad, really. My beautiful cantaloupe plants finally succumbed to the aphids, which had become so abundant (despite the ladybugs) that their sticky “honeydew” residue, combined with the rains from last week, had led to a nasty sooty mold problem.

aphidsootymold09-18-09.jpg

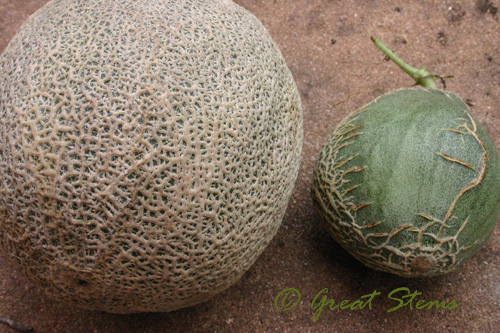
After several days of wondering whether to let my cantaloupes keep trying to ripen, I decided to go ahead and pull the plug. My big one just kept growing but never sweetening, and the shapes of the other two medium-ones led me to believe that I was, in fact, growing a hybrid. I suspected as much, but I decided to enjoy the process anyway.

 
cantaloupehybrids09-18-09.jpgThe big cantaloupe, cut open, actually did look like a cantaloupe. I opted not to take a bite, but I did lick a piece. Yuck… as I suspected. Though I couldn’t help but feel a little disappointed, I do consider the experiment a success. Growing the cantaloupes got me excited about my first veggie garden, led to my first raised beds with trellises, and really helped me get a headstart on the veggie learning curve. I did learn a lot, and I got hooked on growing edibles. Plus, one can’t beat the excitement of finding out that your plant is actually growing fruit (even if it’s weird hybrid fruit). I don’t consider the cantaloupes my first official harvest, mind you. They were an experiment, especially after I found out that seeds from store-bought cantaloupes should not be used, no matter how much fun it might be.

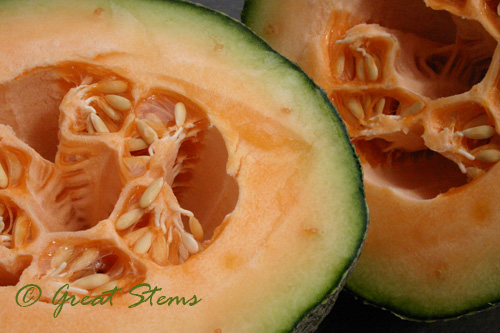
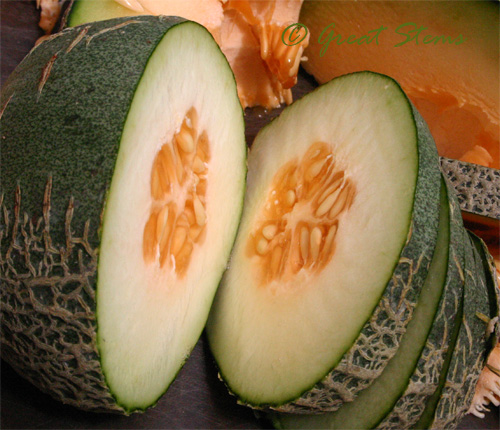
cantaloupehybrid09-18-09.jpgSo I began the process of cutting up the fruit for the compost bin. By the way, ever wonder what the inside of a young cantaloupe looks like? Pretty cool.
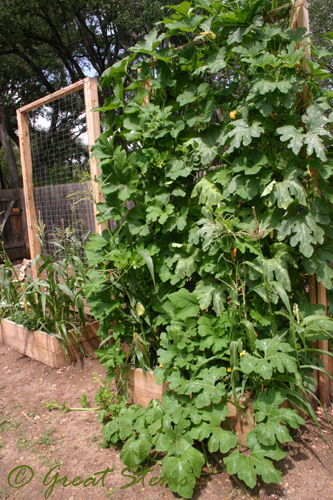
youngcantaloupe09-18-09.jpgRemoving the icky plants from the trellis was NO fun. During the process I realized why many garden bloggers opt only to show their beautiful harvests instead of what might be a failure — it’s depressing. I was out there quite grateful that my camera was nowhere near the sooty mold, and while I felt partially obligated to show the whole miserable trellis, I just wanted to get that cantaloupe and all the thousands of aphids into the trash and as far away from my sugar pumpkin plants ASAP. I didn’t even want the plants to go into the compost, they were so gross.

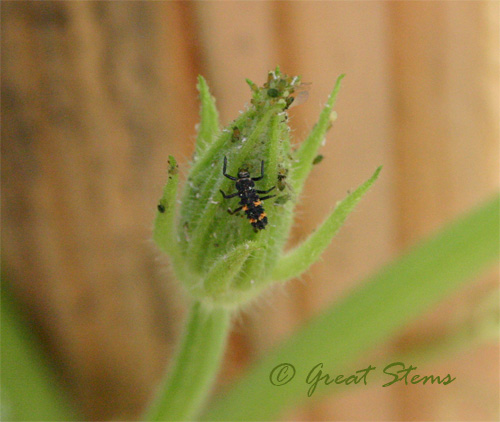
A closer inspection of the sugar pumpkin plants showed that the aphids are starting to move over, and I plan to attack them better. I was happy to find several ladybug nymphs — hurray for my aphid-fighting allies!

ladybugnymph09-18-09.jpgBut all is well, and I’m looking forward. The sugar pumpkins are the biggest things I’ve ever seen. They are growing up and over and out from the raised garden bed.

sugarpumpkins09-18-09.jpg

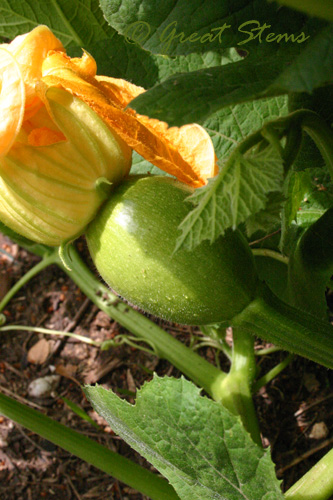
I FINALLY had a blooming female bud on a sugar pumpkin, and hopefully I helped it pollinate in time. Cross your fingers! There will be more, and I must be on the lookout. There were two blooming females on the jack-o-lantern pumpkins, but I doubt they’ll be big enough for carving by Halloween. At least they opened, and I did the pumpkin porn thing to help things along — I didn’t have time to watch to see whether the bees were doing their job!

pumpkinovary09-18-09.jpgThe jack-o-lantern pumpkins have begun their spread into the perennial garden, so I have to monitor them. One is even taking advantage of the dead Mexican redbud. It’s nice to see green on the redbud again, poor thing.  😉    It’s scheduled for fall replacement.

pumpkinvineintree09-18-09.jpgThe corn is growing, though I’ve found a couple of worms hiding out in the leaf niches. I’m trying to watch for more, but they seem to sneak in when the gardener’s not looking. I’ve also got young beans, zucchini, and snap peas growing, as well as tiny kohlrabi, carrots, lettuce and spinach seedlings.

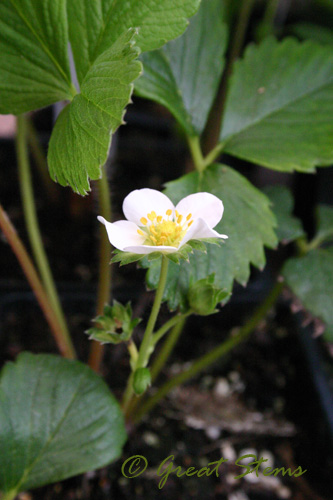
This morning I found some strawberry plants at Natural Gardener. These are “Seascape” strawberries, and when more varieties arrive, I’ll try to get some for comparison. I’m eager for strawberry success!

strawberryplant09-18-09.jpgAnd another exciting find at Natural Gardener — I finally got a gargoyle. They arrived this morning, and the staff seemed as excited as I was. Apparently they don’t usually have gargoyles. He’s a little guy, but his protective watch over our garden is sure to drive away all pests. Right?

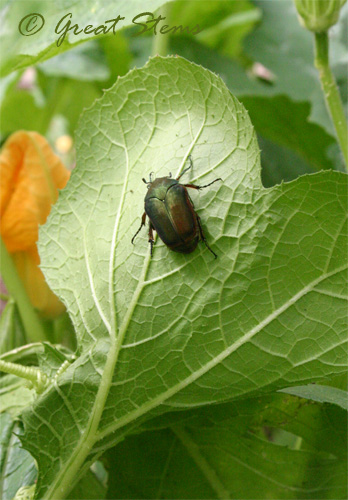
gargoyle09-18-09.jpgMaybe he can tell me what to do about this Green June Beetle. I found it on one of my pumpkin plants. I see beetle grubs in the soil all the time. I believe they qualify as a minor pest, but I’m not sure. The beetle is pretty, as far as beetles go. Underneath is a pretty, shiny coppery surface. It’s still alive, but in a jar, until I decide whether it should stay or go. I don’t care about damage to turf, as I have none worth saving, but I don’t want damage to other plants and fruit.

greenjunebeetle09-18-09.jpg

I did learn an interesting way to identify the Green June Beetle white grubs from other white grubs — the ones of the Green June Beetle will “crawl” on their back via undulating movements. Somehow I think Shrek would appreciate that.

The Indiscriminate Hunter

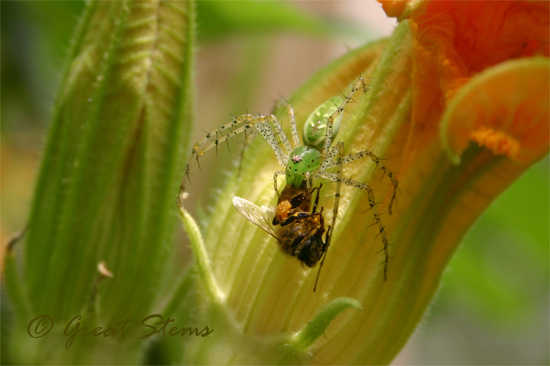
Meet the Green Lynx Spider (Peucetia viridans), a common spider in Texas and Mexico. It surprised me when I was out inspecting my sugar pumpkin vines. I’m amazed I saw it — its lime-green coloring makes it perfectly camouflaged against the vines, and though it was on a bloom and holding a bee, I’m pretty sure what drew my eyes to it were those hairy legs.

greenlynx09-17-09.jpgI’m sad that it chose for its meal one of my precious honeybees, but I’m glad this beneficial spider has found my garden. It might pounce on bees, but it also feasts on wasps (which had been getting out of control during the summer) and pest moths and caterpillars (they’re arriving). This beautiful spider is a female, and like most spiders, she’s much larger than the typical male. The female Green Lynx spiders are fierce protectors of their egg sacs — I’m pleased, because I’d like to see more of them around the garden.

The spines on the spider’s legs seem to match little hairs on the pumpkin blooms, stems, and foliage. With her perfect camouflage, it’s easy for this spider to hide and lurk, and then leap onto her prey, which is how lynx spiders got their name. 

Blooming! GBBD September 2009

The extended rains last week did Central Texas much good. While we are still in a major drought, the rains brought much needed relief to the scorched earth and cooler temperatures for wonderfully pleasant days.

birdart09-15-09.jpgAnd the plants responded right away — greenness abounds, and among the green are the most vibrant blooms of all colors. I think fall just might be my new favorite season. I forgot how beautiful it is. Although technically, I guess it’s still summer! Here are just a few of what’s blooming in my yard today, for Garden Bloggers’ Bloom Day.

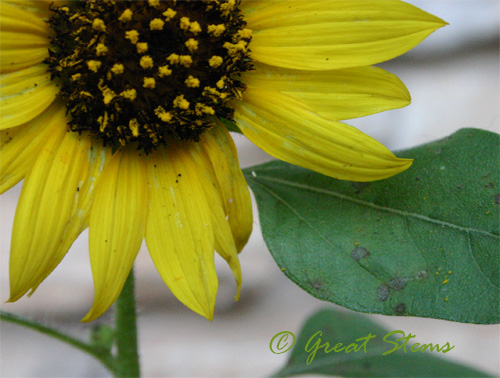
Amazingly, of my three surviving Endurance Sunflowers, I still have three, and all are blooming. Although I’ve loved sunflowers all my life, this is my first time growing them, and I finally understand why bees love them so. Even my young sunflowers are really putting out the pollen, and they are only going to grow bigger and bigger. I’m thrilled! My sunflowers have a few specks of dirt on them — because they are still babies and low to the ground, they got splashed during the rain.

endurancesunflower09-15-09.jpg

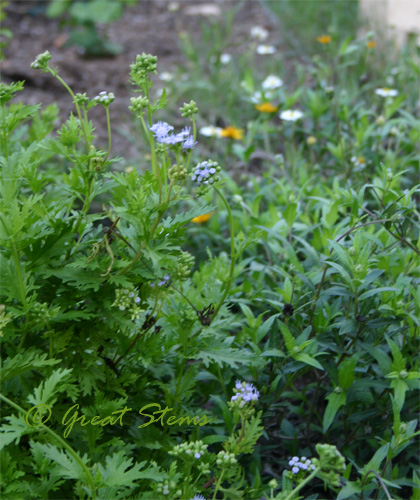
I’m finally starting to see color combinations in the yard again. In the main butterfly garden, the Gregg’s Mistflower is starting to bloom once more, with Blackfoot Daisy and Zexmenia nearby. The butterflies are already fluttering about again. I missed them when all my plants gave up their blooms in the heat.

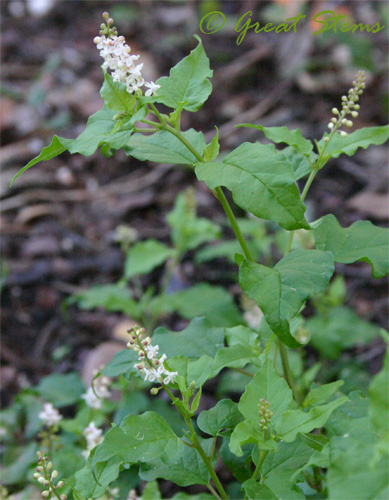
greggsmistflower09-15-09.jpgThe Pigeonberry plants are blooming like crazy. They berry, too, but the birds pick them off so fast.
pigeonberrya09-15-09.jpg
 
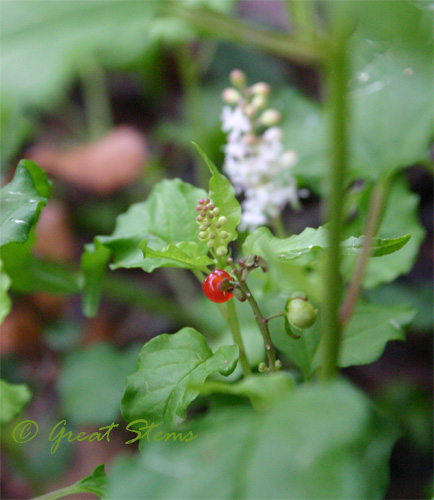
Here, I found a berry.

pigeonberryb09-15-09.jpg

Speaking of berrying plants — I was woken up in the middle of the night with one of the dogs trying to break through the window screen to get to something outside. While I hope it wasn’t a prowler, I did get up to discover my American Beautyberry plants were missing berry clusters. I went outside to see if I could see anything — seriously hoping at that point that it wasn’t a prowler! No creature found. Bolted. Who wouldn’t when that massive husky is trying to lunge for them though a mere window screen? Thank goodness it held tight.

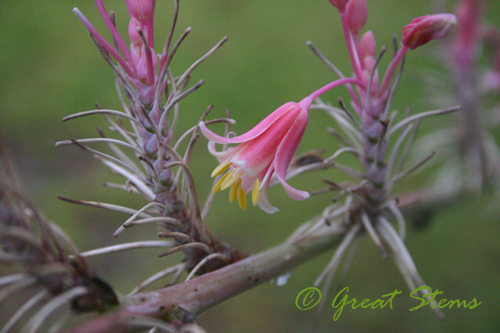
This Red Yucca’s is technically on my neighbor’s property, but it’s right where our yards meet, and I think I’m the only one who pays attention to it. But oh I could photograph those blooms all day. Love, love, love. Someday mine will bloom!  

redyucca09-15-09.jpg

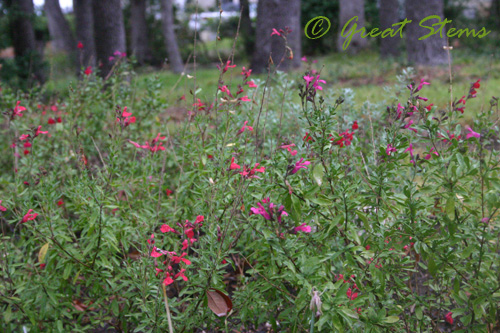
The Salvias are blooming like mad. They are such an interesting flowering perennial — it can be challenging to photograph them, as they tend to look straggly even when they really aren’t, but they look wonderful backdropped by other blooming yellows, blues, or even just trees.

salviagreggii09-15-09.jpg
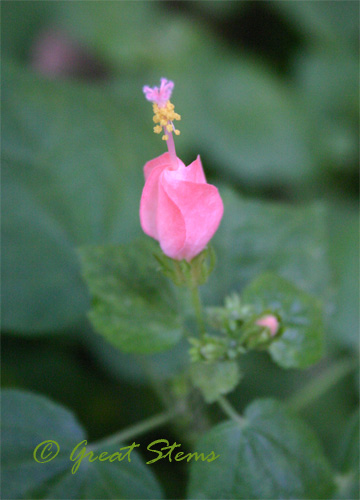
Though most of my Turk’s Caps are the traditional red, I do have a pink bloomer in the front. It’s quite special. Makes me feel like a little girl, loving that pink.

pinkturkscap09-15-09.jpg

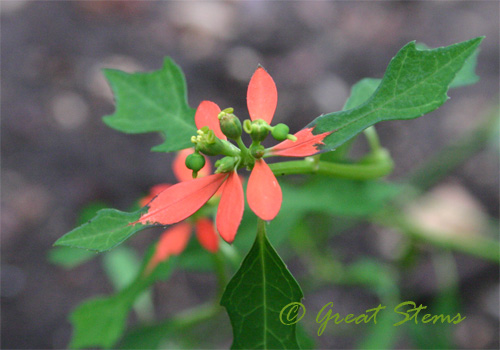
I have a new plant in the yard — actually all over the yard, as I placed them in many spots. It’s the native Texas Poinsettia, also known as Wild Poinsettia, or Fire on the Mountain (Euphorbia cyathophora). These were given to several class members of the Habitat Steward Training I’m in — we got to pull them directly from the gorgeous wildlife garden of Cathy Nordstrom. Thank you, Cathy! The reddish-orange you see is part of the leaves, just like the red of the Christmas pointsettias. I think it’s amazing. It’s a spreader, so at some point I’ll probably be giving some away. It’s so easy to pull and replant, too. I planted them all over because I have so much land to fill.

txpoinsettia09-15-09.jpg

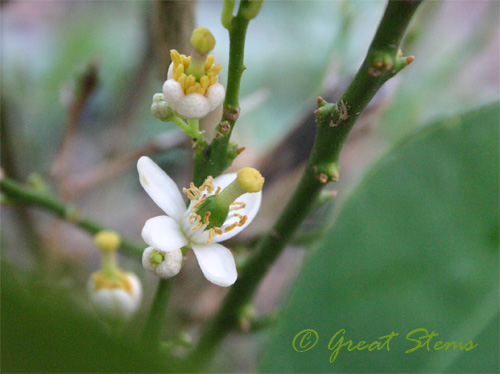
And I have a surprise bloomer — blooms on my newest Key Lime tree? Of course, they are all at the level where the husky lifts his leg. I don’t even want to think about why the tree is blooming only there. Nor do I want to think about what I’ll do if limes actually show up and get peed on.

limeblooms09-15-09.jpg

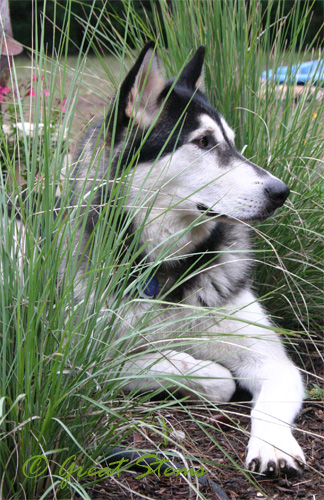
Speaking of the husky… Camouflage FAIL, Loki.

loki09-15-09.jpg

And stop laying on my Lindheimer Muhly! And get out of the butterfly garden! And stop peeing on my plants!